La page est en cours de chargement...

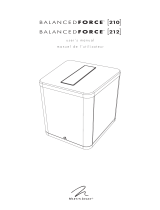
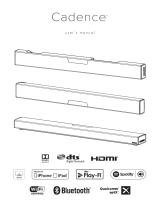
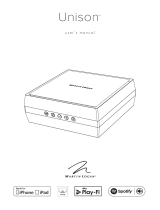
user’s manual
®

2
IMPORTANT SAFETY INSTRUCTIONS!
1 Read these instructions.
2 Keep these instructions.
3 Heed all warnings.
4 Follow all instructions.
5 Do not use this apparatus near water.
6 Clean only with dry cloth.
7 Do not block any ventilation openings. Install in accordance with
the manufacturer's instructions.
8 Do not install near any heat sources such as radiators, heat registers,
stoves, or other apparatus (including amplifiers) that produce heat.
9 Do not defeat the safety purpose of the polarized or grounding-
type plug. A polarized plug has two blades with one wider than the
other. A grounding type plug has two blades and a third ground-
ing prong. The wide blade or the third prong are provided for your
safety. If the provided plug does not fit into your outlet, consult an
electrician for replacement of the obsolete outlet.
10 Protect the power cord from being walked on or pinched, particu-
larly at plugs, convenience receptacles, and the point where they
exit from the apparatus.
11 Only use attachments/accessories specified by the manufacturer.
12 Use only with the cart, stand, tripod,
bracket, or table specified by the manu-
facturer, or sold with the apparatus. When
a cart is used, use caution when moving
the cart/apparatus combination to avoid
injury from tip-over.
13. Unplug this apparatus during lightning storms or when unused for
long periods of time.
14. Refer all servicing to qualified service personnel. Servicing is required
when the apparatus has been damaged in any way, such as power-
supply cord or plug is damaged, liquid has been spilled or objects
have fallen into the apparatus, the apparatus has been exposed to
rain or moisture, does not operate normally, or has been dropped.
15. To completely disconnect this equipment from the AC mains, dis-
connect the power supply cord plug from the AC receptacle.
16.
The mains plug of the power supply cord shall remain readily operable.
17. To prevent overheating, do not cover the apparatus. Install in
accordance with the manufacturer’s instructions.
18. No naked flame sources, such as candles, should be placed on the
product.
19.
Do not expose this apparatus to dripping or splashing and ensure that no
objects filled with liquids, such as vases, are placed on the apparatus.
20. For apparatus mounted to wall, the apparatus shall be installed on
solid wood, bricks, concrete or solid wood columns and battens.
21. DO NOT overload wall outlets or extension cords beyond their rated
capacity as this can cause electric shock or fire.
22. Minimum distances around the apparatus for sufficient ventilation.
23. The ventilation should not be impeded by covering the ventilation
openings with items, such as newspapers, tablecloths,curtains, etc.
24. Do not ingest the battery, Chemical Burn Hazard.
25. Avoid exposure to extreme heat or cold.
26. This equipment is a Class II or double insulated electrical
appliance. It has been designed in such a way that it
does not require a safety connection to electrical earth.
WARNING: This product is intended to be operated ONLY from the AC
Voltages listed on the back panel or included power supply of the prod-
uct. Operation from other voltages other than those indicated may cause
irreversible damage to the product and void the product warranty. The use
of AC Plug Adapters is cautioned because it can allow the product to be
The lightning bolt flash with arrowhead
symbol within an equilateral triangle,
is intended to alert the user to the pres-
ence of potentially “dangerous voltage” within the
product’s enclosure that may be of sufficient magni-
tude to constitute a risk of electric shock to persons.
The exclamation point within an equi-
lateral triangle is intended to alert the
user to the presence of important oper-
ating and maintenance (servicing) instructions in the
literature accompanying the appliance.
Do Not Open! Risk of Electrical Shock. Voltages in this equip-
ment are hazardous to life. No user-serviceable parts inside.
Refer all servicing to qualified service personnel. To prevent
fire or shock hazard, do not expose this module to moisture.
BRAVADO and FORTE
Tested to comply with FCC standards.
FOR HOME OR OFFICE USE

3
plugged into voltages in which the product was not designed to operate.
If the product is equipped with a detachable power cord, use only the type
provided with your product or by your local distributor and/or retailer. If
you are unsure of the correct operational voltage, please contact your local
distributor and/or retailer.
This device complies with Part 15 of the FCC Rules. Operation is subject
to the following two conditions: (1) This device may not cause harmful
interference, and (2) this device must accept any interference received,
including interference that may cause undesired operation.
FEDERAL COMMUNICATIONS COMMISSION INTERFERENCE
STATEMENT: This equipment has been tested and found to comply with
the limits for a Class B digital device, pursuant to part 15 of the FCC Rules.
These limits are designed to provide reasonable protection against harmful
interference in a residential installation. This equipment generates, uses
and can radiate radio frequency energy and, if not installed and used in
accordance with the instructions, may cause harmful interference to radio
communications. However, there is no guarantee that interference will not
occur in a particular installation. If this equipment does cause harmful
interference to radio or television reception, which can be determined by
turning the equipment off and on, the user is encouraged to try to correct
the interference by one or more of the following measures:
• Reorient or relocate the receiving antenna.
• Increase the separation between the equipment and receiver.
• Connect the equipment into an outlet on a circuit different from that
to which the receiver is connected.
• Consult the dealer or an experienced radio/TV technician for help.
Approved under the verification provision of FCC Part 15 as a Class B Digital
Device.
Any changes or modifications not expressly approved by the grantee of this
device could void the user’s authority to operate the equipment.
RF EXPOSURE WARNING: This equipment must be installed and
operated in accordance with provided instructions and the antenna(s) used
for this transmitter must be installed to provide a separation distance of at
least 20 cm from all persons and must not be co-located or operating in
conjunction with any other antenna or transmitter. End-users and install-
ers must be provide with antenna installation instructions and transmitter
operating conditions for satisfying RF exposure compliance.
5GHz RF DEVICE STATEMENT: This device operates in the 5.15–
5.25GHz frequency range and is restricted to indoor use only. Outdoor
operations in the 5150–5250MHz frequency range is prohibited.
CANADA, INDUSTRY CANADA (IC) NOTICES: This Class B digi-
tal apparatus complies with Canadian ICES-003 and RSS-210. Operation
is subject to the following two conditions: (1) this device may not cause
interference, and (2) this device must accept any interference, including
interference that may cause undesired operation of the device.
RADIO FREQUENCY (RF) EXPOSURE INFORMATION: The radi-
ated output power of the Wireless product is below the Industry Canada
(IC) radio frequency exposure limits. The Wireless product should be used
in such a manner such that the potential for human contact during normal
operation is minimized. This device has also been evaluated and shown
compliant with the IC RF Exposure limits under mobile exposure conditions.
(antennas are greater than 20cm from a person’s body).
Caution: (i) The device operating in the band 5150–5250 MHz is only for
indoor use to reduce the potential for harmful interference to co-channel
mobile satellite systems; (ii) The maximum antenna gain permitted for
devices in the bands 5250–5350 MHz and 5470–5725 MHz shall comply
with the e.i.r.p. limit; and (iii) The maximum antenna gain permitted for
devices in the band 5725–5825 MHz shall comply with the e.i.r.p. limits
specified for point-to-point and non point-to-point operation as appropri-
ate. (iv) Users should also be advised that high-power radars are allocated
as primary users (i.e. priority users) of the bands 5250–5350 MHz and
5650–5850 MHz and that these radars could cause interference and/or
damage to LE-LAN devices.
CE: MartinLogan Ltd declares the product Bravado is in compliance with
the provisions of the following directives:
1995/5/EC – R&TTE
2004/108/EC – EMC
2006/95/EC – LVD
2011/65/EU – ROHS2
CE: MartinLogan Ltd declares the product Forte is in compliance with the
provisions of the following directives:
1995/5/EC – R&TTE
2004/108/EC – EMC
2006/95/EC – LVD
2011/65/EU – ROHS2

4
WEEE NOTICE
Note: This mark applies only to countries within the European
Union (EU) and Norway.
In accordance with the European Union WEEE (Waste Electrical and Electronic
Equipment) directive 2002/96/EC effective August 13, 2005, we would like to
notify you that this product may contain regulated materials which upon disposal,
according to the WEEE directive, require special reuse and recycling processing.
For this reason Martin Logan has arranged with our distributors in European
Union member nations to collect and recycle this product at no cost to you.
To
find your local distributor please contact the dealer from whom you purchased
this product, email info@martinlogan.com or visit the distributor locator at
www.martinlogan.com.
Please note, only this product itself falls under the WEEE directive. When dis-
posing of packaging and other related shipping materials we encourage you to
recycle these items through the normal channels.
WARNING/CAUTION!
• Hazardous voltages exist inside—do not remove cover.
• Refer servicing to a qualified technician.
• To prevent fire or shock hazard, do not expose this module to moisture.
• Unplug speaker should any abnormal conditions occur.
• Turn speaker off before making or breaking any signal connections!
• The power cord should not be installed, removed, or left detached from the
speaker while the other end is connected to an AC power source.
• No candles or other sources of open flame should be placed on the speaker.
• No liquids either in glasses or vases should be placed on speaker.
• Speaker should not be exposed to dripping or splashing liquids.
• The terminals marked with the lightning bolt symbol should be connected by
an instructed person or by way of ready made terminals.
• The power cord should remain readily operable should any abnormal
conditions occur.
• Any changes or modifications not expressly approved by the grantee of this
device could void the user’s authority to operate the equipment.
AirPlay, iPad, iPhone, iPod, iPod classic, iPod nano,
and iPod touch are trademarks of Apple Inc., regis-
tered in the U.S. and other countries.
AirPlay works with iPhone, iPad, and iPod touch
with iOS 4.3.3 or later, Mac with OS X Mountain
Lion, and Mac and PC with iTunes 10.2.2 or later.
iPad mini, iPod touch (3rd through 5th genera-
tion), and iPod nano (5th through 7th generation).
“Made for iPod,” “Made for iPhone,” and “Made
for iPad” mean that an electronic accessory has
been designed to connect specifically to iPod,
iPhone, or iPad, respectively, and has been certi-
fied by the developer to meet Apple performance
standards. Apple is not responsible for the opera-
tion of this device or its compliance with safety
and regulatory standards. Please note that the use
of this accessory with iPod, iPhone, or iPad may
affect wireless performance.
Made for:
• iPhone 6 Plus
• iPhone 6
• iPhone 5s
• iPhone 5c
• iPad Air 2
• iPad mini 3
For DTS patents, see http://patents.dts.com. Manufac-
tured under license from DTS, Inc. DTS, Play-Fi, the Sym-
bol, and Play-Fi together in combination with the Symbol
are trademarks of DTS, Inc. DTS and Play-Fi are registered
trademarks of DTS, Inc. © DTS, Inc. All Rights Reserved.
Apple and the Apple logo are trademarks of Apple
Inc., registered in the U.S. and other countries. App
Store is a service mark of Apple Inc.
The Spotify software is subject to third party licenses
found here:
www.spotify.com/connect/third-party-licenses
Windows is a registered trademark of Microsoft
Corporation in the United States and other countries.
Other trademarks and trade names are those of their
respective owners.

5
Bravado & Forte Accessories .............6
Bravado Packaging ....................6
Forte Packaging ......................7
Introduction and Overview ...............8
Placement ............................. 8
Connection ............................ 8
AC Power Connection ................8
Signal Connection ...................8
Network Connection ................10
Subwoofer Connection ...............10
Connecting Speakers to the Forte Amplifier .. 10
Bare Wire and Pin Connectors ..........12
Banana Connectors .................12
Controls .............................. 12
Fixed Volume Mode .................12
Auto Aux Input Mode ................12
Position Switch (Bravado Only) ..........13
An Overview of Connections ............. 13
Audio Streaming Usage Guide ...........14
DTS Play-Fi
®
and Apple
®
AirPlay
®
Setup .... 14
Network Requirements ...............14
DTS Play-Fi App Requirements ...........14
Apple AirPlay Requirements ............14
Wi-Fi Indicator Light .................14
Downloading the DTS Play-Fi App ........15
Connecting to a Wireless Network:
Access Point Setup .................15
Connecting to a Wireless Network:
Wi-Fi Protected Setup (WPS) ..........16
Connecting to a Wired Network ........17
Apple AirPlay Setup (Without DTS App) ....17
Playing Audio Using Play-Fi .............. 18
Automatic Input Selection ..............18
Playback – From the DTS App ..........18
Controlling Multiple Speakers ...........18
Additional Play-Fi Features .............18
Playing Audio Using AirPlay ............. 19
Automatic Input Selection ..............19
Playback – From an Apple iOS Device ....19
Playback – From iTunes
®
on a Mac or PC ..19
Controlling Playback Using iTunes ........19
How to use Connect .................... 19
ARC™ (Anthem Room Correction). . . . . . . . . 20
Updates and Rebooting ................. 21
DTS Play-Fi App Update ..............21
DTS Play-Fi Module Update ............21
MartinLogan Firmware Update ..........21
Rebooting ........................21
Factory Reset ......................21
Contacting Customer Service ............. 22
General Information .................... 22
Warranty Information ................22
Serial Number .....................22
Service .........................22
Frequently Asked Questions .............. 23
Troubleshooting ....................... 23
Bravado Specifications .................. 26
Bravado Dimensional Drawings ..........27
Forte Specifications ...................28
Forte Dimensional Drawings ............29
Serial Number:_____________________________
Record your serial number here for easy reference.
You will need this information when filling out your
warranty registration. The serial number is located
on the bottom of the wireless product and on the
product carton.

6
power
cord
79 inch
(200 cm)
USB cable
for ARC
79 inch
(200 cm)
ARC™
calibrated
microphone
Bravado & Forte accessories
Bravado Packaging

7
Forte Packaging

8
introduction and overview
Placement
Thank you—the MartinLogan owner, for loving what we
do, and making it possible for us to do what we love.
MartinLogan’s dedicated in-house engineering and
design team developed the Bravado speaker and Forte
amplifier to deliver exceptional audio performance for
wireless streaming applications, easily integrated and
installed in a diverse variety of environments.
Anthem
®
Room Correction (ARC) allows you to
analyze the acoustic response of your listening envi-
ronment and adjust output of the Bravado and Forte
for optimal performance.
The Forte amplifier features two channels of dedicated
class-D amplification allowing you to bring wireless
streaming to your existing loudspeakers.
The Bravado speaker produces an enveloping field of
richly detailed audio incorporating two tweeters (fea-
turing MartinLogan’s award-winning Folded Motion
technology), a high-performance woofer, and dedi-
cated class-D amplification.
Additionally, for a fully authentic audio experience,
the Bravado and Forte make connecting a dedicat-
ed subwoofer simple.
We recommend locating the speaker and ampli-
fier on a surface that provides a wide, level, and
stable platform such as a table or audio/video
rack. Please note, this Bravado is not magnetically
shielded and therefore should not be placed direct-
ly beneath or on top of a CRT (cathode ray tube)
television. The magnetic field of the speaker will
not affect plasma and LCD style televisions.
connection
AC POWER CONNECTION
The power cord should be firmly inserted into the
AC power receptacle on the rear of the wireless
product, and then to any convenient AC wall out-
let. If you remove your wireless product from the
country of original sale, be certain that the AC
power supplied in any subsequent location is suit-
able before connecting and operating the device.
Substantially impaired performance or severe
damage may occur to the speaker if operation is
attempted from an incorrect AC power source.
SIGNAL CONNECTION
Connections are made at the signal input section on
the rear electronics panel of the wireless product.
Your speaker features the following audio inputs:
• Ethernet connection: used for streaming audio
from DTS Play-Fi
®
Apple AirPlay.
• Wi-fi connection: used for streaming audio
from DTS Play-Fi or Apple AirPlay.
•
Analog In: On the Bravado speaker, this input
will accept a standard 3.5mm stereo headphone
style plug. On the Forte amplifier, this input will
accept standard stereo RCA connections.
WARNING! Turn your device off
before making or breaking any sig-
nal connections! WARNING! The
power cord should not be installed,
removed, or left detached from the speaker while
the other end is connected to an AC power source.

9
Fig. 1 Forte Controls and Rear Connection Panel

10
Please note, when utilizing this speaker to repro-
duce audio from a television via the speaker’s
Auxiliary (digital or analog) connection, the tele-
vision’s audio output should be defeated. Some
televisions will allow you to turn off the internal
speaker via the television’s menu system. Other
televisions may require you to turn the television’s
volume to “zero” or “mute.” Please refer to your
television’s manual.
NETWORK CONNECTION
To stream audio to your speaker or amp, a LAN
(local area network) connection is required. This
connection can be established using Wi-Fi or
Ethernet. Refer to the wireless setup section of this
manual for setup and usage details.
SUBWOOFER CONNECTION
You may choose to employ a separate subwoofer
to enhance bass performance. Subwoofers can
be connected via the speaker’s “Sub Out” RCA
connection. We recommend using a superb
MartinLogan subwoofer.
Using a high-quality RCA style cable designed for
subwoofer connection, connect “Sub Out” from the
speaker to the “LFE In/Sub In” on the subwoofer.
Reference your subwoofer’s manual to learn how
to properly adjust the sub’s level and phase con-
trols to achieve proper blending with the speaker.
If you are not running ARC™ (Anthem Room
Correction) the subwoofer’s crossover should be set to
100Hz. If you will be running ARC, set the subwoof-
er’s crossover to “bypass” or “LFE” and for subwoofers
that do not have a “bypass” or “LFE” crossover setting,
adjust the crossover to its highest setting. Run ARC
after connecting and adjusting the subwoofer.
Using a MartinLogan Dynamo Subwoofer:
If using a MartinLogan Dynamo family subwoofer,
we recommend beginning with the following sub-
woofer settings:
• Low-pass: Bypass
• Phase: 0°
• Volume: Knob set to vertical (12-o’clock to
1-o’clock position)
connecting sPeakers to the Forte amPliFier
The speakers to be connected to the Forte ampli-
fier should be rated to handle at least 75 Watts
for 8 Ohm speakers and at least 150 Watts for
4 Ohm speakers. Your Forte amplifier’s binding
posts can be used with spades, banana plug con-
nectors, pins, and bare wire.
IMPORTANT! Correct polarity (or phase) is critical
for proper soundstage imaging and bass perfor-
mance. Connect one speaker at a time to ensure
proper connection of every channel. The red (+)
amplifier terminal must be connected to the red (+)
speaker terminal. The same applies to the black (–)
terminals. Make sure all wires are firmly fastened.
Repeat this connection procedure for each speaker
in your system.
IMPORTANT! If you hear a distinct lack of bass
and a dislocated stereo image then one or more
of your speakers may be connected out of phase
(polarity is reversed). Re-check to ensure that each
WARNING! Use Class 2 wiring
only. CAUTION: Do not connect
speakers, which are rated less
than 4 Ohms to the Forte amplifier.
CAUTION: While making connections with
bare wire, ensure that none of your bare wire
comes in contact with a an adjacent terminal.

11
Fig. 2 Bravado Controls and Rear Connection Panel

12
POWER: Press and release to turn the
product on/off.
Press and hold the power button for 3 seconds to
reboot your wireless product. Press and hold the
power button for 10 seconds to reset your wireless
product to factory settings and clear the network
configuration.
Your wireless product will enter Standby Mode
(reduced power consumption) after 20 minutes
of no music playing. It will automatically wake-up
when it senses music being received. The Power
button will stay illuminated whether the unit is pow-
ered on or in Standby Mode. If there is a power
failure while your wireless product is switched on, it
will switch back on once power has been restored.
VOLUME UP / DOWN:
Press once to turn volume up/
down. Press and hold to ramp the volume up/down.
MUTE: Press and release to mute the
MartinLogan wireless product. Pressing this
button a second time or pressing either volume button
will restore the previous volume setting. If you are using
ARC™ (Anthem Room Correction) press and hold the
mute button for 5 seconds to turn off ARC on/off. A
‘negative tone’ will sound to verify ARC is switched off.
A ‘positive tone’ will sound to verify ARC is switched on.
INPUT: Switches to the rear panel analog
input. This button illuminates white when
streaming mode is enabled and blue when
the analog input is enabled. If the wireless product is
set to analog input and detects a new audio stream,
it will automatically switch to streaming mode.
WI-FI INDICATOR: The Wi-Fi Indicator tells you
what your wireless product is doing.
• Rapid Blinking: booting up.
• Blinking: connecting to a wireless router.
• Slow Pulse: Access Point Setup Mode.
• Two Blinks & Pause: WPS (Wi-Fi Protected
Setup) Mode.
• Solid: Connected to a wireless router.
• Off: Connected to a router via Ethernet.
FIXED VOLUME MODE: When fixed level is
on, the output volume level of the unit is set to a
fixed level for sources connected to the analog in-
put. To enable fixed volume mode hold the volume
down and mute buttons for five seconds. Hold them
again for five seconds to cancel.
AUTO AUX INPUT MODE: These devices can
be configured to automatically select the Auxiliary
input when DTS Play-Fi is turned off. This mode can
be useful when using the device to improve TV audio.
controls
speaker’s cable is connected with correct polarity:
red (+) to red (+) and black (–) to black (–).
BARE WIRE AND PIN CONNECTORS
If connecting to the Forte amplifier using bare wire
or pin connectors, loosen the binding posts by
unscrewing them to expose the connection hole
in the shaft of the binding post. Insert the speaker
wire or pin into the hole and retighten the binding
post.
BANANA PLUG CONNECTORS
If you are connecting the Forte amplifier using
banana plugs, remove the end caps from the Forte
amplifier’s binding posts to expose the banana
plug socket; insert the banana plug into the socket.

13
an overview oF connections
Analog Left/Right RCA: [Forte amplifier] The analog input on the Forte amplifier can
accept an analog stereo signal through a cable using RCA connectors. An ana-
log RCA cable can only pass a single channel of audio information between
a source component and audio output device. To achieve two-channels of
audio (left/right), you will find that analog RCA cables come bundled as a
stereo pair (two connectors on each end).
Analog Left/Right 3.5mm Stereo “Headphone Style” Jack: [Bravado speaker] The
analog input on the Bravado speaker can accept an analog stereo signal through
a cable using a 3.5mm “headphone style” connector. Users may find source
components such as digital media players and docks also utilize a 3.5mm
‘headphone style’ connector. These devices also have a “volume control”
that increases or decreases the level of the output signal.
Analog Left/Right RCA to Stereo 3.5mm: Users may find they need to
connect an audio source with 3.5mm headphone style jack to the RCA inputs
on the Forte amplifier, or connect an audio source with RCA outputs to the
3.5mm input on the Bravado speaker. To connect to these devices use a Left/
Right RCA to stereo 3.5mm cable.
Ethernet: This cable allows you to physically connect a device to a LAN (local area net-
work). When connected to a LAN, audio information can be sent to this speaker
using various protocols (such as DTS Play-Fi
®
or Apple AirPlay). If a wireless
(Wi-Fi) connection is used to connect to a LAN, there is no need to use an
Ethernet connection. However, in some installations, a ‘hard-wired’ Ethernet
connection may prove more desirable than a wireless connection.
Wi-Fi: This connection technology wirelessly connects a device to a LAN (local area
network). When connected to a LAN, audio information can be sent to this speaker
using various protocols (such as DTS Play-Fi or AirPlay). If an Ethernet connection is used
to connect to a LAN, there is no need to use a Wi-Fi connection. In some installations a ‘hard-wired’
Ethernet connection may prove more desirable than a wireless connection.
To enable auto input mode hold the input button for
five seconds. Hold it again for five seconds to cancel.
POSITION SWITCH (BRAVADO ONLY):
The rear of the Bravado speaker features a switch
that allows you to customize the output of the speak-
er for specific applications. If the speaker is being
used for stereo output, set this switch to “stereo”.
If a stereo pair of the speakers are being used in
a 2-channel application, set the switch to “left” or
“right” depending on the speaker position.

14
audio streaming usage guide
DEVICE APP CONTENT MULTI-ROOM SUPPORT
Apple iOS
DTS Play-Fi
®
• Select music services
• iTunes music stored on device
• Up to eight
• Multiple simultaneous users
• Speakers can be zoned
Apple AirPlay
• iTunes audio content
• All iOS music apps
• One to one
Android™
DTS Play-Fi
• Select music services
• iTunes music stored on device
• Up to eight
• Multiple simultaneous users
• Speakers can be zoned
Mac PC
Apple AirPlay
• All audio content • Up to six
Windows
®
PC
DTS Play-Fi
• All audio content
• Up to eight
• Multiple simultaneous users
• Speakers can be zoned
Apple AirPlay
• iTunes audio content • Up to six
dts Play‑Fi
and aPPle airPlay setuP
NETWORK REQUIREMENTS
You must have the following to connect your
wireless product to your network:
• A wireless router.
• A high-speed internet connection for reliable
playback of internet based music services.
• Have your network password ready before
connecting the wireless product to your network.
TIP! If wireless connectivity is weak or not available,
connect to your router with an Ethernet cable. TIP! Your
wireless product communicates with wireless networks
that support 802.11g/n. For best performance, a
network that supports 802.11n wireless technology is
recommended. A network supporting 802.11b may be
used, but it will effectively stream to only one device
equipped with DTS Play-Fi. Your wireless product
communicates over a 2.4 GHz wireless band, however,
it can become slow in locations, such as apartments,
where many routers are in operation. Consequently,
your wireless product is capable of jumping onto a 5
GHz band on dual band wireless routers.
DTS PLAY-FI APP REQUIREMENTS
• An Android device running Android 2.2 or later.
• An iOS device running iOS 6.0 or later.
• A Windows
PC running Windows 7, 8 (32 and
64 bit), or later.
APPLE AIRPLAY REQUIREMENTS
• An iOS device running iOS 4.3.3 or later.
• Mac with OS X Mountain Lion, or later.
• Mac or PC with iTunes 10.2.2, or later.
WI-FI INDICATOR LIGHT
The Wi-Fi Indicator light tells you what your wireless
product is doing (fig. 1 & 2).

15
• Rapid Blinking: booting up.
• Blinking: connecting to a wireless router.
• Slow Pulse: Access Point Setup Mode.
• Two Blinks & Pause: WPS (Wi-Fi Protected
Setup) Mode.
• Solid: Connected to a wireless router.
• Off: Connected to a router via Ethernet.
DOWNLOADING THE DTS PLAY-FI
®
APP
•
Android Device Users: Download DTS’s free Play-Fi
app from the Google Play
®
or Amazon App Store
®
.
• iOS Device Users: Download the DTS’s free
Play-Fi app from the Apple App Store.
• PC Users: Download DTS’s free Play-Fi program
from https://play-fi.com/apps/windows
CONNECTING TO A WIRELESS NETWORK:
ACCESS POINT SETUP
Access Point Setup causes your MartinLogan
wireless product to behave as if it were a wireless
router. Using your mobile device or Wi-Fi capable
PC, you connect directly to your wireless product
using Wi-Fi, select your home wireless network,
and enter the network password.
1.
For optimal setup conditions place your wireless
product next to your wireless router. The device
can be moved to its final location after wi-fi setup.
2. Plug in your wireless product and press the
Power button. The Wi-Fi Indicator light will start
rapidly blinking for about 20 seconds while your
wireless product is booting up. If your wireless
product is not configured to connect to your
network, it will continue to blink. If this is the first
time your new wireless product is plugged in,
the Wi-Fi Indicator light will start pulsing slowly.
If the wireless product is already configured to
connect to a wi-fi network, the button will turn
solid (connected) or blink rapidly (not connected).
3. Once the Wi-Fi Indicator light starts pulsing
slowly, your wireless product is in Access Point
Mode and ready to connect to your wireless
network. Note: If the Wi-Fi Indicator light does
not pulse slowly, press and hold the Wi-Fi Setup
button for 8 seconds. You will hear two tones—
one at 3 seconds and another at 8 seconds.
After 20 seconds, the Wi-Fi Indicator light will
begin pulsing slowly to indicate Access Point
mode is ready. At anytime you can press the
button again to cancel the setup mode.
Android Device Users:
a) Launch the DTS Play-Fi app.
b) The app will automatically find your device
and provide prompts for setup.
c) Touch the “Setup” button on the screen.
d) Enter the password for your wireless network;
the app will connect your device to your
network. You will notice the Wi-Fi Indicator
light will have changed from blinking to
solid. This may take up to a minute. If, after a
minute, the button continues to blink rapidly,
setup failed and you should try again.
e)
Your wireless product is now connected
to your wireless network. Reconnect your
mobile device to your wireless network. You
may re-name your device using the app.
iOS Device Users:
Please note: When using an iOS device your
wireless product can stream audio using either
Apple AirPlay or DTS Play-Fi.
a) Make sure your iOS device’s Wi-Fi is turned
on and connected to your Wi-Fi network.
b) Open your iOS device’s ‘Settings’ app
and go to the ‘Wi-Fi’ menu. Your wireless
product will show up under the heading ‘set
up new airplay speaker...’
c) Select your wireless product from the list. It
will have “Play-Fi ” in the name.
d) Once in the ‘AirPlay Setup’ menu you will
be prompted to select your Wi-Fi network

16
and name your speaker (you will not need
to enter your network password).
e) Once your device is connected, you will
notice that the Wi-Fi Indicator light on your
wireless product will change from blinking to
solid. This may take up to a minute. If, after a
minute, the button continues to blink rapidly,
setup failed and you should try again.
f)
Your wireless product is now connected to
your wireless network. Reconnect your iOS
device to your wireless network.
PC Users:
a) Launch the DTS Play-Fi
®
app.
b) The app will automatically find your device
and provide prompts for set up. If the app
does not prompt you to set up a new device,
within the app go to the settings screen and
click ‘Setup Play-Fi Device’. Follow the on-
screen instructions.
c) Click the “Set-up” button on the screen.
d) Select the speaker(s) you want to set up.
e) Enter the password for your wireless network;
the app will connect your device to your
network. You will notice the Wi-Fi Indicator
light will have changed from blinking to
solid. This may take up to a minute. If, after a
minute, the button continues to blink rapidly,
setup failed and you should try again.
f)
Your wireless product is now connected to
your wireless network. Reconnect your PC to
your wireless network. You may re-name your
device using the app.
CONNECTING TO A WIRELESS NETWORK:
WI-FI PROTECTED SETUP (WPS)
Wi-Fi Protected Setup (WPS) is a feature found
on most wireless routers that allows your wireless
product to securely and automatically connect
without needing to enter a password. WPS is not
a standard feature on all routers, and only one
wireless product can be set up at a time.
Check your router’s owner’s manual to see if WPS
is an available feature, or look for a button on
your router marked with the WPS logo ( ). If your
router does not have WPS, then use Access Point
Wireless Setup.
1. For optimal setup conditions place your wireless
product next to your wireless router. The device
can be moved to its final location after wi-fi setup.
2. Plug in your wireless product and press the
Power button. The Wi-Fi Indicator light will start
rapidly blinking for about 20 seconds while your
wireless product is booting up. If your wireless
product is not configured to connect to your
network, it will continue to blink. If this is the first
time your new wireless product is plugged in,
the Wi-Fi Indicator light will start pulsing slowly.
If the wireless product is already configured to
connect to a wi-fi network, the button will turn
solid (connected) or blink rapidly (not connected).
3. To initiate Wi-Fi Protected Setup (WPS), for 3
seconds, press and hold the Wireless Setup
button on the back of your wireless product until
you hear a tone. The Wi-Fi Indicator light will
blink twice in continuous intervals to indicate
WPS mode. Now push the WPS button ( ) on
your router. If you cannot find a WPS button on
your router, refer to the router’s owner’s manual.
4. Once the Wi-Fi Indicator light turns solid (not
blinking), this indicates your wireless product
is connected to your wireless network. If, after
a minute, the button continues to blink rapidly,
setup failed and you should try again.
5. Connect your mobile device or PC to the same
network as your wireless product.
Launch the DTS
Play-Fi app. Upon launching, it will automatically
detect your wireless product and should prompt
you to name your wireless product.

17
CONNECTING TO A WIRED NETWORK
1. Using an Ethernet cable, connect your wireless
product to your router.
2. Plug in your wireless product and press the
Power button. The Wi-Fi Indicator light will start
rapidly blinking for about 20 seconds while
your wireless product is booting up.
3. The Wi-Fi Indicator light turns off when the
wireless product is connected via Ethernet.
4. Connect your mobile device or PC to the same
network as your wireless product.
Launch the DTS
Play-Fi
®
app. Upon launching, it will automatically
detect your wireless product and should prompt
you to name your wireless product.
APPLE AIRPLAY SETUP (WITHOUT DTS APP)
If you do not want to install and use the DTS Play-Fi
®
app you can still setup the wireless product to work
with iTunes and AirPlay on your Mac or Windows
PC using the following procedure.
Alternate Connection for Mac and Windows PC:
1. To avoid a delayed wireless set up, place
your wireless product in close proximity to your
router during wireless set up.
2. Plug in your wireless product and press the
Power button. The Wi-Fi Indicator light will start
rapidly blinking for about 20 seconds while your
wireless product is booting up. If your wireless
product is not configured to connect to your
network, it will continue to blink. If this is the first
time your new wireless product is plugged in,
the Wi-Fi Indicator light will start pulsing slowly.
If the wireless product is already configured to
connect to a wi-fi network, the button will turn
solid (connected) or blink rapidly (not connected).
3.
Once the Wi-Fi Indicator light starts pulsing
slowly, your wireless product is in Access Point
Mode and ready to connect to your wireless
network. Note: If the Wi-Fi Indicator light does
not pulse slowly, press and hold the Wi-Fi Setup
button for 8 seconds. You will hear two tones—
one at 3 seconds and another at 8 seconds.
After 20 seconds, the Wi-Fi Setup and Status
button will begin pulsing slowly to indicate
Access Point mode is ready. At anytime you can
press the button again to cancel the setup mode.
4. Ensure that Wi-fi is enabled on your computer.
Go to your computer’s Wi-Fi set up. Select the
Wi-Fi network with “Play-Fi ” in the name.
5. Once your wireless product is selected as the
Wi-Fi network, open your web browser and
type http://192.168.0.1/index.html in the
address bar. You will see a web page from
your wireless product.
6. Click on ‘Set Up’. A list of wireless networks will
be displayed. Click on the wireless network
you wish to connect to.
7. Enter the password for your wireless network
then click ‘Next’.
8. Enter a name for your wireless product and
then click ‘Next’ to connect your wireless
product to your network.
9. Your wireless product will attempt to connect
to your network. Once the Wi-Fi Indicator light
turns solid (not blinking), this indicates your
wireless product is connected to your wireless
network. If the Wireless button rapidly blinks,
setup failed and should be tried again.
10. Connect your Mac or PC to the same network
as your wireless product. Open your music
application, press the AirPlay icon, and choose
your speaker from the list.

18
Playing audio using Play‑Fi
®
AUTOMATIC INPUT SELECTION
Your speaker will automatically switch to the
streaming input if it detects that a new Play-Fi con-
nection has been established with the speaker.
PLAYBACK – FROM THE DTS APP
Note: Future updates to the DTS Play-Fi application
may change functionality.
1. Launch the DTS Play-Fi app on your mobile
device or PC (located in the system tray).
2. Android and iOS Device Users: Within the
Play-Fi app, select your music source. You can
choose from your personal music library, Internet
Radio, or from select internet music services. PC
Users: Any audio content from your computer
can be streamed using Play-Fi.
3.
If you have more than one Play-Fi speaker
connected to your network, you will be prompted
to select the speaker to which you want to stream.
CONTROLLING MULTIPLE SPEAKERS
If you have more than one Play-Fi speaker connect-
ed to your network, you can simultaneously stream
the same audio to multiple speakers.
1. Android and iOS Device Users: Within the
app, press the Play-Fi logo in the lower corner
of the app. PC Users: open the Play-Fi program
using the icon in your system tray.
2.
Select additional devices to play audio from.
PC Users: The free version of the Windows app
may not allow streaming to multiple speakers. An
upgraded version of the DTS Play-Fi app, with this
capability, can be purchased from the DTS website.
Note: 8 Play-Fi speakers can be synced to
play the same audio content at the same time.
We recommend up to 32 Play-Fi speakers on
a network for the best experience, but the only
limit to connected devices is how many your
router can support.
TIP! Primary and Secondary Speakers
When streaming audio content to multiple devices,
you will be asked to assign them to two categories:
primary and secondary devices. The DTS Play-Fi
module requires a primary device be selected.
This maximizes synchronization between multiple
devices simultaneously streaming the same content.
Select the DTS Play-Fi
device with the strongest signal
as your primary device. Secondary devices connect
to your primary device, so if you disable your primary
device, you will need to select a new primary device
before audio resumes on your secondary devices.
ADDITIONAL PLAY-FI FEATURES
New versions of the Play-Fi app will add features
not mentioned in this manual. Please refer to the
app and related documentation for details on new
and enhanced features such as streaming different
audio content to multiple zones and grouping of two
discrete speakers for stereo (left/right) playback.

19
AUTOMATIC INPUT SELECTION
Your speaker will automatically switch to the
streaming input if it detects that a new AirPlay con-
nection has been established with the speaker.
PLAYBACK – FROM AN APPLE iOS DEVICE
1. Open your music application.
2. Press the AirPlay icon and choose your speaker
from the list.
3. Play music.
PLAYBACK – FROM ITUNES ON A MAC
OR PC (PERSONAL COMPUTER)
1. Launch iTunes (version 10 or later).
2. Click the AirPlay icon (usually located in the
upper left of the iTunes window) and choose
your speaker from the list. You can choose
multiple speakers if you have more than one
speaker on your network.
3. Play music.
CONTROLLING PLAYBACK USING ITUNES
To control playback (play/pause/volume) from
your speaker or remote control, follow these steps:
1. On your computer, launch iTunes (version
10.2.2 or later).
2. Open “Preferences” and choose “Devices.”
3. Check the box for “Allow iTunes audio control
from remote speakers” and click okay.
Playing audio using airPlay
You’ll need Spotify Premium to use Connect, see
details overleaf.
1. Add your new device to the same wifi network
as your phone, tablet or PC (see product user
instructions for details).
2. Open the Spotify app on your phone, tablet or
PC, and play any song.
3. If you’re using the app on a phone - tap the
song image in the bottom left of the screen. For
tablet and PC move to step 4.
4. Tap the Connect icon
5. Pick your device from the list. If you can’t see
it, just check it’s connected to the same wifi net-
work as your phone, tablet or PC.
All done! Happy listening.
Licenses
The Spotify Software is subject to third party licens-
es found here:
www.spotify.com/connect/third-party-licenses.
how to use connect

20
arc™ (anthem room correction)
Even when the finest speakers are perfectly positioned,
the room itself still has a dramatic impact on any
system’s sound, an impact more profound than that
of any individual component. Various solutions have
fallen in and out of favor over the years, but none has
solved the problem of “the room.” Until ARC.
Using proprietary processes and the power of your
PC, the ARC system analyzes each speaker’s in-
room sound, then computes the required correction
to yield optimal performance from every speaker.
It’s a process that takes approximately 5 minutes.
Anthem’s approach is a true audiophile solution to
the problems of the room.
IMPORTANT! The listening space must be silent while
performing ARC. A noisy computer fan, a dishwasher
or microwave running, etc. can negatively affect
ARC’s measurements.
How to Use ARC Technology:
1. Ensure that your wireless product is already
connected to your home network and is
powered on.
2. Download the latest Window’s version of ARC-2
software from www.anthemav.com or “Anthem
ARC Mobile” from the iTunes App Store and
install it. Follow the on-screen instructions.
3. Window’s only: Using the USB cable, connect
the ARC microphone to a Windows PC. The
USB cable and ARC microphone are provided
with your soundbar.
4. Look for the icon and launch the ARC
program. Follow the prompts on your screen to
successfully run the ARC™ software; the entire
process should take approximately 5 minutes.
5.
Hold the ARC microphone with your arm fully
extended, the ARC microphone tip must point towards
the ceiling and it must be positioned at ear level.
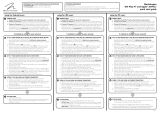
6. For best results, hold the microphone in 5
positions around the room.
TIP! Once the ARC process is complete, the
corrected listening curves will be stored and music
will be played back reflecting these corrections.
To turn ARC correction on and off, press and hold
the mute button for 5 seconds. A ‘negative tone’
will sound to verify ARC is switched off. A ‘positive
tone’ will sound to verify ARC is switched on.
ARC™
Microphone
Ear Level
Fig. 3
1/60