Whirlpool LTE5243DT7 Le manuel du propriétaire
- Catégorie
- Machines à laver
- Taper
- Le manuel du propriétaire

WASHER/DRYERUSER INSTRUCTIONS
INSTRUCCIONES PARA EL USUARIO
DE LALAVADORA/SECADORA
INSTRUCTIONSD'UTILISATION
.#
DE LALAVEUSE/SECHEUSE
• o,.
Table of Contents /Indlce /Table des matieres
ASSISTANCE OR SERVICE ............................ 1
WASHER/DRYER SAFETY ............................. 2
WASHER USE .................................................. 4
DRYER USE ...................................................... 5
WASHER/DRYER CARE ................................. 6
TROUBLESHOOTING WASHER .................... 8
TROUBLESHOOTING DRYER ...................... 10
WARRANTY .................................................... 12
AYUDA O SERVICIO TleCNICO .................... 13
SEGURIDAD DE LA
LAVADORA/SECADORA ............................... 13
USO DE LA LAVADORA ................................ 16
USO DE LA SECADORA ............................... 17
CUlDADO DE LA
LAVADORA/SECADORA ............................... 18
SOLUCION DE PROBLEMAS
DE LA LAVADORA ......................................... 20
SOLUCION DE PROBLEMAS
DE LA SECADORA ........................................ 22
GARANTiA ...................................................... 24
ASSISTANCE OU SERVICE .......................... 25
SleCURITle DE LA
LAVEUSE/SF=CHEUSE ................................... 25
UTILISATION DE LA LAVEUSE .................... 28
UTILISATION DE LA SleCHEUSE ................. 29
ENTRETIEN DE LA
LAVEUSE/SF=CHEUSE ................................... 30
DlePANNAGE DE LA LAVEUSE .................... 32
DlePANNAGE DE LA SleCHEUSE ................. 34
GARANTIE ...................................................... 36
Assistance or Service
If you need assistance or service, first see the "Troubleshooting"
section. Additional help is available by calling our Customer
eXperience Center at 1-800-253-1301 from anywhere in the
U.S.A., or write:
Whirlpool Corporation
Customer eXperience Center
553 Benson Road
Benton Harbor, MI 49022-2692
Information may also be obtained by visiting our website at
www.whirlpool.com.
In Canada, for assistance, installation or service, call us at
1-800-807-6777, or write:
Whirlpool Canada LP
Customer Interaction Centre
1901 Minnesota Court
Mississauga, Ontario L5N 3A7
In Canada, visit www.whirlpool.ca.
Please include a daytime phone number in your correspondence.
Keep this book and your sales slip together for future
reference. You must provide proof of purchase or installation
date for in-warranty service.
Write down the following information about your appliance to help
you obtain assistance or service if you ever need it. You will need
to know your complete model number and serial number. You can
find this information on the model and serial number label, located
at the top inside dryer door well.
Dealer name
Serial number
Address
Phone number
Model number
Purchase date
8578179B
AGINE _

WASHER/DRYERSAFETY
Your safety and the safety of others are very important.
We have provided many important safety messages in this manual and on your appliance. Always read and obey all safety
messages.
This is the safety alert symbol.
This symbol alerts you to potential hazards that can kill or hurt you and others.
All safety messages will follow the safety alert symbol and either the word "DANGER" or "WARNING."
These words mean:
You can be killed or seriously injured if you don't immediately
follow instructions.
You can be killed or seriously injured if you don't follow
instructions.
All safety messages will tell you what the potential hazard is, tell you how to reduce the chance of injury, and tell you what can
happen if the instructions are not followed.
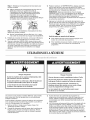
WARNING: For your safety, the information in this manual must be followed to minimize
the risk of fire or explosion, or to prevent property damage, personal injury, or death.
- Do not store or use gasoline or other flammable vapors and liquids in the vicinity of this
or any other appliance.
m WHAT TO DO IF YOU SMELL GAS:
• Do not try to light any appliance.
• Do not touch any electrical switch; do not use any phone in your building.
• Clear the room, building, or area of all occupants.
• Immediately call your gas supplier from a neighbor's phone. Follow the gas supplier's
instructions.
• If you cannot reach your gas supplier, call the fire department.
- Installation and service must be performed by a qualified installer, service agency, or
the gas supplier.

IMPORTANT SAFETY INSTRUCTIONS
WARNING: To reduce the risk of fire, electric shock, or injury to persons when using the washer/dryer, follow basic
precautions, including the following:
[] Read all instructions before using the washer/dryer.
[] Do not place items exposed to cooking oils in your dryer.
Items contaminated with cooking oils may contribute to a
chemical reaction that could cause a load to catch fire.
[] Do not wash or dry articles that have been previously
cleaned in, washed in, soaked in, or spotted with gasoline,
dry-cleaning solvents, other flammable, or explosive
substances as they give off vapors that could ignite or
explode.
[] Do not add gasoline, dry-cleaning solvents, or other
flammable, or explosive substances to the wash water.
These substances give off vapors that could ignite or
explode.
[] Do not allow children to play on or in the washer/dryer.
Close supervision of children is necessary when the
washer/dryer is used near children.
[] Before the washer/dryer is removed from service or
discarded, remove the doors to the washer/dryer
compartments.
[] Do not reach into the washer/dryer if the tub, agitator or
drum is moving.
[] Do not install or store the washer/dryer where it will be
exposed to the weather.
[] Do not tamper with controls.
[] Clean dryer lint screen before or after each load.
[] Under certain conditions, hydrogen gas may be produced
in a hot water system that has not been used for 2 weeks
or more. HYDROGEN GAS IS EXPLOSIVE. If the hot water
system has not been used for such a period, before using
the washing machine, turn on all hot water faucets and let
the water flow from each for several minutes. This will
release any accumulated hydrogen gas. As the gas is
flammable, do not smoke or use an open flame during
this time.
[] Do not repair or replace any part of the washer/dryer or
attempt any servicing unless specifically recommended in
this Use and Care Guide or in published user-repair
instructions that you understand and have the skills to
carry out.
[] Do not use fabric softeners or products to eliminate static
unless recommended by the manufacturer of the fabric
softener or product.
[] Do not use heat to dry articles containing foam rubber or
similarly textured rubber-like materials.
[] Keep area around the exhaust opening and adjacent
surrounding areas free from the accumulation of lint, dust,
and dirt.
[] The interior of the machine and dryer exhaust vent should
be cleaned periodically by qualified service personnel.
[] See "Electrical Requirements" section for grounding
instructions.
SAVE THESE INSTRUCTIONS
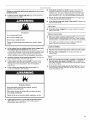
Your dryer must be properly installed and vented to achieve
maximum drying efficiency and shorten drying times. Use the
minimum recommended installation clearances found in the
Installation Instructions. See the Installation Instructions for more
information.
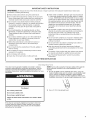
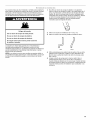
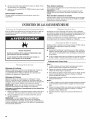
Fire Hazard
Use a heavy metal vent.
Do not use a piaetic vent.
Do not use a metal foil vent.
Failure to follow these instructions can result in death
or fire.
If the dryer is not properly installed and vented, it will not be
covered under the warranty. Proper venting of your dryer is
important for satisfactory drying results. See the Installation
Instructions for more detail.
NOTE: Service calls caused by improper venting will be paid for
by the customer, whether it was a paid installation or self-
installed.
f. Do not use plastic vent or metal foil vent. Use 4" (10.2 cm)
metal or flexible metal vent. Do not kink or crush flexible metal
vent. It must be completely extended to allow adequate
exhaust air to flow. Check vent after installation. Refer to the
Installation Instructions for proper length requirements of vent.
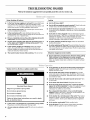
2. Use a 4" (10.2 cm) exhaust hood.

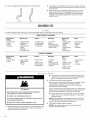
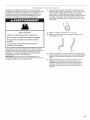
3. Usethestraightestpathpossiblewhenroutingthevent.
Good Better
4.
5.
Use clamps to seal all joints. Do not use duct tape, screws or
other fastening devices that extend into the interior of the vent
to secure vent.
Clean exhaust vent periodically, depending on use, but at
least every 2 years, or when installing your dryer in a new
location. When cleaning is complete, be sure to follow the
Installation Instructions supplied with your dryer for final
product check.
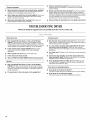
WASHERUSE
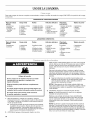
For these suggested full-sized loads, set the LOAD SIZE selector to the highest load size setting.
LARGE CAPACITY WASHERS
Mixed Load Towels Delicates Permanent Knits
Heavy Work
Clothes Press
2 pair of pants 2 double sheets 8 bath towels 2 camisoles 1 double sheet 2 pair of pants
3 shirts 4 pillowcases 8 hand towels 4 slips 1 tablecloth 2 blouses
3 jeans 6 T-shirts 10 washcloths 6 undergarments 1 dress 4 shirts
1 coverall 6 pair of shorts 1 bath mat 2 sets of sleepwear 1 blouse 4 tops
2 shirts 1 child's outfit 2 pair of pants 2 dresses
2 blouses 3 shirts
6 handkerchiefs 2 pillowcases
COMPACT WASHERS
Mixed Load Towels Delicates Permanent Knits
Press
1 pair of pants 9 bath towels 1 camisole 6 shirts 2 pair of pants
2 pillowcases -or- 2 slips -or- 2 shirts
2 shirts 6 bath towels 4 undergarments 2 double sheets -or-
1 T-shirt 3 hand towels 1 set of sleepwear 2 pillowcases 3 dresses
6 washcloths 1 half slip -or-
2 single sheets
2 pillowcases
Heavy Work
Clothes
2 pair of pants
3 shirts
Fire Hazard
Never place items in the washer that are dampened
with gasoline or other flammable fluids.
No washer can completely remove oil.
Do not dry anything that has ever had any type of oil on
it (including cooking oils).
Doing so can result in death, explosion, or fire.
Measure detergent and pour it into the washer. If desired, add
powdered or liquid color safe bleach. Drop a sorted load of
clothes loosely into your washer.
2=
3=
• Load evenly to maintain washer balance. Mix large and
small items. Items should move easily through the wash
water. Overloading can cause poor cleaning.
(OPTIONAL) Add liquid chlorine bleach.
Always measure liquid chlorine bleach. Do not guess. Do not
use more than 1 cup (250 mL) for a full load. Follow
manufacturer's directions for safe use. Use a cup with a
pouring spout to avoid spilling.
Let the washer fill and begin agitating the load. Add bleach to
the wash cycle so it can be removed in the rinse cycle. Pour
bleach around the agitator, not directly onto the load.
• Follow directions on the care labels. Do not use chlorine
bleach on wool, silk, spandex, acetates, or some flame-
retardant fabrics.
NOTE: Undiluted bleach will damage any fabric it touches.
The damage appears as rips, holes, tears, or color loss and
may not show up until several washings later.
(OPTIONAL) Add liquid fabric softener.
NOTE: Your washer/dryer does not come with a fabric
softener dispenser installed.

Tofindoutwhetheryourmodelallowsfabricsoftener
dispenserusageandforinformationonordering,refertothe
frontpageofthismanualorcallthedealerfromwhomyou
purchasedyourwasher/dryer.AskforPartNumber3350834.
NOTE:Donotspillordripanyfabricsoftenerontotheclothes.
Undilutedfabricsoftenercanstainfabrics.Alwaysdilutefabric
softenerwithwarmwater.Toomuchfabricsoftenercanmake
someitems(diapersandtowels)nonabsorbent.Ifthis
happens,donotuseitineveryload,oruselessofitineach
load.
Style1:Withliquidfabricsoftenerdispenser(onsome
models)
• Useonlyliquidfabricsoftenerinthisdispenser.Pour
measuredliquidfabricsoftenerintothedispenser.
Softenerisaddedautomaticallyduringtherinseportionof
thecycle.Diluteliquidfabricsoftenerbyfillingthe
dispenserwithwarmwateruntilliquidreachesthe
crossbarinthedispenseropening.
Style2:Withoutliquidfabricsoftenerdispenser(onsome
models)
• InthefinalrinseONLY,addfabricsoftenerthathasbeen
dilutedwith1/2to1cup(125to250mL)warmwater.
4. Closethewasherlid.Washerwillnotagitateorspinwiththe
lidopen.
5. TurntheWATERLEVELselectortothecorrectsettingforyour
washloadandthetypeoffabricbeingwashed.Youmay
changetheloadsizeorwaterlevelselectionafterthewasher
hasstartedfillingbyturningtheselectortoadifferentsetting.
6. SettheTEMPERATUREselectortothecorrectsettingforthe
typeoffabricandsoilsbeingwashed.Usethewarmestwater
safeforfabric.Followgarmentlabelinstructions.
NOTE:Inwashwatertemperaturescolderthan60°F(15.6°C),
detergentsdonotdissolvewell.Soilscanbedifficultto
remove.Somefabricscanretainwearwrinklesandhave
increasedpilling(theformationofsmalllint-likeballsonthe
surfaceofgarments).
7. PushintheCycleControlknobandturnitclockwisetothe
washcycleyouwant.Reducethewashtimewhenusinga
smallloadsizesetting.PullouttheCycleControlknobtostart
thewasher.
To stop or restart your washer:
• To stop the washer at any time, push in the Cycle
Control knob.
• To restart the washer, close the lid (if open) and pull out the
Cycle Control knob.
DRYERUSE
Explosion Hazard
Keep flammable materials and vapors, such as
gasoline, away from dryer,
Do not dry anything that has ever had anything
flammable on it (even after washing).
Failure to follow these instructions can result in death,
explosion, or fire.
Fire Hazard
No washer can completely remove oil.
Do not dry anything that has ever had any type of oil on
it (including cooking oils).
Items containing foam, rubber, or plastic must be dried
on a clothesline or by using an Air Cycle.
Failure to follow these instructions can result in death
or fire.
This booklet covers several different models. Your dryer may not
have all of the cycles and features described.
Before using your dryer, wipe the dryer drum with a damp cloth to
remove dust from storing and shipping.
1. Clean lint screen before each load. See "Cleaning the Lint
Screen."
2. Load clothes loosely into the dryer and close the door. Do not
pack the dryer. Allow space for clothes to tumble freely.
3. Turn the Cycle Control knob to the recommended cycle for the
type of load being dried. Use the Energy Preferred Automatic
Setting to dry most heavy to medium weight fabrics.
4. (OPTIONAL) Your dryer may have an END OF CYCLE SIGNAL.
The signal is helpful when drying items that should be
removed from the dryer as soon as it stops. The End of Cycle
signal is part of the Start button and is selectable. Turn the
Start button to ON or OFF. The signal will sound only if the
selector is set to On.
5. If desired, add fabric softener sheet. Follow package
instructions.
6. Press the PUSH TO START button.

Stopping and Restarting
You can stop your dryer anytime during a cycle.
To stop your dryer
Open the dryer door or turn the Cycle Control knob to OFE
NOTE: The Cycle Control knob should point to an Off area when
the dryer is not in use.
To restart your dryer
Close the door. Select a new cycle and temperature (if desired).
Press the PUSH TO START button.
WASHER/DRYERCARE
Keep washer/dryer area clear and free from items that would
obstruct the flow of combustion and ventilation air.
Explosion Hazard
Keep flammable materials and vapors, such as
gasoline, away from dryer.
Failure to do so can result in death, explosion, or fire.
Cleaning the exterior
Use a soft, damp cloth or sponge to wipe up any spills such as
detergent or bleach. Occasionally wipe the outside of your washer
to keep it looking new.
Cleaning the interior
Clean your washer interior by mixing 1cup (250 mL) of chlorine
bleach and 2 scoops or caps full of detergent. Pour this into your
washer and run it through a complete cycle using hot water.
Repeat this process if necessary.
NOTE: Remove any hard water deposits using only cleaners
labeled as washer safe.
Cleaning the liquid fabric softener dispenser (on some
models):
1. Remove dispenser by grasping top with both hands and
squeezing, while pushing upward with thumbs.
2. Rinse dispenser under a warm water faucet, then replace it.
NOTE: Ifyour model has a liquid fabric softener dispenser, do not
wash clothes with this dispenser removed. Do not add detergent
or bleach to this dispenser; it is for liquid fabric softener only.
Replace inlet hoses after 5 years of use to reduce the risk of hose
failure. Periodically inspect and replace inlet hoses if bulges,
kinks, cuts, wear or leaks are found.
When replacing your inlet hoses, mark the date of replacement on
the label with a permanent marker.
Clean the lint screen before each load. A screen blocked by lint
can increase drying time.
IMPORTANT:
• Do not run the dryer with the lint screen loose, damaged,
blocked or missing. Doing so can cause overheating and
damage to both the dryer and fabrics.
• If lint falls off the screen into the dryer during removal, check
the exhaust hood and remove the lint.
Every Load Cleaning
Style 1:
1. The lint screen is located inside the dryer on the back wall.
Pull out the lint screen and its cover.
2. Separate the cover and the screen by squeezing the screen
and pulling on the cover at the same time.
3. Roll lint off the screen with your fingers. Do not rinse or wash
screen to remove lint. Wet lint is hard to remove.
4. Put the lint screen and cover back together and push firmly
back into place.
Style 2:
1. The lint screen is located inside the dryer in the front door well.
Pull the lint screen straight up.
2. Roll lint off the screen with your fingers. Do not rinse or wash
screen to remove lint. Wet lint is hard to remove.
3. Push the lint screen firmly back into place.
As Needed Cleaning
Laundry detergent and fabric softener residue can build up on the
lint screen. This buildup can cause longer drying times for your
clothes, or cause the dryer to stop before your load is completely
dry. The screen is probably clogged if lint falls off the screen.
Clean the lint screen (as outlined following) every 6 months, or
more frequently if it becomes clogged due to a residue buildup.
1. Roll lint off the screen with your fingers.
2. Wet both sides of lint screen with hot water.
3. Wet a nylon brush with hot water and liquid detergent. Scrub
lint screen with the brush to remove residue buildup.
4. Rinse screen with hot water.
5. Thoroughly dry lint screen with a clean towel. Replace screen
in dryer.
To clean dryer drum
1. Apply a nonflammable household cleaner to the stained area
of the drum and rub with a soft cloth until stain is removed.
2. Wipe drum thoroughly with a damp cloth.
3. Tumble a load of clean cloths or towels to dry the drum.
NOTE: Garments that contain unstable dyes, such as denim blue
jeans or brightly colored cotton items, may discolor the dryer
interior. These stains are not harmful to your dryer and will not
stain future loads of clothes. Dry unstable dye items inside out to
avoid dye transfer.

In Canada
From Inside the Dryer Cabinet
Lint should be removed every 2 years, or more often, depending
on dryer usage. Cleaning should be done by a qualified person.
From Inside the Exhaust Vent
Lint should be removed every 2 years, or more often, depending
on dryer usage.
Install and store your washer/dryer where it will not freeze.
Because some water may stay in the hoses, freezing can damage
your washer/dryer. If storing or moving your washer/dryer during
freezing weather, winterize it.
Non-use or vacation care
Operate your washer/dryer only when you are at home. If you will
be on vacation or not using your washer/dryer for an extended
period of time, you should:
• Unplug washer/dryer or disconnect power.
• Turn off the water supply to the washer. This helps avoid
accidental flooding (due to a water pressure surge) while you
are away.
To winterize washer/dryer
1. Shut off both water faucets.
2. Disconnect and drain water inlet hoses.
3. Put 1 qt (1 L) of R.V.-type antifreeze in the basket.
4. Run washer on a drain and spin setting for about 30 seconds
to mix the antifreeze and water.
5. Unplug washer/dryer or disconnect power.
To use washer/dryer again
1. Flush water pipes and hoses.
2. Reconnect water inlet hoses.
3. Turn on both water faucets.
4. In the U.S.A.
Electrical Shock Hazard
Plug into a grounded 3 prong outlet.
Do not remove ground prong.
Do not use an adapter.
Do not use an extension cord.
Failure to follow these instructions can result in death,
fire, or electrical shock.
Electrical Shock Hazard
Plug into a grounded 4 prong outlet.
Failure to do so can result in death or electrical shock.
• Plug in washer/dryer or reconnect power.
5. Run the washer through a complete cycle with 1 cup (250 mL)
of detergent to clean out antifreeze.
To transport the washer/dryer
1. Shut off both water faucets.
2. Disconnect and drain water inlet hoses.
3. If washer/dryer will be moved during freezing weather, put in a
qt (1 L) of R.V.-type antifreeze in the basket. Run washer on a
spin setting for about 30 seconds to mix the antifreeze and
water.
4. Disconnect the drain from the drain system.
5. Unplug washer/dryer or disconnect power. Disconnect wiring
if washer/dryer is direct wired.
6. Disconnect the exhaust vent.
7. Wash lint screen.
8. Make sure leveling legs are secure.
9. Place the inlet hoses into the basket.
10. Drape the power cord and drain hose over edge and into the
basket.
11. Use masking tape to secure the washer lid and dryer door.
Reinstalling your washer/dryer
1. Follow the "Installation Instructions" to locate, level and
connect the washer/dryer.
2. Run the washer through a complete cycle with 1 scoop or
capful of detergent to clean the washer and remove the
antifreeze, if used.
• Plug in washer/dryer or reconnect power.

TROUBLESHOOTINGWASHER
First try the solutions suggested here and possibly avoid the cost of a service call...
Noisy, vibrating, off-balance
• Is the floor flexing, sagging or not level? Flooring that flexes
or is uneven can contribute to noise and vibration of the
washer. A %" (1.9 cm) piece of plywood under the washer will
reduce the sounds. See the Installation Instructions.
• Is the washer/dryer level? The washer/dryer must be level.
See the Installation Instructions.
• Is the load balanced? Evenly distribute the load in the
washer basket and make sure the height of the load does not
exceed the top row of basket holes.
• Did you completely remove the yellow shipping strap with
cotter pins? See the Installation Instructions.
• Are the gears engaging after the drain and before spin, or
is the upper part of agitator clicking during wash? These
are normal washer noises.
Is the washer gurgling or humming? When the washer
drains, the pump will make a continuous humming with
periodic gurgling or surging sounds as the final amounts of
water are removed. This is normal.
• The washer basket moves while washing. This is normal.
Leaking
• Are the fill hoses tight?
• Are the fill hose gaskets properly seated? Check both ends
of each hose. See the Installation Instructions.
• Is the drain hose properly installed? The drain hose should
be secured to the drainpipe or laundry tub. See the Installation
Instructions.
• Is the sink or drain clogged? Sink and drainpipe must be
able to carry away 17 gal. (64 L) of water per minute. If sink or
drainpipe is clogged or slow, water can back up out of
drainpipe or sink. Check household plumbing (laundry tubs,
faucets, drainpipe, water pipes) for leaks.
• Is water splashing off the tub ring? Center the tub before
starting the washer.
• Is water splashing off the load? Evenly distribute the load in
the washer basket and make sure the height of the load does
not exceed the top row of basket holes. The fill or spray rinses
can splash off the load.
Dispenser clogged (on some models)
• Did you follow the manufacturer's directions when adding
fabric softener to the dispenser (on some models)?
Measure fabric softener and slowly pour into the dispenser.
Wipe up all spills. Dilute fabric softener in the fabric softener
dispenser.
Washer won't run, fill, rinse or agitate; washer stops
Electrical Shock Hazard
Plug into a grounded 3 prong outlet.
Do not remove ground prong.
Do not use an adapter.
Do not use an extension cord.
Failure to follow these instructions can result in death,
fire, or electrical shock.
• Is the power cord plugged into a grounded 3 prong outlet?
Plug power cord into a grounded 3 prong outlet.
• Are you using an extension cord? Do not use an extension
cord.
• Is the indicator on the Cycle Control knob properly lined
up with a cycle? Turn the Cycle Control knob to the right
slightly and pull to start.
• Are the water inlet valve screens clogged? Turn off the
water and remove inlet hoses from the washer. Remove any
accumulated film or particles. Reinstall hoses, turn on water
and check for leaks.
Are both the hot and cold water faucets turned on? Turn
on the water.
Is the water inlet hose kinked? Straighten the hoses.
Does the water level seem too low, or does the washer
appear to not fill completely? The top of the agitator is much
higher than the highest water level. This is normal and
necessary for clothes to move freely.
Has a household fuse blown, or has a circuit breaker
tripped? Replace the fuse, or reset the circuit breaker. Ifthe
problem continues, call an electrician.
Is the washer in a normal pause in the cycle? The washer
pauses for about 2 minutes during certain cycles. Allow the
cycle to continue. Some cycles feature periods of agitation
and soak.
Is the washer overloaded? Wash smaller loads.
Is the lid open? The lid must be closed during operation.
Washer will not agitate or spin with the lid open.

Washer continues to fill or drain; cycle seems stuck
• Is the top of drain hose lower than the control knobs on
washer? The top of the drain hose must be at least
39" (99 cm) above the floor. See the Installation Instructions.
• Does the drain hose fit too tightly in the standpipe, or is it
taped to the standpipe? The drain hose should be loose yet
fit securely. Do not seal the drain hose with tape. The hose
needs an air gap. See the Installation Instructions.
Washer won't drain or spin; water remains in washer
• Is the drain hose clogged, or the end of the drain hose
more than 96" (244 cm) above the floor? See the Installation
Instructions,
• Is the lid open? The lid must be closed during operation.
Washer will not agitate or spin with the lid open.
• Is there excessive sudsing? Always measure detergent.
Follow manufacturer's directions, If you have very soft water,
you might need to use less detergent.
Wash/Rinse temperature
• Are the hot and cold water inlet hoses reversed? See
"Connect Inlet Hoses."
• Are you washing many loads? As your frequency of loads
washed increases, the water temperature may decrease for
hot and warm temperatures, This is normal,
Load too wet
• Did you use the right cycle for the load being washed?
Select a cycle with a higher spin speed (if available).
• Did you wash an extra-large load? A large unbalanced load
could result in a reduced spin speed and wet clothes at the
end of the cycle. Evenly distribute the load and make sure the
height of the load does not exceed the top row of basket
holes.
Residue or lint on load
• Did you sort properly? Sort lint givers (towels, chenille) from
lint takers (corduroy, synthetics). Also sort by color.
• Did you overload the washer? The wash load must be
balanced and not overloaded, Clothes should move freely.
Lint or powdered detergent can be trapped in the load if
overloaded. Wash smaller loads.
Did you select the correct water level? The water level
should be correct for the load size. The load should be under
water.
• Did you use enough detergent? Follow manufacturer's
directions, Use enough detergent to hold the lint in the water.
• Did you line dry your clothing? If so, you can expect some
lint on the clothing. The air movement and tumbling of a dryer
removes lint from the load.
• Was paper or tissue left in the pockets?
• Is your water colder than 60°F (15.6°C)? Wash water colder
than 60°F (15.6°C) may not completely dissolve the detergent.
• Did you use the proper cycle time and agitation speed for
the load? Reducing wash time (duration) and agitation speed
are ways to reduce lint.
Load is wrinkled, twisted or tangled
• Did you unload the washer promptly? Unload the washer as
soon as it stops.
• Did you use the right cycle for the load being washed?
Use cycles with shorter wash times and low wash and spin
speeds (if available) to reduce wrinkling, tangling and twisting.
• Did you overload the washer? The wash load must be
balanced and not overloaded. Loads should move freely
during washing to reduce wrinkling, tangling and twisting.
• Was the wash water warm enough to relax wrinkles? If
safe for the load, use warm or hot wash water. Use cold rinse
water.
Are the hot and cold water hoses reversed? Check to be
sure the hot and cold water hoses are connected to the right
faucets, A hot rinse followed by spin will cause wrinkling, See
the Installation Instructions,
• Did you wrap items around the agitator? Drop items loosely
into the washer. Do not wrap items around the agitator.
Stains, gray whites, dingy colors
• Did you properly sort the load? Dye transfer can occur when
mixing whites and colors in a load. Sort dark clothes from
whites and lights.
• Was the wash temperature too low? Use hot or warm
washes if safe for the load. Make sure your hot water system
is adequate to provide a hot water wash.
• Did you use enough detergent, or do you have hard
water? Use more detergent for washing heavy soils in cold or
hard water.
• Are the hot and cold water hoses reversed? Check to be
sure the hot and cold water hoses are connected to the right
faucets, See the Installation Instructions.
Did you follow the manufacturer's directions when adding
detergent and fabric softener? Measure detergent and
fabric softener. Use enough detergent to remove soil and hold
it in suspension. Dilute fabric softener and add to the rinse
portion of a cycle only. Do not drip fabric softener onto
clothes.
• Is there above average iron (rust) in water? You may need
to install an iron filter.

Garments damaged
• Were sharp items removed from pockets before washing?
Empty pockets, zip zippers, snap or hook fasteners before
washing to avoid snagging and tearing of load.
• Were strings and sashes tied to avoid tangling? Straps and
strings can easily become entangled in the load, causing
strain on seams and tearing.
• Were items damaged before washing? Mend rips and
broken threads in seams before washing.
Did you overload the washer? The wash load must be
balanced and not overloaded. Loads should move freely
during washing.
Did you add chlorine bleach properly? Do not pour chlorine
bleach directly onto load. Wipe up bleach spills. Undiluted
bleach will damage fabrics. Do not place load items on top of
the bleach dispenser when loading and unloading the washer
(on some models). Do not use more than than the
manufacturer's recommended amount for a full load.
• Did you follow the manufacturer's care label instructions?
TROUBLESHOOTINGDRYER
First try the solutions suggested here and possibly avoid the cost of a service call...
Dryer will not run
• Has a household fuse blown, or has a circuit breaker
tripped? There may be 2 fuses or circuit breakers for the
dryer. Check that both fuses are intact and tight, or that both
circuit breakers have not tripped. Replace the fuse or reset the
circuit breaker. If the problem continues, call an electrician.
• Is the correct power supply available? Electric dryers
require 240 volt power supply. Check with a qualified
electrician.
• Was a regular fuse used? Use a time-delay fuse.
• Is the dryer door firmly closed?
• Was the PUSH TO START DRYER button firmly pressed?
No heat
• Has a household fuse blown, or has a circuit breaker
tripped? The drum may be turning, but you may not have
heat. Electric dryers use 2 fuses or circuit breakers. Replace
the fuse or reset the circuit breaker. If a problem continues,
call an electrician.
• For gas dryers, is the valve open on the supply line?
Unusual sounds
• Has the dryer had a period of non-use? If the dryer hasn't
been used for a while, there may be a thumping sound during
the first few minutes of operation.
• Is a coin, button, or paper clip caught between the drum
and front or rear of the dryer? Check the front and rear
edges of the drum for small objects. Clean out pockets before
laundering.
• Is it a gas dryer? The gas valve clicking is a normal operating
sound.
• Are the four legs installed, and is the dryer level front to
back and side to side? The dryer may vibrate if not properly
installed. See the Installation Instructions.
• Is the clothing knotted or balled up? When balled up, the
load will bounce, causing the dryer to vibrate. Separate the
load items and restart the dryer.
Timer does not noticeably advance
• Is the dryer set to Timed or Air Dry?
The timer moves slowly and continuously for the time setting.
• Is the dryer set to Automatic Drying?
The timer moves only when the clothing is mostly dry.
10

Clothes are not drying satisfactorily, drying times are too long,
or load is too hot
• Is the lint screen clogged with lint? Lint screen should be
cleaned before each load.
Fire Hazard
Use a heavy metal vent.
Do not use a plastic vent.
Do not use a metal foil vent.
Failure to follow these instructions can result in death
or fire.
Is the exhaust vent or outside exhaust hood clogged with
lint, restricting air movement? Run the dryer for
5-10 minutes. Hold your hand under the outside exhaust hood
to check air movement. Ifyou do not feel air movement, clean
exhaust system of lint or replace exhaust vent with heavy
metal or flexible metal vent. See the Installation Instructions.
Are fabric softener sheets blocking the grille? Use only one
fabric softener sheet, and use it only once.
Is the exhaust vent the correct length? Check that the
exhaust vent is not too long or has too many turns. Long
venting will increase drying times. See the Installation
Instructions.
Is the exhaust vent diameter the correct size? Use
4" (10.2 cm) diameter vent material.
Explosion Hazard
Keep flammable materials and vapors, such as
gasoline, away from dryer,
Place dryer at least 18 inches (46 cm) above the floor
for a garage installation.
Failure to do so can result in death, explosion, or fire.
• Is the dryer located in a room with temperature below
45°F (7°0)? Proper operation of dryer cycles requires
temperatures above 45°F (7°C).
• Is the dryer located in a closet? Closet doors must have
ventilation openings at the top and bottom of the door. A
minimum of 1" (2.5 cm) of airspace is recommended for the
front of the dryer, and, for most installations, the rear of the
dryer requires 5" (12.7 cm). See the Installation Instructions.
• Has an air dry cycle been selected? Select the right cycle
for the types of garments being dried.
• Is the load too large and heavy to dry quickly? Separate the
load to tumble freely.
Lint on load
• Is the lint screen clogged? Lint screen should be cleaned
before each load.
Stains on load or drum
• Was dryer fabric softener properly used? Add dryer fabric
softener sheets at the beginning of the cycle. Fabric softener
sheets added to a partially dried load can stain your garments.
Drum stains are caused by dyes in clothing (usually blue
jeans). This will not transfer to other clothing.
Loads are wrinkled
• Was the load removed from dryer at the end of the cycle?
• Was the dryer overloaded? Dry smaller loads that can
tumble freely.
Odors
• Have you recently been painting, staining or varnishing in
the area where your dryer is located? Ifso, ventilate the
area. When the odors or fumes are gone from the area, rewash
and dry the clothing.
• Is the electric dryer being used for the first time? The new
electric heating element may have an odor. The odor will be
gone after the first cycle.
11

WHIRLPOOLCORPORATIONMAJOR APPLIANCEWARRANTY
ONE YEAR LIMITED WARRANTY
For one year from the date of purchase, when this major appliance is operated and maintained according to instructions attached to or
furnished with the product, Whirlpool Corporation or Whirlpool Canada LP (hereafter "Whirlpool") will pay for Factory Specified Parts
and repair labor to correct defects in materials or workmanship. Service must be provided by a Whirlpool designated service company.
This limited warranty applies only when the major appliance is used in the country in which it was purchased.
ITEMS WHIRLPOOL WILL NOT PAY FOR
1. Service calls to correct the installation of your major appliance, to instruct you how to use your major appliance, to replace or repair
house fuses or to correct house wiring or plumbing.
2. Service calls to repair or replace appliance light bulbs, air filters or water filters. Those consumable parts are excluded from warranty
coverage.
3. Repairs when your major appliance is used for other than normal, single-family household use.
4. Damage resulting from accident, alteration, misuse, abuse, fire, flood, acts of God, improper installation, installation not in
accordance with electrical or plumbing codes, or use of products not approved by Whirlpool.
5. Any food loss due to refrigerator or freezer product failures.
6. Replacement parts or repair labor costs for units operated outside the United States or Canada.
7. Pickup and delivery. This major appliance is designed to be repaired in the home.
8. Repairs to parts or systems resulting from unauthorized modifications made to the appliance.
9. Expenses for travel and transportation for product service in remote locations.
10. The removal and reinstallation of your appliance if it is installed in an inaccessible location or is not installed in accordance with
published installation instructions.
11. Replacement parts or repair labor costs when the major appliance is used in a country other than the country in which it was
purchased.
DISCLAIMER OF IMPLIED WARRANTIES; LIMITATION OF REMEDIES
CUSTOMER'S SOLE AND EXCLUSIVE REMEDY UNDER THIS LIMITED WARRANTY SHALL BE PRODUCT REPAIR AS PROVIDED
HEREIN. IMPLIED WARRANTIES, INCLUDING WARRANTIES OF MERCHANTABILITY OR FITNESS FOR A PARTICULAR PURPOSE,
ARE LIMITED TO ONE YEAR OR THE SHORTEST PERIOD ALLOWED BY LAW. WHIRLPOOL SHALL NOT BE LIABLE FOR
INCIDENTAL OR CONSEQUENTIAL DAMAGES. SOME STATES AND PROVINCES DO NOT ALLOW THE EXCLUSION OR LIMITATION
OF INCIDENTAL OR CONSEQUENTIAL DAMAGES, OR LIMITATIONS ON THE DURATION OF IMPLIED WARRANTIES OF
MERCHANTABILITY OR FITNESS, SO THESE EXCLUSIONS OR LIMITATIONS MAY NOT APPLY TO YOU. THIS WARRANTY GIVES
YOU SPECIFIC LEGAL RIGHTS AND YOU MAY ALSO HAVE OTHER RIGHTS, WHICH VARY FROM STATETO STATE OR PROVINCE
TO PROVINCE.
Outside the 50 United States and Canada, this warranty does not apply. Contact your authorized Whirlpool dealer to determine if
another warranty applies.
If you need service, first see the "Troubleshooting" section of the Use & Care Guide. After checking "Troubleshooting," additional help
can be found by checking the "Assistance or Service" section or by calling Whirlpool. Inthe U.S.A., call 1-800-253-1301. In Canada,
call 1-800-807-6777. 12/05
Replacement parts
If you need to order replacement parts, we recommend that you
only use FSP_ factory specified parts. These parts will fit right
and work right because they are made with the same precision
used to build every new WHIRLPOOL ®appliance.
To locate FSP replacement parts in your area:
Call the Customer eXperience Center at 1-800-253-1301, or your
nearest designated service center. In Canada call 1-800-807-6777.
For information on how to contact Whirlpool Corporation, please
see front page of this document.
12

1NSTRUCCIONESPARAEL USUARIODELA
LAVADORA/SECADORA
Ayuda o servicio t6cnico
Si necesita ayuda o servicio tecnico, vea primero la secci6n
"Soluci6n de Problemas". Puede obtener asistencia adicional
Ilamando a nuestro Centre para la eXperiencia del Cliente al
1-800-253-1301 desde cualquier lugar de los EE.UU., o escriba a:
Whirlpool Corporation
Customer eXperience Center
553 Benson Road
Benton Harbor, MI 49022-2692
Tambien puede obtener informaci6n visitando nuestro sitio web
en www.whirlpool.com.
Favor de incluir un n_mero telef6nico de d[a en su
correspondencia.
Guarde este libro y su comprobante de compra juntos para
referencia futura. Usted debera proporcionar evidencia de la
compra o una fecha de instalaci6n para obtener servicio bajo
la garantia.
Escriba la siguiente informaci6n acerca de su electrodomestico
para ayudarle mejor a obtener ayuda o servicio tecnico si alguna
vez Ilegara a necesitarlo. Debera tenet a mane el nQmero
completo del modelo y de la serie. Podra encontrar esta
informaci6n en la etiqueta con el nOmero del modelo y de la serie,
en la cavidad interna superior de la puerta de la secadora.
Nombre del distribuidor
N0mero de serie
Direcci6n
N0mero de tel6fono
N0mero del modelo
Fecha de compra
SEGURIDADDE LALAVADORA/SECADORA
Su seguridad y la seguridad de los demos es muy importante.
Hemos incluido muchos mensajes importantes de seguridad en este manual yen su electrodomestico. Lea y obedezca siempre
todos los mensajes de seguridad.
Este es el s[mbolo de advertencia de seguridad.
Este simbolo le llama la atencion sobre peligros potenciales que pueden ocasionar la muerte o una lesion a
usted y a los demas.
Todos los mensajes de seguridad iran a continuaci6n del simbolo de advertencia de seguridad y de la palabra
"PELIGRO" o "ADVERTENClA". Estas palabras significan:
Si no sigue las instrucciones de inmediato, usted puede
morir o sufrir una lesion grave.
Si no sigue las instrucciones, usted puede morir o sufrir
una lesion grave.
Todos los mensajes de seguridad le diran el peligro potencial, le diran come reducir las posibilidades de sufrir una lesion y Io que
puede suceder si no se siguen las instrucciones.
13

ADVERTENCIA: Para su seguridad, la informacibn en este manual debe ser observada
para minimizar el riesgo de incendio o explosibn, o para prevenir dahos a propiedades,
heridas o la muerte.
- No almacene o use gasolina u otros Iiquidos y vapores inflamables cerca de _ste u otro
aparato electrodom_stico.
- PASOS QUE USTED DEBE SEGUIR SI HUELE A GAS:
• No trate de encender ning_n aparato electrodom_stico.
• No toque ning_n interruptor el_ctrico; no use ning_n tel_fono en su edificio.
• Desaloje a todos los ocupantes del cuarto, edificio o area.
• Llame inmediatamente a su proveedor de gas desde el tel_fono de un vecino.
Siga las instrucciones de su proveedor de gas.
• Si usted no puede comunicarse con su proveedor de gas, Ilame al departamento
de bomberos.
- La instalacibn y el servicio deben ser efectuados por un instalador calificado, una
agencia de servicio o por el proveedor de gas.
INSTRUCCIONES IMPORTANTES DE SEGURIDAD
ADVERTENCIA: A fin de reducir el riesgo de incendio, descarga electrica o de daho alas personas que usen
la lavadora/secadora, deben seguirse las precauciones basicas, incluidas las siguientes:
[] Lea todas las instrucciones antes de usar la
lavadora/secadora.
[] No coloque los objetos expuestos a aceite para cocinar en
su secadora. Los objetos expuestos a aceites para cocinar
pueden contribuir a una reacci6n quimica que podrfa
causar que la ropa se inflame.
[] No lave o seque articulos que hayan side previamente
limpiados, lavados, remojados o humedecidos con
gasolina, solventes de limpieza en seco, u otras sustancias
inflamables o explosivas ya que estas emanan vapores que
podrian encenderse o causar una explosion.
[] No agregue gasolina, solventes para lavar en seco, u otras
sustancias inflamables o explosivas al agua de lavado.
Estas sustancias emanan vapores que podrfan encenderse
o causar una explosion.
[] No permita que los nihos jueguen encima o dentro de la
lavadora/secadora. Es necesario una supervisi6n
cuidadosa de los nihos cada vez que se use la
lavadora/secadora cerca de ellos.
[] Antes de poner la lavadora/secadora fuera de servicio o
desecharla, quite las puertas a los compartimientos de la
lavadora/secadora.
[] No introduzca las manes en la lavadora/secadora cuando
la tina, el agitador, o el tambor estan movimiento.
[] No instale o almacene esta lavadora/secadora donde este
expuesta al agua o a la intemperie.
[] No trate de jugar con los controles.
[] Limpie el filtro de pelusa antes o despues de cada carga
de ropa.
[] En ciertas condiciones, puede generarse gas hidrogeno en
un sistema de agua caliente que no se haya usado por dos
semanas o un perfodo mayor. EL GAS HIDROGENO ES
EXPLOSlVO. Si no se ha usado el agua caliente durante
dicho perfodo, antes de usar la lavadora, abra todos los
grifos de agua caliente y deje que corra el agua per varies
minutes. Esto liberara todo el gas hidr6geno que se haya
acumulado. Debido a la inflamabilidad de dicho gas, no fume
ni use una llama abierta durante este lapse.
[] No repare o reemplace ninguna pieza de la
lavadora/secadora nitrate de repararla a menos que esto se
recomiende especfficamente en el Manual de Use y Cuidado
o en instrucciones de reparaci6n publicadas para el usuario
que usted comprenda y s61o si cuenta con la experiencia
necesaria para Ilevar a cabo dicha reparaci6n.
[] No utilice suavizante de telas o productos para eliminar la
estatica de prendas a menos que Io recomiende el
fabricante del suavizante de telas o del producto en uso.
[] No utilice calor para secar prendas que contengan hule
espuma o materiales con textura de hule similar.
[] Mantenga el Area alrededor de la abertura de ventilaci6n y
las Areas adyacentes a esta abertura sin pelusa, polvo o
suciedad.
[] La parte interior de la maquina y el ducto de escape se
deben limpiar peri6dicamente. Esta limpieza la debe Ilevar a
cabo un reparador calificado.
[] Para obtener informaci6n respecto a los requisitos de
conexion a tierra, refierase a los "Requisites Electricos'.
GUARDE ESTAS INSTRUCCIONES
14

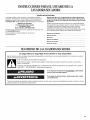
Su secadora debe de estar instalada y ventilada adecuadamente
para obtener una eficiencia maxima de secado y acortar el tiempo
de secado. Use los espacios mfnimos recomendados para la
instalaci6n que se encuentran en las Instrucciones de instalaci6n.
Vea las Instrucciones de instalaci6n para mas informaci6n,
%
1. No utilice un ducto de escape de plastico o de aluminio,
Utilice un ducto de escape de metal o de metal flexible de 4"
(10,2 cm). No tuerza o prense el ducto de escape de metal
flexible. El ducto de escape debe de estar completamente
extendido para permitir el fiujo del aire de ventilaci6n. Revise
el ducto de escape despues de la instalaci6n, Vea las
Instrucciones de instalaci6n para los requerimientos
necesarios para la Iongitud del ducto.
Peligro de Incendio
Use un ducto de escape de metal pesado.
No use un ducto de escape de plastico.
No use un ducto de escape de aluminio.
No seguir estas instrucciones puede ocasionar
la muerte o incendio.
La secadora no estara bajo garantia si no esta instalada y
ventilada adecuadamente. Es importante contar con una
ventilaci6n adecuada de su secadora para obtener resultados de
secado satisfactorios. Para obtener mas informaci6n, vea las
Instrucciones de instalaci6n.
NOTA: Las visitas de servicio que resulten necesarias debido a
una ventilaci6n inadecuada iran per cuenta del cliente, ya sea que
se trate de una instalaci6n pagada o una hecha pot el cliente
mismo.
2. Utilice una capota de ventilaci6n de 4" (10,2 cm),
3. Utilice el camino mas directo posible al instalar el ducto.
Bien Mejor
4. Utilice abrazaderas para sellar todas las juntas, No use cinta
adhesiva para conductos, tornillos ni otros dispositivos de
fijaci6n que se extiendan dentro del ducto de escape, para
fijar el ducto.
5. Limpie el ducto de escape por Io menos cada 2 a_os o
peri6dicamente segt]n el uso que le de a la secadora o
cuando instale la secadora en un nuevo lugar. Cuando termine
la limpieza revise per Qltima vez el producto, asegurandose de
seguir las Instrucciones de instalaci6n que acompa_an a su
secadora.
15

USODELALAVADORA
Para estas cargas de volumen completo recomendadas, coloque el control de tamaSo de carga (LOAD SIZE) a la posici6n de la carga
mas grande.
LAVADORAS DE CAPACIDAD GRANDE
Ropa de trabajo Carga mixta Toallas Articulos delicados Planchado Tejidos de punto
pesada permanente
2 pantalones 2 sabanas dobles 8 toallas de ba_o 2 camisolas 1 sabana de tama_o 2 pantalones
3 camisas 4 fundas 8 toallas de mano 4 fondos matrimonial 2 blusas
3 pantalones de 6 camisetas 10 toallas faciales 6 piezas de ropa 1 mantel 4 camisas
mezclilla 6 shorts 1 tapete de baSo interior 1 vestido 4 tops
1 overol 2 camisas 2 juegos de pijamas 1 blusa 2 vestidos
2 blusas 1 vestido de ni_o 2 pantalones
6 pa_uelos 3 camisas
2 fundas
LAVADORAS COM PACTAS
Carga mixta Toallas Articulos delicados Planchado Tejidos de punto
permanente
1 pantalones 9 toallas de ba_o 1 camisola 6 camisas 2 pantalones
2 fundas -o- 2 fondos -o- 2 camisas
2 camisas 6 toallas de ba_o 4 piezas de ropa 2 sabanas dobles -o-
1 camiseta 3 toallas de mano interior 2 fundas 3 vestidos
6 toallas faciales 1 juego de pijama -o-
1 medio fondo 2 sabanas de una
plaza
2 fundas
Ropa de trabajo
pesada
2 pantalones
3 camisas
Mida siempre el blanqueador liquido con cloro. No Io haga al
calculo. Nunca use mas de 250 ml para una carga completa
de ropa. Siga las instrucciones del fabricante para un uso
seguro. Use una taza con un pico vertedor para evitar
derrames.
Peligro de Incendio
Nunca eoloque en la lavadora artieuloe que eet6n
humedeeidos con gaeolina o cualquier otro
liquido infiamable.
Ninguna lavadora puede eliminar completamente
el aeeite.
No seque ning_n articulo que haya tenido alguna vez
cualquier tipo de aceite (incluyendo aceites de cocina).
No seguir estas instrueeionee puede ocasionar
la muerte, explosi6n o incendio.
1. Mida el detergente y viertalo en la lavadora. Agregue
blanqueador en polvo o blanqueador Ifquido no decolorante,
si Io desea. Coloque en la lavadora la ropa seleccionada de
modo que quede suelta.
• Coloque las prendas de manera uniforme para mantener
el equilibrio de la lavadora. Mezcle articulos grandes con
articulos pequeMos. Las prendas deben moverse con
facilidad en el agua de lavado. El sobrecargar la lavadora
puede causar una limpieza insatisfactoria.
2. (OPCIONAL) Agregue el blanqueador liquido con cloro.
Deje que la lavadora se Ilene y comience a agitar la carga,
Agregue el blanqueador durante el ciclo de lavado de modo
que pueda eliminarse durante el ciclo de enjuague. Vierta el
blanqueador alrededor del agitador, no directamente sobre las
prendas,
• Siga las indicaciones de cuidado mencionadas en las
etiquetas de las prendas. No use blanqueador liquido con
cloro en articulos de lana, seda, spandex, acetato o
algunas fibras resistentes al fuego.
NOTA: El blanqueador sin diluir da_a cualquier tejido que
toque. Estos da_os lucen como rasgaduras, agujeros, roturas
o decoloraciones y quizas no aparezcan hasta despues de
varias lavadas,
3. (OPCIONAL) Agregue el suavizante liquido de telas.
NOTA: Su lavadora/secadora no viene con un dep6sito
instalado de suavizante de telas,
Refi_rase a la portada del manual o Ilame al distribuidor
donde compr6 su lavadora/secadora para saber si puede
usar un suavizante de telas con su modelo, y para recibir
informaci6n sobre c6mo ordenarlo, Pida la pieza nOmero
3350834.
NOTA: No derrame o gotee el suavizante de telas sobre las
prendas. El suavizante de telas sin diluir puede manchar la
tel& Siempre diluya el suavizante de telas con agua tibia. El
exceso de suavizante de telas puede quitar la capacidad de
absorci6n de algunos productos (pa_ales y toallas). Si sucede
esto, no Io use o use menos en cada carga.
16

4.
5.
Estilo 1: Con dep6sito del suavizante liquido de telas (en
algunos modelos)
• Use solamente suavizante de telas liquido en este
dep6sito. Vierta el suavizante Ifquido de telas en el
dep6sito. El suavizante se incorpora automaticamente
durante la etapa de enjuague del ciclo. Diluya el
suavizante liquido de telas Ilenando el dep6sito con agua
tibia hasta que el liquido Ilegue a la cruceta en la abertura
del dep6sito.
Estilo 2: Sin dep6sito del suavizante liquido de telas (en
algunos modelos)
• Agregue el suavizante de telas que ha sido diluido con 1/2a
1taza (125 a 250 mL) de agua tibia SOLAMENTE en el
enjuague final.
Cierre la tapa de la lavadora. La lavadora no agita ni exprime
con la tapa abierta.
Gire el selector de tamaSo de carga (LOAD SIZE) al ajuste
adecuado para la carga y el tipo de tela que va a lavar. Usted
puede cambiar el tama_o de la carga despues de que haya
empezado a Ilenarse la lavadora girando el selector a un
ajuste diferente.
6=
7.
Fije el selector de temperatura (TEMPERATURE) al ajuste
adecuado para el tipo de tela y suciedad que va a lavar. Use el
agua mas caliente que la tela pueda resistir. Siga las
instrucciones de la etiqueta de las prendas.
NOTA: En temperaturas de agua inferiores a60°F (15,6°C), los
detergentes no se disuelven bien. Ademas puede ser diffcil
quitar la suciedad. AIgunas telas pueden retener las arrugas
del use y aumentar la formaci6n de motitas (la formaci6n de
pequer_as bolitas en la superficie de las prendas).
Empuje la perilla de control de ciclos y girela en la direcci6n
de las manecillas del reloj hasta el ciclo de lavado que desee.
Reduzca el tiempo de lavado cuando use un ajuste para
cargas pequeSas. Jale la perilla del control de ciclos para
poner la lavadora en marcha.
Para detener o volver a poner en marcha su lavadora:
• Para detener la lavadora en cualquier memento, empuje la
perilla de control de ciclos.
• Para volver a poner en marcha la lavadora, cierre la tapa
(siesta abierta) y jale la perilla de control de ciclos.
USODELASECADORA
Peligro de E×plosi6n
IVlantenga los materiales y vapores inflamablee, tales
como la gasolina, alejadoe de la eecadora.
No seque ningun articulo que haya tenido alguna vez
cualquier substancia inflamable (ann deepu6e de
lavarlo).
No seguir estas instrucciones puede ocaeionar
la muerte, e×ploei6n o incendio.
Peligro de Incendio
Ninguna lavadora puede eliminar completamente
el aceite.
No eeque ning_n articulo que haya tenido alguna vez
cualquier tipo de aceite (incluyendo los aceites de
cocina).
Los articuloe que contengan espuma, hule o plastico
deben secaree en un tendedero o usando un
Ciclo de Aire.
No seguir eetae instruccionee puede ocasionar
la muerte o incendio.
Este folleto cubre varios modelos diferentes. Puede ser que su
secadora no cuente con todos los ciclos y caracterfsticas
descritos.
Antes de usar la secadora, limpie el tambor de la misma con un
paso h0medo para quitar el polvo que se acumul6 durante el
almacenaje y envio.
1. Limpie el filtro de pelusa antes de cada carga. Vea "Limpieza
del filtro de pelusa".
2. Coloque la ropa en la secadora de mode suelto y cierre la
puerta. No Ilene en exceso la secadora. Deje suficiente
espacio para que la ropa rote con libertad.
3=
4.
Gire la perilla de Control de ciclos al ciclo recomendado para
el tipo de carga que se va a secar. Use el ajuste Ahorro de
energia (Energy Preferred Automatic Setting) para secar la
mayoria de las telas pesadas y de peso mediano.
(OPCIONAL) Su secadora puede tener una SeSal de fin de
ciclo (END OF CYCLE SIGNAL). Esta seSal es Qtil cuando se
sequen articulos que deben sacarse de la secadora tan
pronto como se detenga. La seSal de fin de ciclo forma parte
del bot6n Inicio (Start) y se puede seleccionar. Gire el bot6n
PUSH TO START a Puesta en marcha (ON) u Apagado (OFF).
La serial sonara s61o cuando el selector se fije en ON.
17

5. Si desea, agregue una hoja de suavizante de telas. Siga las
instrucciones del paquete.
6. Oprima el bot6n de PUSH TO START.
Para detener y volver a poner en marcha
Usted puede detener su secadora en cualquier momento durante
un ciclo.
Para detener su secadora
Abra la puerta de la secadora o gire la perilla de Control de Ciclos
a Apagado (OFF).
NOTA: La perilla de Control de Ciclos debe apuntar hacia el Area
de Apagado cuando la secadora no esta en uso.
Para volver a porter en marcha su secadora
Cierre la puerta. Seleccione un nuevo ciclo y temperatura (si Io
desea). Oprima empuje para iniciar (PUSH TO START).
CUIDADODELALAVADORA/SECADORA
=at
Mantenga el Area donde esta el centro de lavanderia despejada y
libre de art[culos que pudieran obstruir el flujo de aire para la
combusti6n y la ventilaci6n.
Peligro de Explosi6n
Mantenga los materiales y vapores inflamables,
tales como la gasolina, alejados de la seeadora.
No eeguir estae inetruceionee puede ocasionar
la muerte, explosibn o incendio.
Limpieza externa
Use un paBo o una esponja suave y h@meda para lirnpiar
cualquier derrame, tales corno los de detergente o blanqueador.
De vez en cuando, limpie el exterior de su lavadora para que se
yea 6omo nueva.
Limpieza del interior
Limpie el interior de su lavadora mezclando 1 taza (250 mL) de
blanqueador con cloro y 2 tazas o tapas (500 mL) de detergente.
Vierta esta mezcla en su lavadora y deje funcionar su lavadora
durante un ciclo complete, utilizando agua caliente. Repita este
proceso si fuera necesario.
NOTA: Quite los dep6sitos endurecidos de agua usando
solamente productos de limpieza cuya etiqueta indica que
pueden emplearse en lavadoras.
Limpieza del dep6sito del suavizante liquido de telas (en
algunos modelos):
1. Quite el dep6sito agarrando la parte superior con las manos y
apretandolo, mientras empuja hacia arriba con los pulgares.
2. Enjuague el dep6sito debajo del grifo de agua, y luego vuelva
a colocarlo.
NOTA: Si su modelo tiene un dep6sito de suavizante liquido de
telas, no lave la ropa si Io ha quitado. No agregue detergente o
blanqueador en este dep6sito ya que es para use exclusivo del
suavizante liquido de telas.
Reemplace las mangueras de entrada de agua despues de
5 aries de uso para reducir el riesgo de fallas. Revise
peri6dicamente y cambie las mangueras de entrada si se hallan
protuberancias, torceduras, cortes, desgaste o perdidas de agua.
Cuando reemplace sus mangueras de entrada de agua, anote la
fecha de reposici6n en la etiqueta con un marcador permanente.
Limpie el filtro de pelusa antes de cada carga. Un filtro obstruido
con pelusa puede aumentar el tiempo de secado.
IMPORTANTE:
• No ponga a funcionar la secadora con el filtro de pelusa flojo,
da_ado, obstruido o sin el. El hacerlo puede causar un
sobrecalentamiento y dafiar tanto la secadora come las
prendas.
• Sial quitar la pelusa del filtro esta cae dentro de la secadora,
revise la capota de ventilaci6n y quite la pelusa.
Limpieza de cada carga
Estilo 1:
1. El filtro de pelusa esta ubicado dentro de la secadora en la
pared posterior. Quite el filtro de pelusa y la cubierta.
2. Separe la cubierta y el filtro apretando el filtro y jalando la
cubierta al mismo tiempo.
3. Quite la pelusa enrollandola con los dedos. No enjuague o
lave el filtro para quitar la pelusa. La pelusa mojada es diffcil
de sacar.
4. Vuelva a juntar el filtro y la cubierta y empQjelos firmemente
hasta que queden en su lugar.
Estilo 2:
1. El filtro de pelusa esta ubicado dentro de la secadora en la
cavidad frontal de la puerta. Jale el filtro de pelusa
directamente hacia arriba.
2. Quite la pelusa enrollandola con los dedos. No enjuague o
lave el filtro para quitar la pelusa. La pelusa mojada es dificil
de sacar.
3. Empuje el filtro firmemente hasta que quede en su lugar.
Limpieza peribdica
Los residuos de detergente y suavizante de telas pueden
acumularse en el fide de pelusa. Esta acumulaci6n puede dar
lugar a periodos mas prolongados de secado de su ropa, o
causar que la secadora se detenga antes de que su ropa este
completamente seca. El filtro esta probablemente obstruido si la
pelusa se cae del mismo.
Limpie el filtro de pelusa (como se detalla a continuaci6n) cada
6 meses o con mas frecuencia si se obstruye debido a la
acumulaci6n de residues.
1. Quite la pelusa del filtro enrollandola con sus dedos.
2. Moje ambos lados del filtro de pelusa con agua caliente.
18

3. Moje un cepillo de nylon con agua caliente y detergente
liquido. Talle el filtro de pelusa con el cepillo para quitar la
acumulaci6n de residuos.
4. Enjuague el filtro con agua caliente.
5. Seque minuciosamente el filtro de pelusa con una toalla
limpia. Vuelva a colocar el filtro en la secadora.
Para limpiar el tambor de la secadora
1. Aplique un limpiador domestico no inflammable al Area
manchada del tambor y frote con un paso suave hasta que
desaparezca la mancha.
2. Limpie el tambor minuciosamente con un paso hQmedo.
3. Seque una carga de ropa limpia o toallas para secar el tambor.
NOTA: Las prendas de colores que destiSen tales como
mezclillas o artfculos de algod6n de colores vivos, pueden ter_ir el
interior de la secadora. Estas manchas no dar_an su secadora ni
mancharan las cargas futuras de ropa. Seque los articulos de
colores que destiSen al reves para evitar la transferencia del tinte.
Del interior del gabinete de la secadora
Segt]n el uso de la secadora, se debe quitar la pelusa cada
2 aSos, o con mas frecuencia. La limpieza debera efectuarla una
persona calificada.
Bel interior del ducte de escape
SegQn el uso de la secadora, se debe quitar la pelusa cada
2 aSos, o con mas frecuencia.
Instale y almacene su lavadora/secadora en un lugar donde no se
congele. Debido a que queda algo de agua en las mangueras, la
congelaci6n de esta puede da_ar su lavadora/secadora. Siva a
almacenar o a mover su lavadora/secadora durante una
temporada de inviemo riguroso, acondici6nela para el invierno.
Cuidado durante las vacaciones o en periodos de desuso
Ponga a funcionar su lavadora/secadora s61ocuando usted este
en casa. Siva a salir de vacaciones o no va a usar su lavadora/
secadora por un tiempo prolongado, usted debera:
• Desenchufar la lavadora/secadora o desconectar el
suministro de energ[a.
• Interrumpir el suministro de agua a la lavadora. Esto ayuda a
evitar inundaciones accidentales (debido a aumentos en la
presi6n del agua) en ausencia suya.
Para acondicionar su centro de lavanderia para el invierno
1. Cierre ambos grifos de agua.
2. Desconecte y elimine el agua de las mangueras de admisi6n
de agua.
3. Vierta un 1 cuarto (1 L) de anticongelante tipo R.V. en la
canasta.
4. Ponga a funcionar la lavadora en un ajuste de desag0e y
exprimido por 30 segundos aproximadamente para mezclar el
anticongelante y el agua.
5. Desenchufe el centre de lavanderfa o desconecte la energia.
Para volver a usar el centro de lavanderia
1. Deje correr el agua por los tubes y las mangueras.
2. Vuelva a conectar las mangueras de entrada de agua.
3. Abra ambos grifos de agua.
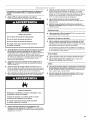
4. En los EE.UU.
Peligro de Cheque Electrico
Conecte a un centacte de pared de cone×ibn a tierra de
3 terminales.
No quite la terminal de cone×ibn a tierra.
No use un adaptador.
No use un cable el_ctrico de extenei6n.
No seguir estas instrucciones puede ocaeionar
la muerte, incendio o cheque electrico.
• Enchufe la lavadora/secadora o vuelva a conectar la energfa.
5. Ponga a funcionar la lavadora por un ciclo completo con
1 taza (250 mL) de detergente para limpiar el anticongelante.
Para transportar el centro de lavanderia
1. Cierre ambos grifos de agua.
2. Desconecte y elimine el agua de las mangueras de admisi6n
de agua.
3. Si va a mover la lavadora/secadora durante una temporada de
inviemo riguroso, coloque un litro (1 L) de anticongelante tipo
R.V. en la canasta. Ponga a funcionar la lavadora en un ajuste
de exprimido por unos 30 segundos para mezclar el
anticongelante y el agua.
4. Desconecte y elimine el agua del sistema de desagOe.
5. Desenchufe la lavadora/secadora o desconecte el suministro
de energfa. Desconecte el cableado si la lavadora/secadora
tiene cableado directo.
6. Desconecte el ducto de escape.
7. Lave el filtro de pelusa.
8. Cerci6rese de que las patas niveladoras esten seguras.
g. Coloque las mangueras de entrada en la canasta.
10. Cuelgue el cable electrico y la manguera de desagOe sobre el
borde y hacia adentro de la canasta.
11. Use cinta adhesiva protectora para asegurar la tapa de la
lavadora y la puerta de la secadora.
Cbmo reinstalar su centro de lavanderia
1. Siga las "lnstructiones de instalaci6n" para ubicar, nivelar y
conectar el centro de lavanderia.
2. Ponga a funcionar la lavadora en un ciclo complete con 1 taza
o tapa Ilena de detergente para limpiar la lavadora y remover
el anticongelante, de haberlo usado.
19

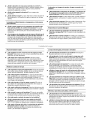
SOLUCIONDEPROBLEMASDELALAVADORA
En primer lugar, pruebe las soluciones sugeridas aqui y posiblemente se evite el gasto de una Ilamada de servicio t_cnico...
Ruidosos, vibrantes, desequilibrados
• &Esta el piso combado, doblado o desnivelado? Un piso
que esta combado o desnivelado puede contribuir a que la
lavadora haga ruido y vibre. Los sonidos se pueden reducir
colocando una madera laminada de 3A"(1,9 cm) debajo de la
lavadora. Vea las Instrucciones de instalaci6n.
• &Esta nivelada la lavadora/secadora? La lavadora/secadora
debe estar nivelado. Vea las Instrucciones de instalaci6n.
&Esta balanceada la carga? Distribuya la carga
uniformemente en la canasta de la lavadora y asegerese de
que la altura de la carga no supere la Ifnea superior de orificios
de la canasta.
• &Ha quitado per complete el fleje amarillo con chavetas?
Vea las Instrucciones de instalaci6n.
&Estan cambiando de velocidad los engranajes despu_s
del desagLie y antes del exprimido, o esta la parte superior
del agitador haciendo chasquidos durante el lavado?
Estos ruidos de la lavadora son normales.
• &La lavadora produce un gorgoteo o zumbido? Cuando la
lavadora desagua, la bomba generara un zumbido continue
con sonidos de gorgoteo peri6dicos a medida que se quitan
las 01timas cantidades de agua. Esto es normal.
• La canasta de la lavadora se mueve durante el lavado.
Esto es normal.
Pierde agua
• &Estan ajustadas las mangueras de Ilenado?
• &Estan debidamente colocadas las empaquetaduras de
las mangueras de Ilenado? Controle ambos extremes de
cada manguera. Yea las Instrucciones de instalaci6n.
• &Se ha instalado debidamente la manguera de desagLie?
Se debe fijar la manguera de desag(_e al tube de desagOe o a
la tina de lavadero. Vea las Instrucciones de instalaci6n.
• &Esta obstruido el lavadero o el desagiie? El lavadero y el
tube de desag0e deben tener la capacidad para desplazar
17 galones (64 L) de agua per minute. Si estan obstruidos o
lentos, el agua puede subir y salir per el tube de desag0e o el
lavadero. Revise la plomeria de la casa (tinas de lavadero,
grifos, tube de desagOe, tuberfas de agua) y fijese si hay fugas
de agua.
• &Se esta salpicando el agua fuera del are del tambor?
Centre el tambor antes de poner la lavadora en marcha.
• &Se esta salpicando el agua fuera de la carga? Distribuya
la carga uniformemente en la canasta de la lavadora y
aseg0rese de que la altura de la carga no supere la linea
superior de orificios de la canasta. El Ilenado o los enjuagues
per rode pueden salpicar fuera de la carga.
Dep6sito tapado (en algunos modelos)
• &Ha seguido las instrucciones del fabricante cuando
agreg6 el suavizante de telas en el depbsito (en algunos
modelos)? Mida el suavizante de telas y viertalo
cuidadosamente en el dep6sito. Limpie todos los derrames.
Diluya el suavizante de telas en el dep6sito del suavizante de
telas.
!¸•_,d_•_•_,_•_ _ }_d_•_
La lavadora no se pone en marcha, no Ilena, no enjuaga o no
agita; la lavadora se detiene
Peligro de Cheque Electrico
Cenecte a un contacto de pared de conexi6n a tierra de
3 terminales.
No quite la terminal de conexion a tierra.
No use un adaptador.
No use un cable el_ctrico de extensibn.
No seguir estas instrucciones puede ocasionar
la muerte, incendio o cheque el_ctrico.
&Esta usando un cable el_ctrico de extensi6n? No use un
cable electrico de extensi6n.
&Est_ el indicador de la perilla del control de ciclos
debidamente alineado con un ciclo? Gire la perilla de
control de ciclos ligeramente a la derecha y jalela para poner
en marcha.
• &Estan obstruidos los filtros de la valvula de entrada del
agua? Cierre el agua y quite las mangueras de entrada de la
lavadora. Saque cualquier pelicula o partfculas que se hayan
acumulado. Vuelva a abrir las mangueras, abra el agua y
revise si hay fugas de agua.
• &Est_n abiertos los grifos del agua caliente y del agua
fria? Abra el agua.
• &Esta retorcida la manguera de entrada del agua?
Enderece las mangueras.
• &Parece que el nivel del agua esta demasiado bajo, o
parece que la lavadora no se Ilena per complete? La parte
superior del agitador esta mucho mas alta que el nivel mas
alto del agua. Esto es normal y es necesario para que la ropa
se mueva libremente.
&Hay un fusible de la casa fundido o se dispar6 el
cortacircuitos? Reemplace el fusible o reposicione el
cortacircuitos. Si el problema continOa, Ilame a un electricista.
• &Esta el cable electrico enchufado en un tomacorriente de
3 terminales con conexi6n a tierra? Conecte a un contacto
de pared de conexi6n a tierra de 3 terminales.
20
La page est en cours de chargement...
La page est en cours de chargement...
La page est en cours de chargement...
La page est en cours de chargement...
La page est en cours de chargement...
La page est en cours de chargement...
La page est en cours de chargement...
La page est en cours de chargement...
La page est en cours de chargement...
La page est en cours de chargement...
La page est en cours de chargement...
La page est en cours de chargement...
La page est en cours de chargement...
La page est en cours de chargement...
La page est en cours de chargement...
La page est en cours de chargement...
-
 1
1
-
 2
2
-
 3
3
-
 4
4
-
 5
5
-
 6
6
-
 7
7
-
 8
8
-
 9
9
-
 10
10
-
 11
11
-
 12
12
-
 13
13
-
 14
14
-
 15
15
-
 16
16
-
 17
17
-
 18
18
-
 19
19
-
 20
20
-
 21
21
-
 22
22
-
 23
23
-
 24
24
-
 25
25
-
 26
26
-
 27
27
-
 28
28
-
 29
29
-
 30
30
-
 31
31
-
 32
32
-
 33
33
-
 34
34
-
 35
35
-
 36
36


Whirlpool LTE5243DT7 Le manuel du propriétaire
- Catégorie
- Machines à laver
- Taper
- Le manuel du propriétaire