Whirlpool LTG5243DQ8 Le manuel du propriétaire
- Catégorie
- Machines à laver
- Taper
- Le manuel du propriétaire

WASHER/DRYERUSERINSTRUCTIONS
INSTRUCTIONSPOURUUTILISATEUR
DELALAVEUSE/SECHEUSE
TableofContents/Tabledesmati6res
ASSISTANCE OR SERVICE ............................ 1
ACCESSORIES ................................................. 2
WASHER/DRYER SAFETY .............................. 2
WASHER USE .................................................. 6
DRYER USE ...................................................... 7
WASHER/DRYER CARE ................................. 8
TROUBLESHOOTING WASHER ................... 10
TROUBLESHOOTING DRYER ...................... 12
WARRANTY .................................................... 14
ASSISTANCE OU SERVICE ........................... 15
ACCESSOIRES ............................................... 15
SECURITE DE LA LAVEUSE/SECHEUSE ....16
UTILISATION DE LA LAVEUSE ..................... 19
UTILISATION DE LA SECHEUSE .................. 21
ENTRETIEN DE LA LAVEUSE/SECHEUSE..22
DEPANNAGE DE LA LAVEUSE ..................... 24
DEPANNAGE DE LA SECHEUSE .................. 26
GARANTIE ....................................................... 28
Para obtener acceso al manual de uso y cuidado en espa_ol, o para obtener informaci6n adicional acerca de su producto, visite:
www.whirlpool.com
Tenga listo su n0mero de modelo completo. Puede encontrar el n0mero de modelo y de serie dentro de la cavidad superior de la
puerta.
If you need assistance or service, first see the "Troubleshooting"
section. Additional help is available by calling our Customer
eXperience Center at 1-800-253-1301 from anywhere in the
U.S.A., or write:
Whirlpool Corporation
Customer eXperience Center
553 Benson Road
Benton Harbor, MI 49022-2692
Information may also be obtained by visiting our website at
www.whirlpool.com.
In Canada, for assistance, installation or service, call us at
1-800-807-6777, or write:
Whirlpool Canada LP
Customer Interaction Centre
1901 Minnesota Court
Mississauga, Ontario L5N 3A7
In Canada, visit www.whirlpool.ca.
Keep this book and your sales slip together for future
reference. You must provide proof of purchase or installation
date for in-warranty service.
Write down the following information about your appliance to help
you obtain assistance or service if you ever need it. You will need
to know your complete model number and serial number. You can
find this information on the model and serial number label, located
at the top inside dryer door well.
Dealer name
Serial number
Address
Phone number
Model number
Purchase date
Please include a daytime phone number in your correspondence.
W10196553A

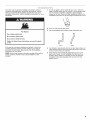
Enhance your dryer with these premium accessories.
For more high-quality items or to order, call 1-800-901-2042, or visit us at www.whirlpool.com/accessories.
In Canada call 1-800-807-6777, or visit us at www.whirlpoolparts.ca.
Part Number Accessory Part Number Accessory
20-48KITRC 4 ft (1.2 m) gas line dryer connector 8212656RP 10 ft (3.0 m) Inlet hose, Black EPDM
installation kit (2 pack)
PT220L 4 ft (1.2 m) dryer cord, 3-wire, 30 amp 8212638RP 6 ft (1.8 m) Nylon braided inlet hose, space-
saving 90° elbow, hypro-blue steel
couplings. (2-pack)
PT400L 4 ft (1.2 m) dryer cord, 4-wire, 30 amp 8212487RP 5 ft (1.5 m) Nylon braided inlet hose.
(2-pack)
PT600L 6 ft (1.8 m) dryer cord, 4-wire, 30 amp 8212637RP 6 ft (1.8 m) Inlet hose, Black EPDM, space
saving 90° elbow, hypro-blue steel
couplings. (2-pack)
8212614 Dryer vent lint brush 8212545RP 5 ft (1.5 m) Inlet hose, Red and Blue EPDM.
(2-pack)
3404351 Drying rack - fits 29" (737 mm) 8212641RP 5 ft (1.5 m) Inlet hose, Black EPDM (2 pack)
Super Capacity, 6.5 cu. ft (0.18 cu. m) -
side swing or hamper door
3406839 Drying rack - fits 29" (737 mm) 8212546RP 4 ft (1.2 m) Inlet hose, Black EPDM (2 pack)
Super Capacity Plus, 7.0 cu. ft (0.20 cu. m)
- side swing door only
49971 Compact dryer stand - white 31682 All purpose appliance cleaner
49572 LP gas conversion kit 1903WH Laundry supply storage cart
This washer does not include inlet water hoses.
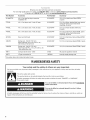
WASHER/DRYERSAFETY
Your safety and the safety of others are very important.
We have provided many important safety messages in this manual and on your appliance. Always read and obey all safety
messages.
This is the safety alert symbol.
This symbol alerts you to potential hazards that can kill or hurt you and others.
All safety messages will follow the safety alert symbol and either the word "DANGER" or "WARNING."
These words mean:
You can be kiUed or seriously injured if you don't immediately
follow instructions.
You can be killed or seriously injured if you don't follow
instructions.
All safety messages will tell you what the potential hazard is, tell you how to reduce the chance of injury, and tell you what can
happen if the instructions are not followed.
2

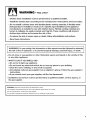
WARNING - ".isk ofFire"
- Clothes dryer installation must be performed by a qualified installer.
- Install the clothes dryer according to the manufacturer's instructions and local codes.
- Do not install a clothes dryer with flexible plastic venting materials, if fle×ible metal
(foil type) duct is installed, it must be of a specific type identified by the appliance
manufacturer as suitable for use with clothes dryers. Fle×ible venting materials are
known to collapse, be easily crushed, and trap lint. These conditions will obstruct
clothes dryer airflow and increase the risk of fire.
- To reduce the risk of severe injury or death, follow all installation instructions.
- Save these instructions.
WARNING: For your safety, the information in this manual must be followed to minimize
the risk of fire or explosion, or to prevent property damage, personal injury, or death.
- Do not store or use gasoline or other flammable vapors and liquids in the vicinity of this
or any other appliance.
- WHAT TO DO iF YOU SMELL GAS:
= Do not try to light any appliance.
= Do not touch any electrical switch; do not use any phone in your building.
= Clear the room, building, or area of all occupants.
= Immediately call your gas supplier from a neighbor's phone. Follow the gas supplier's
instructions.
• If you cannot reach your gas supplier, call the fire department.
- Installation and service must be performed by a qualified installer, service agency, or
the gas supplier.
WARNING: Gas leaks cannot always be detected by smell.
Gas suppliers recommend that you use a gas detector approved by UL or CSA.
For more information, contact your gas supplier.
If a gas leak is detected, follow the "What to do if you smell gas" instructions.

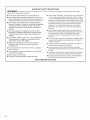
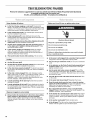
IM PORTANT SAFETY iNSTRUCTiONS
WARNING: To reduce the risk of fire, electric shock, or injury to persons when using the washer/dryer, follow basic
precautions, including the following:
[] Read all instructions before using the washer/dryer.
[] Do not place items exposed to cooking oils in your dryer.
Items contaminated with cooking oils may contribute to a
chemical reaction that could cause a load to catch fire.
[] Do not wash or dry articles that have been previously
cleaned in, washed in, soaked in, or spotted with gasoline,
dry-cleaning solvents, other flammable, or explosive
substances as they give off vapors that could ignite or
explode.
[] Do not add gasoline, dry-cleaning solvents, or other
flammable, or explosive substances to the wash water.
These substances give off vapors that could ignite or
explode.
[] Do not allow children to play on or in the washer/dryer.
Close supervision of children is necessary when the
washer/dryer is used near children.
[] Before the washer/dryer is removed from service or
discarded, remove the doors to the washer/dryer
compartments.
[] Do not reach into the washer/dryer if the tub, agitator or
drum is moving.
[] Do not install or store the washer/dryer where it will be
exposed to the weather.
[] Do not tamper with controls.
[] Clean dryer lint screen before or after each load.
[] Under certain conditions, hydrogen gas may be produced
in a hot water system that has not been used for 2 weeks
or more. HYDROGEN GAS IS EXPLOSIVE. If the hot water
system has not been used for such a period, before using
the washing machine, turn on all hot water faucets and let
the water flow from each for several minutes. This will
release any accumulated hydrogen gas. As the gas is
flammable, do not smoke or use an open flame during
this time.
[] Do not repair or replace any part of the washer/dryer or
attempt any servicing unless specifically recommended in
this Use and Care Guide or in published user-repair
instructions that you understand and have the skills to
carry out.
[] Do not use fabric softeners or products to eliminate static
unless recommended by the manufacturer of the fabric
softener or product.
[] Do not use heat to dry articles containing foam rubber or
similarly textured rubber-like materials.
[] Keep area around the exhaust opening and adjacent
surrounding areas free from the accumulation of lint, dust,
and dirt.
[] The interior of the machine and dryer exhaust vent should
be cleaned periodically by qualified service personnel.
[] See "Electrical Requirements" section of the Installation
Instructions booklet for grounding instructions.
SAVE THESE INSTRUCTIONS
4

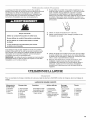
Your dryer must be properly installed and vented to achieve
maximum drying efficiency and shorten drying times. Use the
minimum recommended installation clearances found in the
Installation Instructions. See the Installation Instructions for more
information.
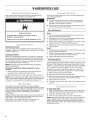
Fire Hazard
Use a heavy metal vent.
Do not use a plastic vent.
Do not use a metal foil vent.
Failure to follow these instructions can result in death
or fire.
If the dryer is not properly installed and vented, it will not be
covered under the warranty. Proper venting of your dryer is
important for satisfactory drying results. See the Installation
Instructions for more detail.
NOTE: Service calls caused by improper venting will be paid for
by the customer, whether it was a paid installation or self-
installed.
1.
Do not use plastic vent or metal foil vent. Use 4" (102 mm)
metal or flexible metal vent. Do not kink or crush flexible metal
vent. It must be completely extended to allow adequate
exhaust air to flow. Check vent after installation. Refer to the
Installation Instructions for proper length requirements of vent.
2. Use a 4" (102 mm) exhaust hood.
3. Use the straightest path possible when routing the vent.
Good Better
4.
5.
Use clamps to seal all joints. Do not use duct tape, screws, or
other fastening devices that extend into the interior of the vent
to secure vent, which can catch lint.
Clean exhaust vent periodically, depending on use, but at
least every 2 years, or when installing your dryer in a new
location. When cleaning is complete, be sure to follow the
Installation Instructions supplied with your dryer for final
product check.

WASHERUSE
For these suggested full-sized loads, set the LOAD SIZE selector to the highest load size setting.
LARGE CAPACITY WASHERS
Mixed Load Towels Delicates Permanent Press Knits
Heavy Work Clothes
2 pair of pants
3 shirts
3 jeans
1 coverall
2 double sheets 8 bath towels 2 camisoles 1 double sheet 2 pair of pants
4 pillowcases 8 hand towels 4 slips 1tablecloth 2 blouses
6 T-shirts 10 washcloths 6 undergarments 1 dress 4 shirts
6 pair of shorts 1 bath mat 2 sets of sleepwear 1 blouse 4 tops
2 shirts 1 child's outfit 2 pair of pants 2 dresses
2 blouses 3 shirts
6 handkerchiefs 2 pillowcases
1.
2.
Fire Hazard
Never place items in the washer that are dampened
with gasoline or other flammable fluids.
No washer can completely remove oil.
Do not dry anything that has ever had any type of oil on
it (including cooking oils).
Doing so can result in death, explosion, or fire.
Measure detergent and pour it into the washer. If desired, add
powdered or liquid color safe bleach. Drop a sorted load of
clothes loosely into your washer.
• Load evenly to maintain washer balance. Mix large and
small items. Items should move easily through the wash
water. Overloading can cause poor cleaning.
(OPTIONAL) Add liquid chlorine bleach.
Always measure liquid chlorine bleach. Do not guess. Do not
use more than 1 cup (250 mL) for a full load. Follow
manufacturer's directions for safe use. Use a cup with a
pouring spout to avoid spilling.
Let the washer fill and begin agitating the load. Add bleach to
the wash cycle so it can be removed in the rinse cycle. Pour
bleach around the agitator, not directly onto the load.
• Follow directions on the care labels. Do not use chlorine
bleach on wool, silk, spandex, acetates, or some flame-
retardant fabrics.
NOTE: Undiluted bleach will damage any fabric it touches.
The damage appears as rips, holes, tears, or color loss and
may not show up until several washings later.
3.
4.
5.
6.
(OPTIONAL) Add liquid fabric softener.
NOTE: Do not spill or drip any fabric softener onto the clothes.
Undiluted fabric softener can stain fabrics. Always dilute fabric
softener with warm water. Too much fabric softener can make
some items (diapers and towels) nonabsorbent. If this
happens, do not use it in every load, or use less of it in each
load.
Style 1: With liquid fabric softener dispenser (on some
models)
Use only liquid fabric softener in this dispenser. Pour
measured liquid fabric softener into the dispenser.
Softener is added automatically during the rinse portion
of the cycle. Dilute liquid fabric softener by filling the
dispenser with warm water until liquid reaches the
crossbar inthe dispenser opening.
Style 2: Without liquid fabric softener dispenser (on some
models)
• In the final rinse ONLY, add fabric softener that has been
diluted with V2to 1 cup (125 to 250 mL) warm water.
Close the washer lid. Washer will not agitate or spin with the
lid open.
Turn the WATER LEVEL selector to the correct setting for your
wash load and the type of fabric being washed. You may
change the load size or water level selection after the washer
has started filling by turning the selector to a different setting.
Set the TEMPERATURE selector to the correct setting for the
type of fabric and soils being washed. Use the warmest water
safe for fabric. Follow garment label instructions.
NOTE: In wash water temperatures colder than 60°F (15.6°C),
detergents do not dissolve well. Soils can be difficult to
remove. Some fabrics can retain wear wrinkles and have
increased pilling (the formation of small lint-like balls on the
surface of garments).

7=
Push in the Cycle Control knob and turn it clockwise to the
wash cycle you want. Reduce the wash time when using a
small load size setting. Pull out the Cycle Control knob to start
the washer.
To stop or restart your washer:
• To stop the washer at any time, push in the Cycle
Control knob.
• Torestart the washer, close the lid (if open) and pull out the
Cycle Control knob.
DRYERUSE
Explosion Hazard
Keep flammable materials and vapors, such as
gasoline, away from dryer.
Do not dry anything that has ever had anything
flammable on it (even after washing}.
Failure to follow these instructions can result in death,
explosion, or fire.
Fire Hazard
No washer can completely remove oil.
Do not dry anything that has ever had any type of oil on
it (including cooking oils}.
items containing foam, rubber, or plastic must be dried
on a clothesline or by using an Air Cycle.
Failure to follow these instructions can result in death
or fire.
Before using your dryer, wipe the dryer drum with a damp cloth to
remove dust from storing and shipping.
1. Clean lint screen before each load. See "Cleaning the Lint
Screen."
2. Load clothes loosely into the dryer and close the door. Do not
pack the dryer. Allow space for clothes to tumble freely.
3. Turn the Cycle Control knob to the recommended cycle for the
type of load being dried. Use the Energy Preferred Automatic
Setting to dry most heavy to medium-weight fabrics.
4. (OPTIONAL) Your dryer may have an END OF CYCLE SIGNAL.
The signal is helpful when drying items that should be
removed from the dryer as soon as it stops. The End of Cycle
signal is part of the Start button and is selectable. Turn the
Start button to ON or OFR The signal will sound only if the
selector is set to On.
5. If desired, add fabric softener sheet. Follow package
instructions.
Stopping and Restarting
You can stop your dryer anytime during a cycle.
To stop your dryer
Open the dryer door or turn the Cycle Control knob to OFF.
NOTE: The Cycle Control knob should point to an Off area when
the dryer is not in use.
To restart your dryer
Close the door. Select a new cycle and temperature (if desired).
Press the PUSH TO START button.
6. Press the PUSH TO START button.

WASHEP RYER CARE
Keep washer/dryer area clear and free from items that would
obstruct the flow of combustion and ventilation air.
Explosion Hazard
Keep flammable materials and vapors, such as
gasoline, away from dryer.
Failure to do so can result in death, explosion, or fire.
Cleaning the exterior
Use a soft, damp cloth or sponge to wipe up any spills such as
detergent or bleach. Occasionally wipe the outside of your washer
to keep it looking new.
Cleaning the interior
Clean your washer interior by mixing 1 cup (250 mL) of chlorine
bleach and enough detergent to equal twice the manufacturer's
recommended amount for a normal wash load. Pour this mixture
into your washer and run it through a complete cycle using hot
water. Repeat this process if necessary.
NOTE: Remove any hard water deposits using only cleaners
labeled as washer safe.
Cleaning the liquid fabric softener dispenser (on some
models):
1. Remove dispenser by grasping top with both hands and
squeezing, while pushing upward with thumbs.
2. Rinse dispenser under a warm water faucet, then replace it.
NOTE: Ifyour model has a liquid fabric softener dispenser, do not
wash clothes with this dispenser removed. Do not add detergent
or bleach to this dispenser; it is for liquid fabric softener only.
This washer does not include water inlet hoses. Whirlpool
Corporation recommends use of Factory Specified Parts. A list of
factory specified hoses available for separate purchase are listed
on the first page of this user instructions. These hoses are
manufactured and tested to meet Whirlpool Corporation's
specifications.
Replace water inlet hoses after 5 years of use to reduce the risk of
hose failure. Periodically inspect and replace water inlet hoses if
bulges, kinks, cuts, wear, or leaks are found.
When replacing your water inlet hoses, mark the date of
replacement on the label with a permanent marker.
,; eaxsT_}_Ssd_4}_e bc _e(£4_;
Glean the lint screen before each load. A screen blocked by lint
can increase drying time.
IMPORTANT:
• Do not run the dryer with the lint screen loose, damaged,
blocked, or missing. Doing so can cause overheating and
damage to both the dryer and fabrics.
• If lint falls off the screen into the dryer during removal, check
the exhaust hood and remove the lint.
Every Load Cleaning
Style 1:
1. The lint screen is located inside the dryer on the back wall.
Pull out the lint screen and its cover.
2. Separate the cover and the screen by squeezing the screen
and pulling on the cover at the same time.
3. Roll lint off the screen with your fingers. Do not rinse or wash
screen to remove lint. Wet lint is hard to remove.
4. Put the lint screen and cover back together and push firmly
back into place.
Style 2:
1. The lint screen is located inside the dryer in the front door well.
Pull the lint screen straight up.
2. Roll lint off the screen with your fingers. Do not rinse or wash
screen to remove lint. Wet lint is hard to remove.
3. Push the lint screen firmly back into place.
As Needed Cleaning
Laundry detergent and fabric softener residue can build up on the
lint screen. This buildup can cause longer drying times for your
clothes, or cause the dryer to stop before your load is completely
dry. The screen is probably clogged if lint falls off the screen.
Clean the lint screen (as outlined following) every 6 months, or
more frequently if it becomes clogged due to a residue buildup.
1. Roll lint off the screen with your fingers.
2. Wet both sides of lint screen with hot water.
3. Wet a nylon brush with hot water and liquid detergent. Scrub
lint screen with the brush to remove residue buildup.
4. Rinse screen with hot water.
5. Thoroughly dry lint screen with a clean towel. Replace screen
in dryer.
To clean dryer drum
1. Apply a nonflammable household cleaner to the stained area
of the drum and rub with a soft cloth until stain is removed.
2. Wipe drum thoroughly with a damp cloth.
3. Tumble a load of clean cloths or towels to dry the drum.
NOTE: Garments that contain unstable dyes, such as denim blue
jeans or brightly colored cotton items, may discolor the dryer
interior. These stains are not harmful to your dryer and will not
stain future loads of clothes. Dry unstable dye items inside out to
avoid transfer of dye.

From Inside the Dryer Cabinet
Lint should be removed every 2 years, or more often, depending
on dryer usage. Cleaning should be done by a qualified person.
From Inside the Exhaust Vent
Lint should be removed every 2 years, or more often, depending
on dryer usage.
Install and store your washer/dryer where it will not freeze.
Because some water may stay in the hoses, freezing can damage
your washer/dryer. If storing or moving your washer/dryer during
freezing weather, winterize it.
Non-use or vacation care
Operate your washer/dryer only when you are at home. If you will
be on vacation or not using your washer/dryer for an extended
period of time, you should:
• Unplug washer/dryer or disconnect power.
• Turn off the water supply to the washer. This helps avoid
flooding (due to a water pressure surge) while you are away.
Towinterize washer/dryer
1. Shut off both water faucets.
2. Disconnect and drain water inlet hoses.
3. Put 1 qt (1 L) of R.V.-type antifreeze in the basket.
4. Run washer on a drain and spin setting for about 30 seconds
to mix the antifreeze and water.
5. Unplug washer/dryer or disconnect power.
To use washer/dryer again
1. Flush water pipes and hoses.
2. Reconnect water inlet hoses.
3. Turn on both water faucets.
In the U.S.A.
Electrical Shock Hazard
Plug into a grounded 3 prong outlet.
Do not remove ground prong.
Do not use an adapter.
Do not use an extension cord.
Failure to follow these instructions can result in death,
fire, or electrical shock.
In Canada
Electrical Shock Hazard
Plug into a grounded 4 prong outlet.
Failure to do so can result in death or electrical shock.
• Plug in washer/dryer or reconnect power.
4. Run the washer through a complete cycle with 1 cup (250 mL)
of detergent to clean out antifreeze.
To transport the washer/dryer
1. Shut off both water faucets.
2. Disconnect and drain water inlet hoses.
3. If washer/dryer will be moved during freezing weather, put in a
qt (1 L) of R.V.-type antifreeze in the basket. Run washer on a
spin setting for about 30 seconds to mix the antifreeze and
water.
4. Disconnect the drain from the drain system.
5. Unplug washer/dryer or disconnect power. Disconnect wiring
if washer/dryer is direct wired.
6. Disconnect the exhaust vent.
7. Wash lint screen.
8. Make sure leveling legs are secure.
9. Place the inlet hoses into the basket.
10. Drape the power cord and drain hose over edge and into the
basket.
11. Use masking tape to secure the washer lid and dryer door.
Reinstalling your washer/dryer
1. Follow the "Installation Instructions" to locate, level, and
connect the washer/dryer.
2. Run the washer through a complete cycle with 1 scoop or
capful of detergent to clean the washer and remove the
antifreeze, if used.
• Plug inwasher/dryer or reconnect power.

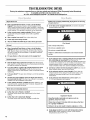
TROUBLESHOOTINGWASHER
First try the solutions suggested here or visit our website and reference FAQs (Frequently Asked Questions)
to possibly avoid the cost of a service call...
In U.S.A. www.whirlpool.com/help - In Canada www.whirlpool.ca
Noisy, vibrating, off-balance
• Is the floor flexing, sagging, or not level? Flooring that
flexes or is uneven can contribute to noise and vibration of the
washer. A 3A"(19 mm) piece of plywood under the washer will
reduce the sounds. See the Installation Instructions.
• Is the washer/dryer level? The washer/dryer must be level.
See the Installation Instructions.
Is the load balanced? Evenly distribute the load inthe
washer basket and make sure the height of the load does not
exceed the top row of basket holes.
Did you completely remove the yellow shipping strap with
cotter pins? See the Installation Instructions.
Are the gears engaging after the drain and before spin, or
is the upper part of agitator clicking during wash? These
are normal washer noises.
Is the washer gurgling or humming? When the washer
drains, the pump will make a continuous humming with
periodic gurgling or surging sounds as the final amounts of
water are removed. This is normal.
• The washer basket moves while washing. This isnormal.
Leaking
• Are the fill hoses tight?
• Are the fill hose gaskets properly seated? Check both ends
of each hose. See the Installation Instructions.
Is the drain hose properly installed? The drain hose should
be secured to the drainpipe or laundry tub. See the Installation
Instructions.
Is the sink or drain clogged? Sink and drainpipe must be
able to carry away 17 gal. (64 L) of water per minute. If sink or
drainpipe is clogged or slow, water can back up out of
drainpipe or sink. Check household plumbing (laundry tubs,
faucets, drainpipe, water pipes) for leaks.
Is water splashing off the tub ring? Center the tub before
starting the washer.
Is water splashing off the load? Evenly distribute the load in
the washer basket and make sure the height of the load does
not exceed the top row of basket holes. The fill or spray rinses
can splash off the load.
Dispenser clogged (on some models)
Did you follow the manufacturer's directions when adding
fabric softener to the dispenser (on some models)?
Measure fabric softener and slowly pour into the dispenser.
Wipe up all spills. Dilute fabric softener in the fabric softener
dispenser.
Washer won't run, fill, rinse, or agitate; washer stops
Electrical Shock Hazard
Plug into a grounded 3 prong outlet.
Do not remove ground prong.
Do not use an adapter.
Do not use an extension cord.
Failure to follow these instructions can result in death,
fire, or electrical shock.
Is the power cord plugged into a grounded 3 prong outlet?
Plug power cord into a grounded 3 prong outlet.
Are you using an extension cord? Do not use an extension
cord.
Is the indicator on the Cycle Control knob properly lined
up with a cycle? Turn the Cycle Control knob to the right
slightly and pull to start.
Are the water inlet valve screens clogged? Turn off the
water and remove inlet hoses from the washer. Remove any
accumulated film or particles. Reinstall hoses, turn on water,
and check for leaks.
Are both the hot and cold water faucets turned on? Turn
on the water.
Is the water inlet hose kinked? Straighten the hoses.
Does the water level seem too low, or does the washer
appear to not fill completely? The top of the agitator is much
higher than the highest water level. This is normal and
necessary for clothes to move freely.
Has a household fuse blown, or has a circuit breaker
tripped? Replace the fuse, or reset the circuit breaker. If the
problem continues, call an electrician.
Is the washer in a normal pause in the cycle? The washer
pauses for about 2 minutes during certain cycles. Allow the
cycle to continue. Some cycles feature periods of agitation
and soak.
Is the washer overloaded? Wash smaller loads.
Is the lid open? The lid must be closed during operation.
Washer will not agitate or spin with the lid open.
10

Washer continues to fill or drain; cycle seems stuck
Is the top of drain hose lower than the control knobs on
washer? The top of the drain hose must be at least
39" (990 mm) above the floor. See the Installation Instructions.
Does the drain hose fit too tightly in the standpipe, or is it
taped to the standpipe? The drain hose should be loose yet
fit securely. Do not seal the drain hose with tape. The hose
needs an air gap. See the Installation Instructions.
Washer won't drain or spin; water remains in washer
Is the drain hose clogged, or the end of the drain hose
more than 96" (2440 mm) above the floor? See the
Installation Instructions.
Is the lid open? The lid must be closed during operation.
Washer will not agitate or spin with the lid open.
Is there excessive sudsing? Always measure detergent.
Follow manufacturer's directions. If you have very soft water,
you might need to use less detergent.
Wash/Rinse temperature
Are the hot and cold water inlet hoses reversed? See
"Connect Inlet Hoses" in the Installation Instructions.
Are you washing many loads? As your frequency of loads
washed increases, the water temperature may decrease for
hot and warm temperatures. This is normal.
Load too wet
Did you use the right cycle for the load being washed?
Select a cycle with a higher spin speed (if available).
Did you wash an extra-large load? A large unbalanced load
could result in a reduced spin speed and wet clothes at the
end of the cycle. Evenly distribute the load and make sure the
height of the load does not exceed the top row of basket
holes.
Residue or lint on load
Did you sort properly? Sort lint givers (towels, chenille) from
lint takers (corduroy, synthetics). Also sort by color.
Did you overload the washer? The wash load must be
balanced and not overloaded. Clothes should move freely.
Lint or powdered detergent can be trapped in the load if
overloaded. Wash smaller loads.
Did you select the correct water level? The water level
should be correct for the load size. The load should be under
water.
Did you use enough detergent? Follow manufacturer's
directions. Use enough detergent to hold the lint in the water.
Did you line dry your clothing? If so, you can expect some
lint on the clothing. The air movement and tumbling of a dryer
removes lint from the load.
Was paper or tissue left in the pockets?
Is your water colder than 60°F (15.6°0)? Wash water colder
than 60°F (15.6°C) may not completely dissolve the detergent.
Did you use the proper cycle time and agitation speed for
the load? Reducing wash time (duration) and agitation speed
are ways to reduce lint.
Load iswrinkled, twisted, or tangled
Did you unload the washer promptly? Unload the washer as
soon as it stops.
Did you use the right cycle for the load being washed?
Use cycles with shorter wash times and low wash and spin
speeds (if available) to reduce wrinkling, tangling, and twisting.
Did you overload the washer? The wash load must be
balanced and not overloaded. Loads should move freely
during washing to reduce wrinkling, tangling, and twisting.
Was the wash water warm enough to relax wrinkles? If
safe for the load, use warm or hot wash water. Use cold rinse
water.
Are the hot and cold water hoses reversed? Check that the
hot and cold water hoses are connected to the right faucets. A
hot rinse followed by spin will cause wrinkling. See the
Installation Instructions.
• Did you wrap items around the agitator? Drop items loosely
into the washer. Do not wrap items around the agitator.
Stains, gray whites, dingy colors
Did you properly sort the load? Transfer of dye can occur
when mixing whites and colors in a load. Sort dark clothes
from whites and lights.
Was the wash temperature too low? Use hot or warm
washes if safe for the load. Make sure your hot water system
is adequate to provide a hot water wash.
Did you use enough detergent, or do you have hard
water? Use more detergent for washing heavy soils in cold or
hard water.
Are the hot and cold water hoses reversed? Check that the
hot and cold water hoses are connected to the right faucets.
See the Installation Instructions.
Did you follow the manufacturer's directions when adding
detergent and fabric softener? Measure detergent and
fabric softener. Use enough detergent to remove soil and hold
it in suspension. Dilute fabric softener and add to the rinse
portion of a cycle only. Do not drip fabric softener onto
clothes.
Is there above average iron (rust) in water? You may need
to install an iron filter.
Garments damaged
Were sharp items removed from pockets before washing?
Empty pockets, zip zippers, snap, or hook fasteners before
washing to avoid snagging and tearing of load.
Were strings and sashes tied to avoid tangling? Straps and
strings can easily become entangled in the load, causing
strain on seams and tearing.
Were items damaged before washing? Mend rips and
broken threads in seams before washing.
Did you overload the washer? The wash load must be
balanced and not overloaded. Loads should move freely
during washing.
Did you add chlorine bleach properly? Do not pour chlorine
bleach directly onto load. Wipe up bleach spills. Undiluted
bleach will damage fabrics. Do not place load items on top of
the bleach dispenser when loading and unloading the washer
(on some models). Do not use more than the manufacturer's
recommended amount for a full load.
• Did you follow the manufacturer's care label instructions?
11

TROUBLESHOOTINGDRYER
First try the solutions suggested here or visit our website and reference FAQs (Frequently Asked Questions)
to possibly avoid the cost of a service call...
In U.S.A. www.whirlpool.com/help - In Canada www.whirlpool.ca.
Dryer will not run
Has a household fuse blown, or has a circuit breaker
tripped? There may be 2 fuses or circuit breakers for the
dryer. Check that both fuses are intact and tight, or that both
circuit breakers have not tripped. Replace the fuse or reset the
circuit breaker. If the problem continues, call an electrician.
Is the correct power supply available? Electric dryers
require 240 volt power supply. Check with a qualified
electrician.
• Was a regular fuse used? Use a time-delay fuse.
• Is the dryer door firmly closed?
• Was the PUSH TO START dryer button firmly pressed?
No heat
Has a household fuse blown, or has a circuit breaker
tripped? The drum may be turning, but you may not have
heat. Electric dryers use 2 fuses or circuit breakers. Replace
the fuse or reset the circuit breaker. If a problem continues,
call an electrician.
• For gas dryers, is the valve open on the supply line?
Unusualsounds
Has the dryer had a period of non-use? If the dryer hasn't
been used for a while, there may be a thumping sound during
the first few minutes of operation.
Is a coin, button, or paper clip caught between the drum
and front or rear of the dryer? Check the front and rear
edges of the drum for small objects. Clean out pockets before
laundering.
Is it a gas dryer? The gas valve clicking is a normal operating
sound.
Are the four legs installed, and is the dryer level front to
back and side to side? The dryer may vibrate if not properly
installed. See the Installation Instructions.
Is the clothing knotted, or balled up? When balled up, the
load will bounce, causing the dryer to vibrate. Separate the
load items and restart the dryer.
Timer does not noticeably advance
• Is the dryer set to Timed or Air Dry?
The timer moves slowly and continuously for the timed
setting.
• Is the dryer set to Automatic Drying?
The timer moves only when the clothing is mostly dry.
Clothes are not drying satisfactorily, drying times are too long,
or load is too hot
• Is the lint screen clogged with lint? Lint screen should be
cleaned before each load.
Fire Hazard
Use a heavy metal vent.
Do not use a plastic vent.
Do not use a metal foil vent.
Failure to follow these instructions can result in death
or fire.
Is the exhaust vent or outside exhaust hood clogged with
lint, restricting air movement? Run the dryer for
5-10 minutes. Hold your hand under the outside exhaust hood
to check air movement. Ifyou do not feel air movement, clean
exhaust system of lint or replace exhaust vent with heavy
metal or flexible metal vent. See the Installation Instructions.
Are fabric softener sheets blocking the grille? Use only one
fabric softener sheet, and use it only once.
Is the exhaust vent the correct length? Check that the
exhaust vent is not too long or has too many turns. Long
venting will increase drying times. See the Installation
Instructions.
• Is the exhaust vent diameter the correct size? Use
4" (102 ram) diameter vent material.
Explosion Hazard
Keep flammable materials and vapors, such as
gasoline, away from dryer.
Place dryer at least 18 inches (460 ram) above the floor
for a garage instaflation.
Failure to do so can result in death, explosion, or fire.
• Is the dryer located in a room with temperature below
45°F (7°0)? Proper operation of dryer cycles requires
o o
temperatures above 45 F (7 C).
12

Loads are wrinkled
Is the dryer located in a closet? Closet doors must have
ventilation openings at the top and bottom of the door. A
minimum of 1" (25 mm) of airspace is recommended for the
front of the dryer, and, for most installations, the rear of the
dryer requires 5" (127 mm). See the Installation Instructions.
Has an air dry cycle been selected? Select the right cycle
for the types of garments being dried.
Is the load too large and heavy to dry quickly? Separate the
load to tumble freely.
Lint on load
• Is the lint screen clogged? Lint screen should be cleaned
before each load.
Stains on load or drum
Was dryer fabric softener properly used? Add dryer fabric
softener sheets at the beginning of the cycle. Fabric softener
sheets added to a partially dried load can stain your garments.
Drum stains are caused by dyes in clothing (usually blue
jeans). This will not transfer to other clothing.
• Was the load removed from dryer at the end of the cycle?
• Was the dryer overloaded? Dry smaller loads that can
tumble freely.
Odors
Have you recently been painting, staining, or varnishing in
the area where your dryer is located? If so, ventilate the
area. When the odors or fumes are gone from the area, rewash
and dry the clothing.
Is the electric dryer being used for the first time? The new
electric heating element may have an odor. The odor will be
gone after the first cycle.
13

WHIRLPOOLCORPORATIONLAUNDRYWARRANTY
LIMITED WARRANTY
For one year from the date of purchase, when this major appliance is operated and maintained according to instructions attached to or
furnished with the product, Whirlpool Corporation or Whirlpool Canada LP (hereafter "Whirlpool") will pay for Factory Specified Parts
and repair labor to correct defects in materials or workmanship that existed when this major appliance was purchased. Service must be
provided by a Whirlpool designated service company. YOUR SOLE AND EXCLUSIVE REMEDY UNDER THIS LIMITED WARRANTY
SHALL BE PRODUCT REPAIR AS PROVIDED HEREIN. This limited warranty is valid only in the United States or Canada and applies
only when the major appliance is used in the country in which it was purchased. Proof of original purchase date is required to obtain
service under this limited warranty.
ITEMS EXCLUDED FROM WARRANTY
This limited warranty does not cover:
1. Replacement parts or repair labor if this major appliance is used for other than normal, single-family household use or when it is
used in a manner that is inconsistent to published user or operator instructions and/or installation instructions.
2. Service calls to correct the installation of your major appliance, to instruct you on how to use your major appliance, to replace or
repair house fuses, or to correct house wiring or plumbing.
3. Service calls to repair or replace appliance light bulbs, air filters or water filters. Consumable parts are excluded from warranty
coverage.
4. Damage resulting from accident, alteration, misuse, abuse, fire, flood, acts of God, improper installation, installation not in
accordance with electrical or plumbing codes, or use of products not approved by Whirlpool.
5. Cosmetic damage, including scratches, dents, chips or other damage to the finish of your major appliance, unless such damage
results from defects in materials or workmanship and is reported to Whirlpool within 30 days from the date of purchase.
6. Pick up and delivery. This major appliance is intended to be repaired in your home.
7. Repairs to parts or systems resulting from unauthorized modifications made to the appliance.
8. Expenses for travel and transportation for product service if your major appliance is located in a remote area where service by an
authorized Whirlpool servicer is not available.
9. The removal and reinstallation of your major appliance if it is installed in an inaccessible location or is not installed in accordance
with Whirlpool's published installation instructions.
10. Replacement parts or repair labor on major appliances with original model/serial numbers that have been removed, altered, or
cannot be easily determined.
DISCLAIMER OF IMPLIED WARRANTIES
IMPLIED WARRANTIES, INCLUDING ANY IMPLIED WARRANTY OF MERCHANTABILITY OR IMPLIED WARRANTY OF FITNESS FOR
A PARTICULAR PURPOSE, ARE LIMITED TO ONE YEAR OR THE SHORTEST PERIOD ALLOWED BY LAW. Some states and provinces
do not allow limitations on the duration of implied warranties of merchantability or fitness, so this limitation may not apply to you. This
warranty gives you specific legal rights, and you also may have other rights that vary from state to state or province to province.
LIMITATION OF REMEDIES; EXCLUSION OF INCIDENTAL AND CONSEQUENTIAL DAMAGES
YOUR SOLE AND EXCLUSIVE REMEDY UNDER THIS LIMITED WARRANTY SHALL BE PRODUCT REPAIR AS PROVIDED HEREIN.
WHIRLPOOL SHALL NOT BE LIABLE FOR INCIDENTAL OR CONSEQUENTIAL DAMAGES. Some states and provinces do not allow
the exclusion or limitation of incidental or consequential damages, so these limitations and exclusions may not apply to you. This
warranty gives you specific legal rights, and you also may have other rights that vary from state to state or province to province.
If outside the 50 United States and Canada, contact your authorized Whirlpool dealer to determine if another warranty applies.
If you think you need repair service, first see the "Troubleshooting" section of the Use & Care Guide. If you are unable to resolve the
problem after checking "Troubleshooting," additional help can be found by checking the "Assistance or Service" section or by calling
Whirlpool. In the U.S.A., call 1-800-253-1301. In Canada, call 1-800-807-6777. 7/08
Replacement parts
If you need to order replacement parts, we recommend that you
only use FSP_ Factory Specified Parts. These parts will fit right
and work right because they are made with the same precision
used to build every new WHIRLPOOL _ appliance.
To locate FSP_ replacement parts in your area:
Call the Customer eXperience Center at 1-800-253-1301, or your
nearest designated service center. In Canada call 1-800-807-6777.
For information on how to contact Whirlpool, please see front
page of this document.
14

p
INSTRUCTIONSD TILISATIONDELALAVEUSESECHEUSE
Si vous avez besoin d'assistance ou de service, consulter d'abord
la section "Depannage". On peut obtenir de I'aide supplementaire
en tel6phonant au 1-800-807-6777, ou en ecrivant a :
Whirlpool Canada LP
Centre d'interaction avec la clientele
1901 Minnesota Court
Mississauga, Ontario L5N 3A7
Dans votre correspondance, veuillez indiquer un numero de
tel6phone oQ I'on peut vous joindre dans la journee.
Des informations peuvent egalement _tre obtenues en visitant
notre site web www.whirlpool.ca.
Conservez ce manuel et votre re<;ude vente ensemble pour
r_f_rence ult_rieure. Pour le service sous garantie, vous
devez presenter un document prouvant la date d'achat ou
d'installation.
Inscrivez les renseignements suivants au sujet de votre appareil
menager pour mieux vous aider a obtenir assistance ou service en
cas de besoin. Vous devrez connaftre le numero de modele et le
numero de serie au complet. Cette information est donnee sur la
plaque signaletique indiquant les numeros de modele et de serie,
situee dans le Iogement superieur de la porte a I'interieur de la
secheuse.
Nom du marchand
Num_ro de s_rie
Adresse
Num_ro de t_l_phone
Num_ro de modele
Date d'achat
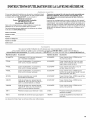
Vous pouvez faciliter I'utilisation de votre laveuse avec ces accessoires de premiere qualite.
Pour d'autres articles de qualite ou pour commander, composer le 1-800-901-2042 ou visiter notre site Web sur
www.whirlpool.com/accessories. Au Canada, composer le 1-800-807-6777 ou visiter notre site Web sur www.whirlpoolparts.ca.
Num_ro de pibce Accessoire Num_ro de pibce Accessoire
20-48KITRC Connecteur 4 pi (1,2 m) pour secheuse a 8212656RP Tuyau d'arrivee d'eau - EPDM noir de
gaz - ensemble d'installation 10 pi (3 m) (Lot de 2)
PT220L Cordon d'alimentation, 3 conducteurs 8212638RP Tuyau d'arrivee de 6 pi (1,8 m) en nylon
30 A, 4 pi (1,2 m) pour secheuse tresse, coude compact a 90 °, raccords
hypro-blue en acier. (lot de 2)
PT400L Cordon d'alimentation, 4 conducteurs 8212487RP Tuyau d'arrivee d'eau de 5 pi (1,5 m)
30 A, 4 pi (1,2 m) pour secheuse en nylon tresse. (Lot de 2)
PT600L Cordon d'alimentation, 4 conducteurs 8212637RP Tuyau d'arrivee d'eau - EPDM noir de
30 A, 6 pi (1,8 m) pour secheuse 6 pi (1,8 m) coude compact de 90°, raccord
acier hypro-blue. (Lot de 2)
8212614 Brosse a peluches pour conduit 8212545RP Tuyau d'arrivee d'eau - EPDM rouge et bleu
d'evacuation de secheuse de 5 pi (1,5 m). (Lot de 2)
3404351 Grille de sechage pour appareil grande 8212641RP Tuyau d'arrivee d'eau - EPDM noir de
capacite 29" (73,7 cm), 6,5 pi3 (0,18 m3)- 5 pi (1,5 m) (Lot de 2)
porte a ouverture laterale ou verticale
3406839 Grille de sechage pour appareil grande 8212546RP Tuyau d'arrivee d'eau - EPDM noir de
capacite 29" (73,7 cm), 7,0 pP (0,20 m_) 4 pi (1,2 m) (Lot de 2)
porte a ouverture laterale seulement
49971 Piedestal compact pour secheuse - blanc 31682 Produit de nettoyage polyvalent pour
appareils menagers
49572 Ensemble de conversion pour gaz propane 1903WH Casier de rangement de fournitures de
buanderie
Les tuyaux d'arrivee d'eau ne sont pas inclus avec cette laveuse.
15

P P P
SECURITEDELALAVEUSE/SECHEUSE
Votre s_curit_ et celle des autres est tr_s importante.
Nous donnons de nombreux messages de s6curit6 importants dans ce manuel et sur votre appareil m6nager. Assurez-vous de
toujours lire tousles messages de s6curit6 et de vous y conformer.
Voici le symbole d'alerte de s6curit6.
Ce symbole d'alerte de s6curit6 vous signale les dangers potentiels de d6ces et de blessures graves a vous
eta d'autres.
Tousles messages de s6curit6 suivront le symbole d'alerte de s6curit6 et le mot "DANGER" ou
"AVERTISSEMENT". Ces mots signifient :
Risque possible de d_c_s ou de blessure grave si vous ne
suivez pas imm_diatement les instructions.
Risque possible de d6c_s ou de blessure grave si vous
ne suivez pas les instructions.
Tous les messages de s6curit6 vous diront quel est le danger potentiel et vous disent comment r6duire le risque de blessure et
ce qui peut se produire en cas de non-respect des instructions.
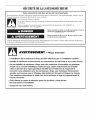
AVERTISSEMENT - "Risque d'incendie"
- L'installation de la s_cheuse & linge dolt _tre effectu_e par un installateur qualifi_.
- installer la s_cheuse conforrn_rnent aux instructions du fabricant et au× codes Iocaux.
- Ne pas installer de s_cheuse & linge avec des mat_riau× d'_vacuation en plastique
souple. Si un conduit rn_tallique souple (de type papier d'aluminiurn) est installS,
celui-ci doit _tre d'un type sp_cifique identifi_ par le fabricant de I'appareil et
convenir _ une utilisation avec les s_cheuses _ linge. Les rnat_riau× d'_vacuation
souples sont connus pour s'affaisser, Ctre facilement _cras_s et bloquer la charpie.
Ces situations obstrueront le d_bit d'air de la s_cheuse & linge et augmenteront le
risque d'incendie.
- Pour r6duire le risque de blessure grave ou de d6c_s, suivre toutes
ies instructions d'installation.
- Conserver ces instructions.

AVERTISSEiVlENT: Pour votre securite, les renseignements dans ce manuel doivent
_tre observ6s pour reduire au minimum les risques d'incendie ou d'explosion ou pour
eviter des dommages au produit, des blessures ou un deces.
- Ne pas entreposer ou utiliser de I'essence ou d'autres vapeurs ou liquides
inflammables b proximit6 de cet appareil ou de tout autre appareil 61ectrom6nager.
-QUE FAIRE DANS LE CAS D'UNE ODEUR DE GAZ :
• Ne pas tenter d'allumer un appareil.
® Ne pas toucher a un commutateur 61ectrique; ne pas utiliser le t_16phone se trouvant
sur les lieux.
® Evacuer tousles gens de la piece, de I'_difice ou du quarrier.
®Appeler imm_diatement le fournisseur de gaz du t_l_phone d'un voisin. Suivre ses
instructions.
= A d_faut de joindre votre fournisseur de gaz, appeler les pompiers.
- L'installation et I'entretien doivent _tre effectu_s par un installateur qualifi6, une
agence de service ou le fournisseur de gaz.
AVERTISSEMENT : L'odorat ne permet pas toujours la detection d'une fuite de gaz.
Les distributeurs de gaz recommandent I'emploi d'un detecteur de gaz (homologation UL ou CSA).
Pour d'autre information, contacter le fournisseur de gaz local.
En cas de detection d'une fuite de gaz, executer les instructions "Que faire dans le cas d'une odeur de gaz".
17

(MPORTANTES INSTRUCTIONS DE Si_CUR(T[ =
AME[::{T_SSE[_M_EN'r • Pour r6duire les risques d'incendie, de choc 61ectrique ou de blessures Iors de I'utilisation de
la laveuse/s6cheuse, suivre les pr6cautions fondamentales dont les suivantes :
m Lire toutes les instructions avant d'utiliser la
laveuse/s6cheuse.
m Ne pas placer des articles expos6s aux huiles de cuisson
dans votre s6cheuse. Les articles contamin6s par des huiles
de cuisson peuvent contribuer &une r6action chimique qui
pourrait causer & la charge de s'enflammer.
m Ne pas faire laver ou s6cher des articles qui ont 6t6 nettoy6s
ou laves avec de I'essence ou imbib6s d'essence, solvants
de nettoyage a sec, ou autres substances inflammables ou
explosives; ces substances peuvent 6mettre des vapeurs
susceptibles de s'enflammer ou d'exploser.
m Ne pas ajouter d'essence, solvant de nettoyage a sec ou
autre produit inflammable ou explosif dans I'eau de lavage.
Ces substances peuvent 6mettre des vapeurs susceptibles
de s'enflammer ou d'exploser.
m Ne pas laisser des enfants jouer sur ou &I'interieur de la
laveuse/s6cheuse. Bien surveiller les enfants Iorsque la
laveuse/s6cheuse est utilis6e & proximit6 d'enfants.
m Avant de mettre la laveuse/s6cheuse au rebut ou hors de
service, enlever la porte ou le couvercle.
m Ne pas tenter d'atteindre un article & I'int6rieur de la cuve de
la laveuse/s6cheuse Iorsque le tambour, la cuve ou
I'agitateur est en mouvement.
m Ne pas installer ou remiser cette laveuse/s6cheuse & un
endroit oQelle serait expos6e aux intemp6ries.
m Ne pas modifier les organes de commande.
m Nettoyer le filtre & charpie avant et apres chaque charge.
m Dans certaines conditions, de I'hydrogene gazeux peut se
former dans un circuit d'eau chaude qui n'a pas 6t6 utilis6
pendant 2 semaines ou plus. LE GAZ HYDROGENE EST
EXPLOSIBLE. Si le circuit d'eau chaude n'a pas 6t6 utilis6
pendant une telle p6riode, avant d'utiliser la laveuse/
s6cheuse, ouvrir tousles robinets d'eau chaude et laisser
I'eau s'6couler pendant plusieurs minutes par chaque
robinet. Ceci permettra 1'6vacuation de I'hydrogene gazeux
accumul6. Comme ce gaz est inflammable, ne pas fumer
ou utiliser une flamme nue au cours de cette p6riode.
I Ne pas reparer ou remplacer un composant quelconque de
la laveuse/s6cheuse, ni entreprendre une op6ration de
service, si ce n'est sp6cifiquement recommand6 dans ce
manuel ou dans un manuel d'instructions de r6parations
destin6 a I'utilisateur; il est alors essentiel que la personne
concernee comprenne ces instructions et soit comp6tente
pour les ex6cuter.
m Ne pas utiliser un produit assouplissant de tissu ou des
produits pour 61iminer la statique & moins qu'ils ne soient
recommand6s par le fabricant du produit assouplissant de
tissu ou du produit.
m Ne pas utiliser la chaleur pour faire secher des articles
fabriqu6s avec du caoutchouc mousse ou des mat6riaux
semblables.
m Ne pas laisser la charpie, la poussiere, ou la salet6
s'accumuler autour du systeme d'6vacuation ou autour de
I'appareil.
m Un nettoyage p6riodique de I'int6rieur de la s6cheuse et du
conduit d'6vacuation doit etre effectue par une personne
qualifiee.
m Voir "Specifications electriques" pour les instructions de
liaison & la terre.
CONSERVEZ CES INSTRUCTIONS
18

_7_ ¸ _ _ _ . __ _ _ _ _ _
La secheuse doit _tre bien installee et munie d'un systeme
adequat d'evacuation de I'air pour donner une efficacite maximale
de sechage et un temps de sechage plus court. Utiliser les
degagements minimums recommandes pour I'installation que
vous trouverez dans vos Instructions d'installation. Voir les
Instructions d'installation pour plus de renseignements.
Risque d'incendie
Utiliser un conduit d'_vacuation en m_tal Iourd.
Ne pas utiliser un conduit d'_vacuation en plastique.
Ne pas utiliser un conduit d'_vacuation en feuille
de m_tal.
Le non-respect de ces instructions peut causer
un d_c_s ou un incendie.
Si la secheuse n'est pas bien installee et munie d'un systeme
adequat d'evacuation de I'air, elle ne sera pas couverte en vertu
de la garantie. Pour obtenir les meilleurs resultats de sechage,
I'evacuation de I'air doit _tre adequate. Voir les Instructions
d'installation pour plus de renseignements.
REMARQUE : Les visites de service causees par une evacuation
inadequate seront aux frais du client peu importe s'il a fait faire
I'installation ou s'il I'a faite lui-m_me.
1.
Ne pas utiliser un conduit d'evacuation en plastique ou en
feuille de metal. Utiliser un conduit de 4" (102 mm) en metal
Iourd ou flexible. Ne pas deformer ni ecraser le conduit
d'evacuation en metal flexible. II doit _tre completement
deploy6 pour permettre I'evacuation adequate de I'air. Verifier
le systeme d'evacuation apres I'installation. Se ref6rer aux
Instructions d'installation pour la bonne Iongueur du conduit
d'evacuation.
2=
3.
Utiliser un clapet d'evacuation de 4" (102 mm).
Utiliser I'acheminement le plus rectiligne possible Iors de
I'installation du conduit.
Bon Meilleur
4.
5=
Utiliser des brides pour sceller tousles joints. Ne pas utiliser
de ruban adhesif pour conduit, de vis ou d'autres dispositifs
de fixation qui se prolongent & I'interieur du conduit pour fixer
celui-ci. Ceux-ci peuvent retenir la charpie.
Nettoyer periodiquement le conduit d'evacuation, selon
I'utilisation, mais au moins tous les 2 ans ou Iors de
I'installation de la secheuse & un nouvel endroit. Apres le
nettoyage, veuillez suivre les Instructions d'installation
fournies avec la secheuse pour une verification finale de
I'appareil.
UTILISATIONDELALAVEUSE
Pour ces exemples de charges completes de la laveuse, regler le selecteur LOAD SIZE (volume de charge) au plus haut reglage de
charge.
LAVEUSE DE GRANDE CAPACITE
V6tements de Charge mixte Serviettes Articles d_licats Pressage Tricots
travail Iourds permanent
2 pantalons 2 draps doubles 8 serviettes de bain 2 chemisettes 1 drap double 2 pantalons
3 chemises 4 taies d'oreiller 8 serviettes & main 4 combinaisons- 1 nappe 2 chemisiers
3 jeans 6 tee-shirts 10 debarbouillettes jupons 1 robe 4 chemises
1 salopette 6 shorts 1 tapis de bain 6 sous-v_tements 1 chemisier 4 hauts
2 chemises 2 paires de pyjamas 2 pantalons 2 robes
2 chemisiers 1 ensemble pour 3 chemises
6 mouchoirs enfant 2 taies d'oreiller
19

Risque d'incendie
Ne jamais mettre des articles humect_s d'essence ou
d'autres fiuides inflammables darts la laveuse.
Aucune laveuse ne peut cornpleternent enlever I'huile.
Ne pas faire s_cher des articles qui ont _t_ salis par
tout genre d'huile (y compris les huiles de cuisson).
Le non=respect de ces instructions peut causer un
d_c_s, une explosion ou un incendie.
1=
2.
3.
Style 1 : Distributeur d'assouplissant de tissu liquide (sur
certains modeles)
Utiliser seulement de I'assouplissant de tissu liquide dans
ce distributeur. Verser une quantite mesuree de
I'assouplissant de tissu liquide dans le distributeur.
L'assouplissant est ajoute automatiquement durant
I'operation de rin£;age du programme. Diluer
I'assouplissant de tissu liquide en remplissant le
distributeur d'eau tiede jusqu'& ce que le liquide atteigne
le croisillon dans I'ouverture du distributeur.
Style 2 :Absence de distributeur d'assouplissant de tissu
liquide (sur certains modeles)
• Ajouter I'assouplissant de tissu dilue avec 1/2& 1tasse
(125 &250 mL) d'eau tiede au rin(}age final SEULEMENT.
Mesurer le detergent et le verser dans la laveuse. Si desir6,
ajouter de la Javel sans danger pour les couleurs, en poudre
ou liquide. Mettre une charge de v_tements tries dans la
laveuse sans la tasser.
Charger uniformement pour maintenir I'equilibre de la
laveuse. M61anger les gros et les petits articles. Les
articles doivent pouvoir se deplacer facilement dans I'eau
de lavage. Une surcharge peut causer un pietre nettoyage.
(FACULTATIF) Ajouter I'eau de Javel liquide.
Toujours mesurer I'eau de Javel liquide. Ne pas verser une
quantite approximative. Ne jamais utiliser plus de 1 tasse (250
mL) pour une charge complete. Suivre les instructions du
fabricant pour une utilisation sans danger. Utiliser une tasse
avec un bec verseur pour eviter de renverser le liquide.
Laisser la laveuse se remplir et commencer I'agitation de la
charge. Ajouter I'eau de Javel au programme de lavage de
sorte qu'elle puisse _tre elimin6e au programme de rin£_age.
Verser I'eau de Javel autour de I'agitateur et non directement
sur la charge.
• Suivre le mode d'emploi sur les etiquettes du linge. Ne
pas utiliser d'eau de Javel sur les articles en laine, soie,
spandex, les acetates ou certains tissus ignifuges.
REMARQUE : L'eau de Javel non diluee peut endommager
tousles tissus avec lesquels elle entre en contact. IIen resulte
des deg&ts comme des dechirures, des trous, de I'usure ou
des pertes de couleur, qui peuvent ne pas paraftre avant
plusieurs lavages subsequents.
4=
5.
6.
7=
Rabattre le couvercle de la laveuse. La laveuse n'effectuera
pas d'agitation ni d'essorage avec le couvercle ouvert.
Tourner le selecteur WATER LEVEL (niveau d'eau) au bon
reglage pour votre charge de lavage et le type de tissu & laver.
Vous pouvez changer votre selection de la taille de charge et
du niveau d'eau apres que la laveuse a commence & se
remplir en tournant le bouton de selection & un reglage
different.
Regler le selecteur de TEMP#RATURE au reglage approprie
pour le type de tissu et le niveau de salete de la charge.
Utiliser I'eau la plus chaude sans danger pour le tissu. Suivre
les instructions sur I'etiquette des v_tements.
REMARQUE •Dans les temperatures d'eau de lavage
inferieures & 60°F (15,6°C), les detergents ne se diluent pas
bien. Les saletes peuvent _tre difficiles & enlever. Certains
tissus peuvent retenir les faux plis et comporter un
boulochage accru (formation de petites boules de charpie sur
la surface des v_tements).
Appuyer sur le bouton de commande de programme et le
tourner dans le sens horaire au programme que vous desirez.
Reduire le temps de lavage Iors de I'utilisation d'un reglage
pour petite charge. Tirer sur le bouton de commande de
programme pour mettre la laveuse en marche.
(FACULTATIF) Ajouter I'assouplissant de tissu liquide.
REMARQUE • Ne pas renverser ou faire degoutter
d'assouplissant de tissu sur les v_tements. Un assouplissant
de tissu non dilu_ peut causer des taches sur les tissus.
Toujours diluer I'assouplissant de tissu avec de I'eau tiede.
Une trop grande quantite d'assouplissant de tissu peut rendre
certains articles (couches et serviettes) non absorbants. Le
cas echeant, ne pas I'utiliser &chaque charge ou en utiliser
moins avec chaque charge.
Arr6t et remise en marche de la laveuse :
Pour arr_ter la laveuse &tout moment, appuyer sur le
bouton de commande de programme.
Pour remettre la laveuse en marche, rabattre le couvercle
(si ouvert) et tirer sur le bouton de commande de
programme.
20
La page est en cours de chargement...
La page est en cours de chargement...
La page est en cours de chargement...
La page est en cours de chargement...
La page est en cours de chargement...
La page est en cours de chargement...
La page est en cours de chargement...
La page est en cours de chargement...
-
 1
1
-
 2
2
-
 3
3
-
 4
4
-
 5
5
-
 6
6
-
 7
7
-
 8
8
-
 9
9
-
 10
10
-
 11
11
-
 12
12
-
 13
13
-
 14
14
-
 15
15
-
 16
16
-
 17
17
-
 18
18
-
 19
19
-
 20
20
-
 21
21
-
 22
22
-
 23
23
-
 24
24
-
 25
25
-
 26
26
-
 27
27
-
 28
28


Whirlpool LTG5243DQ8 Le manuel du propriétaire
- Catégorie
- Machines à laver
- Taper
- Le manuel du propriétaire
dans d''autres langues
- English: Whirlpool LTG5243DQ8 Owner's manual
Documents connexes
-
Whirlpool LTE5243DT7 Le manuel du propriétaire
-
Whirlpool 49971 Manuel utilisateur
-
Bauknecht W10196553A Manuel utilisateur
-
-
-
-
-
Autres documents
-
Kenmore 11027224600 Le manuel du propriétaire
-
Crosley CAWSS16445WQ0 Le manuel du propriétaire
-
Maytag MET3800TW2 Le manuel du propriétaire
-
Maytag MGT3800TW - 27" Gas Laundry Center Le manuel du propriétaire
-
Kenmore 11029522801 Manuel utilisateur
-
Kenmore W10026670A Washer Mode d'emploi
-
-