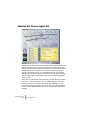
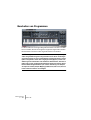
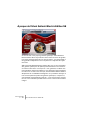
Steinberg VST Instruments Studio Case II Mode d'emploi
- Taper
- Mode d'emploi


The information in this document is subject to change without notice and does not rep-
resent a commitment on the part of Steinberg Media Technologies GmbH. The soft-
ware described by this document is subject to a License Agreement and may not be
copied to other media except as specifically allowed in the License Agreement. No part
of this publication may be copied, reproduced or otherwise transmitted or recorded, for
any purpose, without prior written permission by Steinberg Media Technologies GmbH.
All product and company names are ™ or ® trademarks of their respective owners.
Windows XP is a trademark of Microsoft Corporation. The Mac logo is a trademark
used under license. Macintosh and Power Macintosh are registered trademarks.
© Steinberg Media Technologies GmbH, 2005.
All rights reserved.

ENGLISH
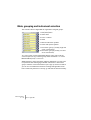
Table of Contents

VST Instruments
4Table of Contents
7 Introduction
8 About this manual
9 What are VST instruments?
9 About the instruments
included in Studio Case
11 Optimizing the hard disk
before installation
12 Minimum system require-
ments (PC version)
12 Minimum system require-
ments (Mac version)
13 About the Steinberg Key
16 Installation
18 Register your software!
19 Activating VST instruments
in Cubase SE
21 Virtual Guitarist
Electric Edition SE
22 About Virtual Guitarist
Electric Edition SE
23 How do I use Virtual
Guitarist?
23 What is Virtual Guitarist
Electric Edition SE?
24 How does Virtual Guitarist
work?
24 What you can and can’t do
with Virtual Guitarist Electric
Edition SE
25 First test
26 How to play Virtual Guitarist
Electric Edition SE
27 Players
28 Parts
29 Chord recognition
31 Latch mode
31 Expression and timing
variations
35 Sound variations
36 MIDI controller assignments
37 Reference
43 Virtual Bassist SE
44 About Virtual Bassist SE
45 What is Virtual Bassist SE?
45 How does Virtual Bassist
SE work?
46 What you can and can’t do
with Virtual Bassist
47 The first test
48 Playing Virtual Bassist SE
48 Using a MIDI keyboard
50 Virtual Bassist SE
terminology
52 Loading and saving Styles
53 Auditioning styles
54 Virtual Bassist SE controls
60 Guitar controls
62 MIDI Controller assignments
63 Assigning MIDI controllers
in Virtual Bassist SE
64 Chord recognition
67 Groove Agent SE
68 What is Groove Agent SE?
68 First test
69 Groove Agent SE
terminology
70 Using Groove Agent SE
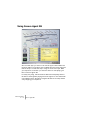
71 The LCD window
71 Range
72 Sliders and buttons
78 Mute, grouping and
instrument selection
79 Stop/Run

VST Instruments
Table of Contents 5
ENGLISH
81 Using the automation in Cu-
base SE
81 Controlling Groove Agent
SE from a MIDI keyboard
83 The Grand SE
84 Introduction
85 Playing The Grand SE
86 Opening the Edit window
86 Sound Character
87 Global
89 D’cota SE
90 Introduction
90 Overview
93 The synthesis section
94 Creating a synth sound with
PWM – a brief tutorial
96 Analog parameters
106 The modulation and output
section
107 The Controller strip
113 Using external MIDI
controllers
113 LFO section
115 The Envelope section
117 Volume and Pan dials
118 The Effect section
120 The keyboard
121 Tips and tricks
123 HALion SE
124 Introduction
125 HALion SE overview
125 How HALion SE plays
samples
125 About program banks and
programs
132 Tweaking programs
132 The Filter section
135 DCA and Envelope
136 The LFO
137 The Tune Section
137 Glide
137 The Options pop-up menu
139 Importing samples and
soundbanks into HALion SE
141 Automation and MIDI
controllers
141 Recording dynamic control
settings
142 Using MIDI controllers
143 Optimizing system
performance
145 Composer Set
Documentation
151 Index

VST Instruments
6Table of Contents

ENGLISH
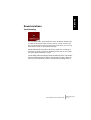
1
Introduction

VST Instruments
1 – 8 Introduction
About this manual
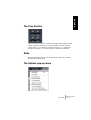
Steinberg Studio Case consists of two main parts:
• Cubase SE software – the recording studio
•A set of 6 software instruments – the band
This manual describes the instruments included in Studio Case. They
complement Cubase SE with a backing band that offers you sounds
and instruments for a vast range of musical styles.
Key command conventions
Many of the key commands in Cubase SE use modifier keys, some of
which are different depending on the operating system, Windows or
Mac. When key commands with modifier keys are described in this
manual, they are shown with the Windows modifier key first, in the fol-
lowing form:
[Win modifier key]/[Mac modifier key]-[key] or action
For example, [Ctrl]/[Command]-click means “press [Ctrl] under
Windows or [Command] under Mac OS, and mouse click”.

VST Instruments
Introduction 1 – 9
ENGLISH
What are VST instruments?
With computers becoming more powerful and a more integral part of
home and professional studios all over the world, instruments that
used to be hardware move into the computer.
VST instruments (short: VSTis) are software instruments which run un-
der any VST compatible host, such as Cubase SE. They are plugged
into the host software, which means that you set up and play them
from within the host. This offers many advantages to external/hardware
instruments:
• First off, since VST instruments use your computer system and don’t need their
own hardware, they’re a much better value and more portable. Even more, when
you own one VST instrument, you can use multiple instances of it in one song
without having to buy multiple copies of the instrument. Two acoustic Grand
Pianos would be a significant investment in terms of money, space and mainte-
nance – in Studio Case, a second Grand Piano is a matter of two mouse clicks.
• VST instruments are part of the song. When you load up your song, the instru-
ments used in it and their settings are automatically restored – “Total Recall“.
• VST instruments offer a much better integration into your musical environment
than external instruments can. They can be fully automated (you can record
and play back knob or fader movements within the VSTi).
• Software instruments do not have to deal with hardware limitations such as
RAM, small graphic displays or missing hard disks. Their performance depends
only on your computer system, and these instruments can make full use of the
CPU power, RAM, hard disk or monitor your computer has to offer.
About the instruments included in Studio Case
Steinberg has gained a world-wide reputation for software instruments.
You’ll hardly find a music studio without Steinberg software instruments.
Award-winning products like The Grand, Virtual Guitarist or D’cota are
used by high-profile artists world-wide and can be heard in countless
chartbreaking music productions and film scores.
Studio Case incorporates essential versions of six of these great instru-
ments. SE versions are easier to use and less demanding on computer
performance than their professional counterparts. At the same time,
they offer the same sound quality the originals are well known for.

VST Instruments
1 – 10 Introduction
The six instruments complement each other perfectly, representing a
comprehensive collection of sounds for any musical style:
• HALion SE is a powerful software sampler. A composer set from Wizoo is al-
ready included, providing you with important sounds like basses, guitars,
strings or even drumloops. It imports all HALion-compatible libraries (sepa-
rately available) and even imports AIF/WAV and Soundfont files, so it can pro-
duce a vast range of instruments, sounds and grooves.
• The Grand SE is an emulation of the grandest instrument of all times – the
acoustic concert grand piano. Apart from four characteristics to choose from,
it offers you exactly the controls you’re used to from the real thing: Keys, ped-
als and nothing else.
• Groove Agent SE relieves you of the time-consuming task of programming
your own grooves. Just hit a key and let him do his magic. You are in full con-
trol of playing style, complexity, dynamics and fills. And if you like, you can of
course create your own grooves using Groove Agent SE’s built-in drumkits.
• Virtual Guitarist Electric Edition SE is a professional electric guitarist with a
perfect sound, perfect timing and perfect playing technique. Tell him what
style to play and he’ll beef up your tracks with juicy funk/wah licks or crunchy
rock riffs – it’s all up to you.
• Virtual Bassist SE is a professional bass player with a perfect sound, perfect
timing and the ability to flexibly adapt the playing to suit most musical needs.
With Virtual Bassist SE, you can easily add professional-sounding bass guitar
tracks to your projects.
• D’cota SE is a powerful analog synthesizer. It complements your backing band
with a vast range of synth basses, leads, pads and other typical analog sounds.
You can either choose from the 128 patches supplied or make your own ones.
Although SE instruments are great tools that can last a lifetime, we’ve
taken into account that maybe sooner or later you feel like you’ve made
a lot of progress and your demand gets higher. In such a case, you can
conveniently upgrade to the original versions of each of the instruments.
For feature comparisons and upgrading options, check the Steinberg
website.

VST Instruments
Introduction 1 – 11
ENGLISH
Optimizing the hard disk before installation
The VSTi installer installs about 1 GB of data on your hard disk, and if
your drive is quite full, or has not been defragmented recently, it’s pos-
sible that the install data will get split (fragmented) into many parts over
the disk. This can affect the performance of some VSTis, and it can
lead to longer loading times of library files.
Therefore we recommend that you defragment the target hard disk
before you start the installation. This can be done with the defragmen-
tation system software on Windows, or with Norton Utilities (or another
defragmentation program) on the Macintosh.
Latency
Although VST instruments are practically latency-free, high latency
times (which result in delays between pressing keys on your MIDI key-
board and hearing a sound) can occur when you play VSTis via your
MIDI keyboard in real time.
This is often caused by the audio card or the MIDI interface, although
it won’t be an issue when playing back a song with a VSTi MIDI track.
To get rid of annoying real time latency, we recommend that you re-
place your current soundcard with a professional audio card for which
an ASIO driver is available. Most soundcards built into off-the-shelf
computers don’t use an ASIO driver and usually produce latencies of
up to several hundred milliseconds.

VST Instruments
1 – 12 Introduction
Minimum system requirements (PC version)
•A PC with an 800 MHz Pentium or Athlon processor (2.8 GHz or faster
recommended).
• 384 MB of RAM (512 MB recommended).
• 1.1 GB of hard disk space.
• Windows® XP Home or Professional.
• Windows MME compatible audio hardware (an ASIO compatible audio card
is recommended).
• The Steinberg Key and an available USB port.
• Monitor and graphics card supporting 1024 x 768 resolution (dual monitor
setup and 1152 x 864 resolution recommended).
•A DVD ROM drive is required for installation.
• When you are upgrading from a previous version of Cubase SE/LE, a working
internet connection is required for the licence activation.
Note that The Grand SE requires 85 MB of RAM!
Minimum system requirements (Mac version)
•A Power Mac G4 867 MHz computer (Power Mac G5 Dual and 1.8 GHz or
faster recommended).
• 384 MB of RAM (512 MB recommended).
• 1.1 GB of hard disk space.
• Mac OS X version 10.3 or 10.4.
• CoreAudio compatible audio hardware.
• The Steinberg Key and an available USB port.
•A DVD ROM drive.
• Monitor and graphics card supporting 1024 x 768 resolution (dual monitor
setup and 1152 x 864 resolution recommended).
• When you are upgrading from a previous version of Cubase SE/LE, a working
internet connection is required for the licence activation.
Note that The Grand SE requires 85 MB of RAM!

VST Instruments
Introduction 1 – 13
ENGLISH
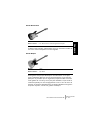
About the Steinberg Key
Please read the following section before installing the instruments
included with Studio Case.
New users
Included with the Studio Case package you will find a hardware key
(sometimes referred to as “dongle”) that is part of the Cubase SE and
the Virtual Bassist SE copy protection scheme. The licenses for both
the program and the instrument are stored on that key. Cubase SE
and Virtual Bassist SE will not run if this key isn’t installed properly.
•
You should first install the program (and any necessary hardware, see
below), then insert the protection key and finally launch the program.
This is because the necessary drivers for the key are installed when you install the
program.
If you’re upgrading from a previous version of Cubase SE/LE
Included with the Studio Case package, you will find a Virtual Bassist
SE activation code for the Steinberg Key, a hardware copy protection
device that is part of the Virtual Bassist SE copy protection scheme.
Virtual Bassist SE will not run if there is no Steinberg Key present or if
this key has not been properly activated.
•
If you already own a copy protection key, you need to activate that key
for use with Virtual Bassist SE. This is done by means of the activation
code included in the upgrade package, after the installation procedure,
see page 15.
•
If your previous version of Cubase SE/LE was not hardware-protected
by a Steinberg Key, you need to purchase this key separately. The key
then needs to be activated for use with Virtual Bassist SE. This is done
by means of the activation code included in the upgrade package, after
the installation procedure, see page 15.
Both licenses can be stored on the same Steinberg key. If you have
already downloaded the Cubase SE license to your Steinberg key,
proceed the same way for Virtual Bassist SE. If you have not installed
Cubase SE yet, please read the following sections and follow the in-
structions carefully.

VST Instruments
1 – 14 Introduction
The Steinberg Key
The Steinberg Key is, in fact, a little computer on which your Steinberg
software licenses are stored. All hardware-protected Steinberg prod-
ucts use the same type of key and you can store more than one license
on a key. Licenses can also (within certain limits) be transferred be-
tween keys – which is helpful, e.g. if you want to sell a piece of software.
•
If you have a Windows PC and have never used a dongle on your
computer before, the installation routine will initiate a restart of Win-
dows after installation of the key drivers. After the restart, the key must
be plugged into the USB port for the installation routine to continue.
When the key is plugged into the USB port, Windows will automatically recognize it as
a new hardware device and will attempt to find drivers for it – these necessary drivers
won’t be present until Virtual Bassist SE has been installed and the computer restarted.
•
If you have an Apple Macintosh computer, there will be no automatic
restart. Be sure to read the information regarding the Steinberg Key
that is displayed during the installation process.
•
If you already own copy-protected Steinberg software, you should re-
move any existing Steinberg Keys from the computer’s USB port dur-
ing the installation routine.
You can load your Virtual Bassist SE license and the Cubase SE license
onto the same Steinberg key.
The Steinberg Key must not be plugged in before or during the installa-
tion of Virtual Bassist SE if this is the first time you use such a key.
Otherwise the operating system of your computer will register it as new
USB hardware and try to find drivers that won’t be present before Virtual
Bassist SE installation.

VST Instruments
Introduction 1 – 15
ENGLISH
Activating the Steinberg Key (only if you’re upgrading from a
previous version of Cubase SE/LE)
• For the activation of the copy protection key, you need a working internet
connection, as this is performed online. In case you have no connection
to the internet on the computer on which you wish to use Studio Case,
you can always use a different computer for activation.
Simply install the License Control Center separately on the internet computer, without
installing the complete product.
Windows: To do this, the product installation DVD contains a dedicated installer called
“SyncrosoftLicenseControlSetup”.
Mac: Double-click the installer file, and select the “Custom” installation type. Deactivate
the installation of the VST instruments and only install the License Control Center.
You can also find up-to-date versions of this installer (for Mac and for PC) on the inter-
net at www.syncrosoft.com/downloads/index.html.
Your Steinberg Key does not yet contain a valid license for Virtual
Bassist SE. You must download a license to it before you can launch
Virtual Bassist SE! Use the activation code supplied with the program
in order to download a valid Virtual Bassist SE license to your Stein-
berg Key. Proceed as follows:
1.
After installation of the dongle drivers and the software (and, on a
Windows PC, after restarting your computer), plug the Steinberg Key
into the USB port.
If you are unsure of which port this is, consult the computer’s documentation.
2.
If this is the first time a copy protection device is plugged in, it will be
registered as a new hardware device. On a Mac, drivers are found
automatically, without further user interaction. Windows will display a
dialog asking you whether you would like to find drivers for the device
manually or automatically. Under Windows, choose to find drivers au-
tomatically.
The dialog closes and you may have to reboot your computer.
3.
Make sure that your computer has a working internet connection.
4.
Launch the “License Control Center” application (found in the Win-
dows Start menu under “Syncrosoft” or in the Macintosh Applications
folder).
This application allows you to view your Steinberg Keys and to load or transfer licenses.

VST Instruments
1 – 16 Introduction
5.
Use the License Control Center “Wizard” function along with the ac-
tivation code supplied with Virtual Bassist SE to download the license
to your Key.
Simply follow the on-screen instructions. If you are uncertain about how to proceed,
consult the help for LCC.
Installation
To install the VST instruments included in Studio Case, proceed as
follows:
Windows
1.
Start your computer and launch Windows.
2.
Make sure that no Steinberg Key is connected to the USB port.
3.
Insert the plug-in installation DVD into your DVD-ROM drive.
4.
A pop-up installation dialog appears automatically.
If this dialog does not appear, open the DVD on the desktop and double click the
installer file.
5.
Follow the instructions on the screen.
6.
During the installation process, you will be asked to select the instru-
ments to be installed and to select the target folders for the audio
content (for all instruments except D’cota SE).
The audio content folders contain specifically designed samples for the different instru-
ments. Please note that the audio content takes up about 1 GB of hard disk space.
Make sure to check the DVD for “read first” or “late changes” files. Please
read all such files before launching any of the instruments, since they may
contain late information not included in this manual.
Please note that the installation routine will take some time to install all
plug-ins and the content files.

VST Instruments
Introduction 1 – 17
ENGLISH
Removing the instruments
To remove the VST instruments from your computer:
1.
Open the “Add or Remove programs” control panel.
2.
Select “Steinberg VSTi Collection” and click “Add/Remove”.
3.
Follow the instructions on the screen.
•
The instruments and the respective audio content are removed from
your computer.
Macintosh
1.
Disable any anti-virus software. Then insert the plug-in DVD into the
computer’s DVD drive.
2.
Double click on the icon for the plug-in DVD.
A window opens.
3.
Double click on the VSTi installer (the .mpkg) file.
The installation procedure starts.
4.
Follow the instructions on screen.
•
At some stage, you will be asked to read and confirm the license
agreement (shown on screen – this is required for the installation to
proceed) and to select a destination for the software installation.
• When the actual software installation starts, a second window will open.
Note that this must not be closed during the installation process, other-
wise installation will not be successful.
Finally, a dialog box informs you that the installation was successful.
Please note that the installation routine will take some time to install all
plug-ins and the content files.
•
For each of the available instruments (except D’cota SE), there are au-
dio content folders with specifically designed samples available. Please
note that the audio content takes up about 1 GB of hard disk space.

VST Instruments
1 – 18 Introduction
Make sure that you have enough free hard disk space on your system
partition for the installation procedure.
Make sure to check the DVD for “read first” or “late changes” files.
Please read all such files before launching any of the instruments, since
they may contain late information not included in this manual.
Removing the instruments
To remove the instruments from your computer, delete the respective
files in the vstplugins folder in your system folder.
Things to note
•
The first time you launch HALion SE, Groove Agent SE, Virtual Guitarist
Electric Edition SE, Virtual Bassist SE and The Grand SE, you might
have to specify the path to its content folder on your hard disk (e.g. if
you chose the custom installation). A dialog will be opened where you
can navigate to the desired folder.
•
When you are launching Virtual Guitarist Electric Edition SE for the
first time, the player content may not be localized automatically and
you will get the message “Content not found”. In this case:
1.
Click OK.
The dialog “Please locate the content folder” appears.
2.
Locate and select the folder “Virtual Guitarist EE SE” and click OK.
Under Mac OS X, the path is /Library/Audio/Plug-Ins/VST/VSTi Collection.
3.
In the VST Instrument rack, it now reads “Please reload the plug-in”.
4.
To “re-load” the plug-in, deselect it in the instrument slot (select “No VST
instrument”) and re-select it from the pop-up menu.
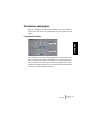
Register your software!
Before getting carried away with the software, which we’re sure you will
do, please take a moment to complete and return the registration card
enclosed with the Studio Case package. This will entitle you to techni-
cal support, and we’ll also keep you up to date with the latest news and
updates.

VST Instruments
Introduction 1 – 19
ENGLISH
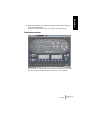
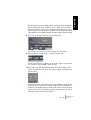
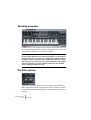
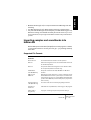
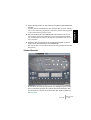
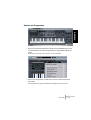
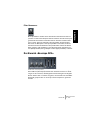
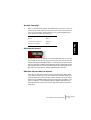
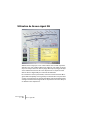
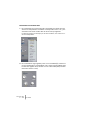
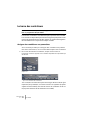
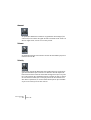
Activating VST instruments in Cubase SE
This section describes how to set up any of the VSTis in Cubase SE.
Make sure Cubase SE has been correctly installed and set up to work
with your MIDI and audio hardware (e.g. a MIDI keyboard and a sound
card).
We’ll show the process of setting up a VSTi instrument using HALion
SE as an example.
1.
In Cubase SE, open the VST Instruments window.
2.
Click the “No VST Instrument” label. In the pop-up menu choose
HALion SE.
3.
Open the HALion SE window by clicking the Edit button (e) in the
VST Instruments window.
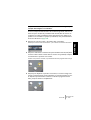
4.
In Cubase SE, select HALion SE as the output for a MIDI track, and
make sure this track is set up to receive MIDI data from your MIDI key-
board and to transmit on channel 1.
5.
HALion SE is now set up properly.
• Please note that for some instruments, you have to choose the content
folder when you launch the instrument for the first time (see page 18).

VST Instruments
1 – 20 Introduction
La page est en cours de chargement...
La page est en cours de chargement...
La page est en cours de chargement...
La page est en cours de chargement...
La page est en cours de chargement...
La page est en cours de chargement...
La page est en cours de chargement...
La page est en cours de chargement...
La page est en cours de chargement...
La page est en cours de chargement...
La page est en cours de chargement...
La page est en cours de chargement...
La page est en cours de chargement...
La page est en cours de chargement...
La page est en cours de chargement...
La page est en cours de chargement...
La page est en cours de chargement...
La page est en cours de chargement...
La page est en cours de chargement...
La page est en cours de chargement...
La page est en cours de chargement...
La page est en cours de chargement...
La page est en cours de chargement...
La page est en cours de chargement...
La page est en cours de chargement...
La page est en cours de chargement...
La page est en cours de chargement...
La page est en cours de chargement...
La page est en cours de chargement...
La page est en cours de chargement...
La page est en cours de chargement...
La page est en cours de chargement...
La page est en cours de chargement...
La page est en cours de chargement...
La page est en cours de chargement...
La page est en cours de chargement...
La page est en cours de chargement...
La page est en cours de chargement...
La page est en cours de chargement...
La page est en cours de chargement...
La page est en cours de chargement...
La page est en cours de chargement...
La page est en cours de chargement...
La page est en cours de chargement...
La page est en cours de chargement...
La page est en cours de chargement...
La page est en cours de chargement...
La page est en cours de chargement...
La page est en cours de chargement...
La page est en cours de chargement...
La page est en cours de chargement...
La page est en cours de chargement...
La page est en cours de chargement...
La page est en cours de chargement...
La page est en cours de chargement...
La page est en cours de chargement...
La page est en cours de chargement...
La page est en cours de chargement...
La page est en cours de chargement...
La page est en cours de chargement...
La page est en cours de chargement...
La page est en cours de chargement...
La page est en cours de chargement...
La page est en cours de chargement...
La page est en cours de chargement...
La page est en cours de chargement...
La page est en cours de chargement...
La page est en cours de chargement...
La page est en cours de chargement...
La page est en cours de chargement...
La page est en cours de chargement...
La page est en cours de chargement...
La page est en cours de chargement...
La page est en cours de chargement...
La page est en cours de chargement...
La page est en cours de chargement...
La page est en cours de chargement...
La page est en cours de chargement...
La page est en cours de chargement...
La page est en cours de chargement...
La page est en cours de chargement...
La page est en cours de chargement...
La page est en cours de chargement...
La page est en cours de chargement...
La page est en cours de chargement...
La page est en cours de chargement...
La page est en cours de chargement...
La page est en cours de chargement...
La page est en cours de chargement...
La page est en cours de chargement...
La page est en cours de chargement...
La page est en cours de chargement...
La page est en cours de chargement...
La page est en cours de chargement...
La page est en cours de chargement...
La page est en cours de chargement...
La page est en cours de chargement...
La page est en cours de chargement...
La page est en cours de chargement...
La page est en cours de chargement...
La page est en cours de chargement...
La page est en cours de chargement...
La page est en cours de chargement...
La page est en cours de chargement...
La page est en cours de chargement...
La page est en cours de chargement...
La page est en cours de chargement...
La page est en cours de chargement...
La page est en cours de chargement...
La page est en cours de chargement...
La page est en cours de chargement...
La page est en cours de chargement...
La page est en cours de chargement...
La page est en cours de chargement...
La page est en cours de chargement...
La page est en cours de chargement...
La page est en cours de chargement...
La page est en cours de chargement...
La page est en cours de chargement...
La page est en cours de chargement...
La page est en cours de chargement...
La page est en cours de chargement...
La page est en cours de chargement...
La page est en cours de chargement...
La page est en cours de chargement...
La page est en cours de chargement...
La page est en cours de chargement...
La page est en cours de chargement...
La page est en cours de chargement...
La page est en cours de chargement...
La page est en cours de chargement...
La page est en cours de chargement...
La page est en cours de chargement...
La page est en cours de chargement...
La page est en cours de chargement...
La page est en cours de chargement...
La page est en cours de chargement...
La page est en cours de chargement...
La page est en cours de chargement...
La page est en cours de chargement...
La page est en cours de chargement...
La page est en cours de chargement...
La page est en cours de chargement...
La page est en cours de chargement...
La page est en cours de chargement...
La page est en cours de chargement...
La page est en cours de chargement...
La page est en cours de chargement...
La page est en cours de chargement...
La page est en cours de chargement...
La page est en cours de chargement...
La page est en cours de chargement...
La page est en cours de chargement...
La page est en cours de chargement...
La page est en cours de chargement...
La page est en cours de chargement...
La page est en cours de chargement...
La page est en cours de chargement...
La page est en cours de chargement...
La page est en cours de chargement...
La page est en cours de chargement...
La page est en cours de chargement...
La page est en cours de chargement...
La page est en cours de chargement...
La page est en cours de chargement...
La page est en cours de chargement...
La page est en cours de chargement...
La page est en cours de chargement...
La page est en cours de chargement...
La page est en cours de chargement...
La page est en cours de chargement...
La page est en cours de chargement...
La page est en cours de chargement...
La page est en cours de chargement...
La page est en cours de chargement...
La page est en cours de chargement...
La page est en cours de chargement...
La page est en cours de chargement...
La page est en cours de chargement...
La page est en cours de chargement...
La page est en cours de chargement...
La page est en cours de chargement...
La page est en cours de chargement...
La page est en cours de chargement...
La page est en cours de chargement...
La page est en cours de chargement...
La page est en cours de chargement...
La page est en cours de chargement...
La page est en cours de chargement...
La page est en cours de chargement...
La page est en cours de chargement...
La page est en cours de chargement...
La page est en cours de chargement...
La page est en cours de chargement...
La page est en cours de chargement...
La page est en cours de chargement...
La page est en cours de chargement...
La page est en cours de chargement...
La page est en cours de chargement...
La page est en cours de chargement...
La page est en cours de chargement...
La page est en cours de chargement...
La page est en cours de chargement...
La page est en cours de chargement...
La page est en cours de chargement...
La page est en cours de chargement...
La page est en cours de chargement...
La page est en cours de chargement...
La page est en cours de chargement...
La page est en cours de chargement...
La page est en cours de chargement...
La page est en cours de chargement...
La page est en cours de chargement...
La page est en cours de chargement...
La page est en cours de chargement...
La page est en cours de chargement...
La page est en cours de chargement...
La page est en cours de chargement...
La page est en cours de chargement...
La page est en cours de chargement...
La page est en cours de chargement...
La page est en cours de chargement...
La page est en cours de chargement...
La page est en cours de chargement...
La page est en cours de chargement...
La page est en cours de chargement...
La page est en cours de chargement...
La page est en cours de chargement...
La page est en cours de chargement...
La page est en cours de chargement...
La page est en cours de chargement...
La page est en cours de chargement...
La page est en cours de chargement...
La page est en cours de chargement...
La page est en cours de chargement...
La page est en cours de chargement...
La page est en cours de chargement...
La page est en cours de chargement...
La page est en cours de chargement...
La page est en cours de chargement...
La page est en cours de chargement...
La page est en cours de chargement...
La page est en cours de chargement...
La page est en cours de chargement...
La page est en cours de chargement...
La page est en cours de chargement...
La page est en cours de chargement...
La page est en cours de chargement...
La page est en cours de chargement...
La page est en cours de chargement...
La page est en cours de chargement...
La page est en cours de chargement...
La page est en cours de chargement...
La page est en cours de chargement...
La page est en cours de chargement...
La page est en cours de chargement...
La page est en cours de chargement...
La page est en cours de chargement...
La page est en cours de chargement...
La page est en cours de chargement...
La page est en cours de chargement...
La page est en cours de chargement...
La page est en cours de chargement...
La page est en cours de chargement...
La page est en cours de chargement...
La page est en cours de chargement...
La page est en cours de chargement...
La page est en cours de chargement...
La page est en cours de chargement...
La page est en cours de chargement...
La page est en cours de chargement...
La page est en cours de chargement...
La page est en cours de chargement...
La page est en cours de chargement...
La page est en cours de chargement...
La page est en cours de chargement...
La page est en cours de chargement...
La page est en cours de chargement...
La page est en cours de chargement...
La page est en cours de chargement...
La page est en cours de chargement...
La page est en cours de chargement...
La page est en cours de chargement...
La page est en cours de chargement...
La page est en cours de chargement...
La page est en cours de chargement...
La page est en cours de chargement...
La page est en cours de chargement...
La page est en cours de chargement...
La page est en cours de chargement...
La page est en cours de chargement...
La page est en cours de chargement...
La page est en cours de chargement...
La page est en cours de chargement...
La page est en cours de chargement...
La page est en cours de chargement...
La page est en cours de chargement...
La page est en cours de chargement...
La page est en cours de chargement...
La page est en cours de chargement...
La page est en cours de chargement...
La page est en cours de chargement...
La page est en cours de chargement...
La page est en cours de chargement...
La page est en cours de chargement...
La page est en cours de chargement...
La page est en cours de chargement...
La page est en cours de chargement...
La page est en cours de chargement...
La page est en cours de chargement...
La page est en cours de chargement...
La page est en cours de chargement...
La page est en cours de chargement...
La page est en cours de chargement...
La page est en cours de chargement...
La page est en cours de chargement...
La page est en cours de chargement...
La page est en cours de chargement...
La page est en cours de chargement...
La page est en cours de chargement...
La page est en cours de chargement...
La page est en cours de chargement...
La page est en cours de chargement...
La page est en cours de chargement...
La page est en cours de chargement...
La page est en cours de chargement...
La page est en cours de chargement...
La page est en cours de chargement...
La page est en cours de chargement...
La page est en cours de chargement...
La page est en cours de chargement...
La page est en cours de chargement...
La page est en cours de chargement...
La page est en cours de chargement...
La page est en cours de chargement...
La page est en cours de chargement...
La page est en cours de chargement...
La page est en cours de chargement...
La page est en cours de chargement...
La page est en cours de chargement...
La page est en cours de chargement...
La page est en cours de chargement...
La page est en cours de chargement...
La page est en cours de chargement...
La page est en cours de chargement...
La page est en cours de chargement...
La page est en cours de chargement...
La page est en cours de chargement...
La page est en cours de chargement...
La page est en cours de chargement...
La page est en cours de chargement...
La page est en cours de chargement...
La page est en cours de chargement...
La page est en cours de chargement...
La page est en cours de chargement...
La page est en cours de chargement...
La page est en cours de chargement...
La page est en cours de chargement...
La page est en cours de chargement...
La page est en cours de chargement...
La page est en cours de chargement...
La page est en cours de chargement...
La page est en cours de chargement...
La page est en cours de chargement...
La page est en cours de chargement...
La page est en cours de chargement...
La page est en cours de chargement...
La page est en cours de chargement...
La page est en cours de chargement...
La page est en cours de chargement...
La page est en cours de chargement...
La page est en cours de chargement...
La page est en cours de chargement...
La page est en cours de chargement...
La page est en cours de chargement...
La page est en cours de chargement...
La page est en cours de chargement...
La page est en cours de chargement...
La page est en cours de chargement...
La page est en cours de chargement...
La page est en cours de chargement...
La page est en cours de chargement...
La page est en cours de chargement...
La page est en cours de chargement...
La page est en cours de chargement...
La page est en cours de chargement...
La page est en cours de chargement...
La page est en cours de chargement...
La page est en cours de chargement...
La page est en cours de chargement...
La page est en cours de chargement...
La page est en cours de chargement...
La page est en cours de chargement...
La page est en cours de chargement...
La page est en cours de chargement...
La page est en cours de chargement...
La page est en cours de chargement...
La page est en cours de chargement...
La page est en cours de chargement...
La page est en cours de chargement...
La page est en cours de chargement...
La page est en cours de chargement...
La page est en cours de chargement...
La page est en cours de chargement...
La page est en cours de chargement...
La page est en cours de chargement...
La page est en cours de chargement...
La page est en cours de chargement...
La page est en cours de chargement...
La page est en cours de chargement...
La page est en cours de chargement...
La page est en cours de chargement...
La page est en cours de chargement...
La page est en cours de chargement...
La page est en cours de chargement...
La page est en cours de chargement...
La page est en cours de chargement...
La page est en cours de chargement...
La page est en cours de chargement...
La page est en cours de chargement...
La page est en cours de chargement...
La page est en cours de chargement...
La page est en cours de chargement...
La page est en cours de chargement...
La page est en cours de chargement...
La page est en cours de chargement...
La page est en cours de chargement...
La page est en cours de chargement...
La page est en cours de chargement...
La page est en cours de chargement...
La page est en cours de chargement...
La page est en cours de chargement...
La page est en cours de chargement...
La page est en cours de chargement...
La page est en cours de chargement...
La page est en cours de chargement...
La page est en cours de chargement...
La page est en cours de chargement...
La page est en cours de chargement...
La page est en cours de chargement...
La page est en cours de chargement...
La page est en cours de chargement...
La page est en cours de chargement...
La page est en cours de chargement...
La page est en cours de chargement...
La page est en cours de chargement...
La page est en cours de chargement...
La page est en cours de chargement...
La page est en cours de chargement...
La page est en cours de chargement...
La page est en cours de chargement...
La page est en cours de chargement...
La page est en cours de chargement...
La page est en cours de chargement...
La page est en cours de chargement...
La page est en cours de chargement...
La page est en cours de chargement...
La page est en cours de chargement...
-
 1
1
-
 2
2
-
 3
3
-
 4
4
-
 5
5
-
 6
6
-
 7
7
-
 8
8
-
 9
9
-
 10
10
-
 11
11
-
 12
12
-
 13
13
-
 14
14
-
 15
15
-
 16
16
-
 17
17
-
 18
18
-
 19
19
-
 20
20
-
 21
21
-
 22
22
-
 23
23
-
 24
24
-
 25
25
-
 26
26
-
 27
27
-
 28
28
-
 29
29
-
 30
30
-
 31
31
-
 32
32
-
 33
33
-
 34
34
-
 35
35
-
 36
36
-
 37
37
-
 38
38
-
 39
39
-
 40
40
-
 41
41
-
 42
42
-
 43
43
-
 44
44
-
 45
45
-
 46
46
-
 47
47
-
 48
48
-
 49
49
-
 50
50
-
 51
51
-
 52
52
-
 53
53
-
 54
54
-
 55
55
-
 56
56
-
 57
57
-
 58
58
-
 59
59
-
 60
60
-
 61
61
-
 62
62
-
 63
63
-
 64
64
-
 65
65
-
 66
66
-
 67
67
-
 68
68
-
 69
69
-
 70
70
-
 71
71
-
 72
72
-
 73
73
-
 74
74
-
 75
75
-
 76
76
-
 77
77
-
 78
78
-
 79
79
-
 80
80
-
 81
81
-
 82
82
-
 83
83
-
 84
84
-
 85
85
-
 86
86
-
 87
87
-
 88
88
-
 89
89
-
 90
90
-
 91
91
-
 92
92
-
 93
93
-
 94
94
-
 95
95
-
 96
96
-
 97
97
-
 98
98
-
 99
99
-
 100
100
-
 101
101
-
 102
102
-
 103
103
-
 104
104
-
 105
105
-
 106
106
-
 107
107
-
 108
108
-
 109
109
-
 110
110
-
 111
111
-
 112
112
-
 113
113
-
 114
114
-
 115
115
-
 116
116
-
 117
117
-
 118
118
-
 119
119
-
 120
120
-
 121
121
-
 122
122
-
 123
123
-
 124
124
-
 125
125
-
 126
126
-
 127
127
-
 128
128
-
 129
129
-
 130
130
-
 131
131
-
 132
132
-
 133
133
-
 134
134
-
 135
135
-
 136
136
-
 137
137
-
 138
138
-
 139
139
-
 140
140
-
 141
141
-
 142
142
-
 143
143
-
 144
144
-
 145
145
-
 146
146
-
 147
147
-
 148
148
-
 149
149
-
 150
150
-
 151
151
-
 152
152
-
 153
153
-
 154
154
-
 155
155
-
 156
156
-
 157
157
-
 158
158
-
 159
159
-
 160
160
-
 161
161
-
 162
162
-
 163
163
-
 164
164
-
 165
165
-
 166
166
-
 167
167
-
 168
168
-
 169
169
-
 170
170
-
 171
171
-
 172
172
-
 173
173
-
 174
174
-
 175
175
-
 176
176
-
 177
177
-
 178
178
-
 179
179
-
 180
180
-
 181
181
-
 182
182
-
 183
183
-
 184
184
-
 185
185
-
 186
186
-
 187
187
-
 188
188
-
 189
189
-
 190
190
-
 191
191
-
 192
192
-
 193
193
-
 194
194
-
 195
195
-
 196
196
-
 197
197
-
 198
198
-
 199
199
-
 200
200
-
 201
201
-
 202
202
-
 203
203
-
 204
204
-
 205
205
-
 206
206
-
 207
207
-
 208
208
-
 209
209
-
 210
210
-
 211
211
-
 212
212
-
 213
213
-
 214
214
-
 215
215
-
 216
216
-
 217
217
-
 218
218
-
 219
219
-
 220
220
-
 221
221
-
 222
222
-
 223
223
-
 224
224
-
 225
225
-
 226
226
-
 227
227
-
 228
228
-
 229
229
-
 230
230
-
 231
231
-
 232
232
-
 233
233
-
 234
234
-
 235
235
-
 236
236
-
 237
237
-
 238
238
-
 239
239
-
 240
240
-
 241
241
-
 242
242
-
 243
243
-
 244
244
-
 245
245
-
 246
246
-
 247
247
-
 248
248
-
 249
249
-
 250
250
-
 251
251
-
 252
252
-
 253
253
-
 254
254
-
 255
255
-
 256
256
-
 257
257
-
 258
258
-
 259
259
-
 260
260
-
 261
261
-
 262
262
-
 263
263
-
 264
264
-
 265
265
-
 266
266
-
 267
267
-
 268
268
-
 269
269
-
 270
270
-
 271
271
-
 272
272
-
 273
273
-
 274
274
-
 275
275
-
 276
276
-
 277
277
-
 278
278
-
 279
279
-
 280
280
-
 281
281
-
 282
282
-
 283
283
-
 284
284
-
 285
285
-
 286
286
-
 287
287
-
 288
288
-
 289
289
-
 290
290
-
 291
291
-
 292
292
-
 293
293
-
 294
294
-
 295
295
-
 296
296
-
 297
297
-
 298
298
-
 299
299
-
 300
300
-
 301
301
-
 302
302
-
 303
303
-
 304
304
-
 305
305
-
 306
306
-
 307
307
-
 308
308
-
 309
309
-
 310
310
-
 311
311
-
 312
312
-
 313
313
-
 314
314
-
 315
315
-
 316
316
-
 317
317
-
 318
318
-
 319
319
-
 320
320
-
 321
321
-
 322
322
-
 323
323
-
 324
324
-
 325
325
-
 326
326
-
 327
327
-
 328
328
-
 329
329
-
 330
330
-
 331
331
-
 332
332
-
 333
333
-
 334
334
-
 335
335
-
 336
336
-
 337
337
-
 338
338
-
 339
339
-
 340
340
-
 341
341
-
 342
342
-
 343
343
-
 344
344
-
 345
345
-
 346
346
-
 347
347
-
 348
348
-
 349
349
-
 350
350
-
 351
351
-
 352
352
-
 353
353
-
 354
354
-
 355
355
-
 356
356
-
 357
357
-
 358
358
-
 359
359
-
 360
360
-
 361
361
-
 362
362
-
 363
363
-
 364
364
-
 365
365
-
 366
366
-
 367
367
-
 368
368
-
 369
369
-
 370
370
-
 371
371
-
 372
372
-
 373
373
-
 374
374
-
 375
375
-
 376
376
-
 377
377
-
 378
378
-
 379
379
-
 380
380
-
 381
381
-
 382
382
-
 383
383
-
 384
384
-
 385
385
-
 386
386
-
 387
387
-
 388
388
-
 389
389
-
 390
390
-
 391
391
-
 392
392
-
 393
393
-
 394
394
-
 395
395
-
 396
396
-
 397
397
-
 398
398
-
 399
399
-
 400
400
-
 401
401
-
 402
402
-
 403
403
-
 404
404
-
 405
405
-
 406
406
-
 407
407
-
 408
408
-
 409
409
-
 410
410
-
 411
411
-
 412
412
-
 413
413
-
 414
414
-
 415
415
-
 416
416
-
 417
417
-
 418
418
-
 419
419
-
 420
420
-
 421
421
-
 422
422
-
 423
423
-
 424
424
-
 425
425
-
 426
426
-
 427
427
-
 428
428
-
 429
429
-
 430
430
-
 431
431
-
 432
432
-
 433
433
-
 434
434
-
 435
435
-
 436
436
-
 437
437
-
 438
438
-
 439
439
-
 440
440
-
 441
441
-
 442
442
-
 443
443
-
 444
444
-
 445
445
-
 446
446
-
 447
447
-
 448
448
-
 449
449
-
 450
450
-
 451
451
-
 452
452
-
 453
453
-
 454
454
-
 455
455
-
 456
456
-
 457
457
-
 458
458
-
 459
459
-
 460
460
-
 461
461
-
 462
462
-
 463
463
-
 464
464
-
 465
465
-
 466
466
-
 467
467
-
 468
468
-
 469
469
-
 470
470
-
 471
471
-
 472
472
-
 473
473
-
 474
474
-
 475
475
-
 476
476
-
 477
477
-
 478
478


Steinberg VST Instruments Studio Case II Mode d'emploi
- Taper
- Mode d'emploi
dans d''autres langues
Documents connexes
-
Steinberg HALion 5 Manuel utilisateur
-
-
-
-
-
-
-
-
-
Autres documents
-
Roland SYSTEM-1 Le manuel du propriétaire
-
Novation Launchpad S Control Pack Mode d'emploi
-
Miditech i^2 Control-61 Le manuel du propriétaire
-
Zoom ST-224 Le manuel du propriétaire
-
Yamaha W7 Le manuel du propriétaire
-
Novation FLkey 37 Mode d'emploi
-
-
Novation UltraNova Mode d'emploi
-
PG Music Band-in-a-Box 2023 for Windows Mode d'emploi
-
Korg opsix Le manuel du propriétaire