Getting Started
14 - English
To determine whether your television is
compatible, follow the instructions below.
1. Switch your television on.
2. Point the remote control towards the television.
3. Press and hold the TV STANDBY/ON button and
enter the two-figure code corresponding to the
brand of your television, by pressing the
appropriate number buttons.
Controllable TV Codes
Result: If your television is compatible with the
remote control, it will switch off.
It is now programmed to operate with the
remote control.
Then you can control the television using the following
buttons after pressing the TV button.
Button Function
TV STANDBY/ON Used to switch the television on and off.
INPUT SEL. Used to select an external source.
VOL (+ –) Used to adjust the volume of the television.
PROG ( ) Used to select the desired channel.
TV MUTE Used to toggle the sound on and off.
Number Used to input number directly.
■
The functions listed above will not necessarily
work on all televisions. If you encounter
problems, operate the television directly.
NOTE
■
If several codes are indicated for your
television brand, try each one in turn until
you find one that works.
■
If you replace the remote control's
batteries, you must set the brand code
again.
NOTE
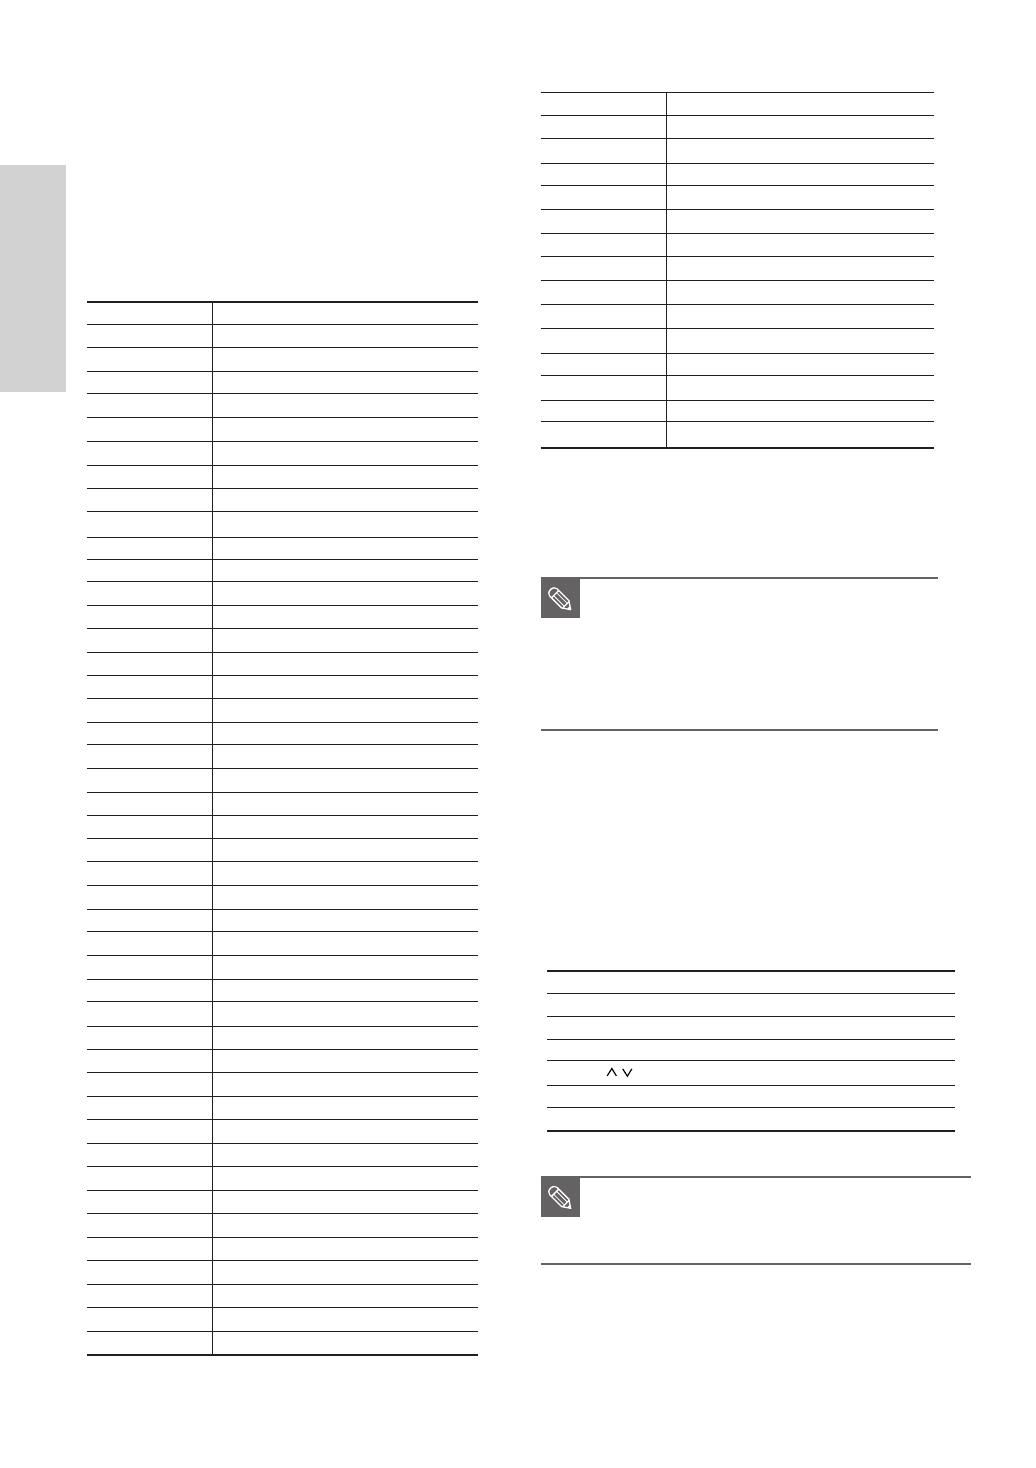
BRAND BUTTON
SAMSUNG 01, 02, 03, 04, 05, 06, 07, 08, 09
AIWA 82
ANAM 10, 11, 12, 13, 14, 15, 16, 17, 18
BANG & OLUFSEN 57
BLAUPUNKT 71
BRANDT 73
BRIONVEGA 57
CGE 52
CONTINENTAL EDISON 75
DAEWOO
19, 20, 23, 24, 25, 26, 27, 28, 29, 30, 31, 32, 33, 34
EMERSON 64
FERGUSON 73
FINLUX 06, 49, 57
FORMENTI 57
FUJITSU 84
GRADIENTE 70
GRUNDIG 49, 52, 71
HITACHI 60, 72, 73, 75
IMPERIAL 52
JVC 61, 79
LG 06, 19, 20, 21, 22, 78
LOEWE 06, 69
LOEWE OPTA 06, 57
MAGNAVOX 40
METZ 57
MITSUBISHI 06, 48, 62, 65
MIVAR 52, 77
NEC 83
NEWSAN 68
NOBLEX 66
NOKIA 74
NORDMENDE 72, 73, 75
PANASONIC 53, 54, 74, 75
PHILIPS 06, 55, 56, 57
PHONOLA 06, 56, 57
PIONEER 58, 59, 73, 74
RADIOLA 06, 56
RADIOMARELLI 57
RCA 45, 46
REX 74
SABA 57, 72, 73, 74, 75
SALORA 74
SANYO 41, 42, 43, 44, 48
SCHNEIDER 06
BRAND BUTTON
SELECO 74
SHARP 36, 37, 38, 39, 48
SIEMENS 71
SINGER 57
SINUDYNE 57
SONY 35, 48
TELEAVA 73
TELEFUNKEN 67, 73, 75, 76
THOMSON 72, 73, 75
THOMSON ASIA 80, 81
TOSHIBA 47, 48, 49, 50, 51, 52
WEGA 57
YOKO 06
ZENITH 63
01111C_HR733_XEB-ENG_01~59 6/15/06 5:59 PM Page 14


