
1
OWNER’S MANUAL
AND INSTALLATION INSTRUCTIONS
State-of-the-art LIGHT & SOUND
One complete system that installs in minutes!
User guide 2
Bedienungsanleitung 30
Gebruiksaanwijzing 58
Användermanual 86
Guide utilisateur 114
Guía del usuario 142
Manual do utilizador 170
Manuale per l’utente 198
One complete system
m
that
installs
in
m
i
tem

2
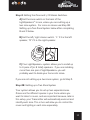
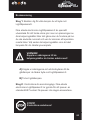
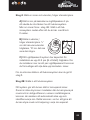
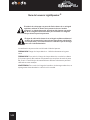
The lightning flash with arrowhead symbol, within an equilateral
triangle, is intended to alert the user to the presence of
uninsulated “dangerous voltage” within the product’s enclosure
that may be of sufficient magnitude to constitute a risk of electric
shock to persons.
The exclamation point within an equilateral triangle is intended
to alert the user to the presence of important operating and
maintenance (servicing) instructions in the literature
accompanying the appliance.
Caution marking is located at the side of the apparatus.
CAUTION: Risk of Electrical Shock - Use in Dry Locations Only
CAUTION: To reduce the risk of electric shock, do not remove cover (or back).
No user servicable parts – refer servicing to qualified service personnel only.
WARNING: To reduce the risk of fire or electric shock, do not expose this
apparatus to rain or moisture.
User Guide LightSpeaker
®

3
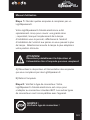
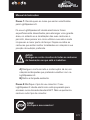
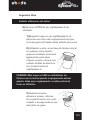
IMPORTANT SAFETY INSTRUCTIONS
1. Read these instructions. Keep these instructions. Heed all Warnings. Follow
all instructions.
2. Do not use this apparatus near water. The apparatus shall not be exposed
to dripping or splashing and that no objects filled with liquids, such as vases,
shall be placed on apparatus.
3. Clean only with a dry cloth.
4. Do not block any ventilation openings. Install in accordance with the
manufacturer’s instructions.
5. Do not install near any heat sources such as radiators, heat registers, stoves,
or other apparatus (including amplifiers) that produce heat.
6. The lamp holder is used as disconnect device. The lamp holder of apparatus
should not be obstructed OR should be easily accessed during intended use.
To completely disconnect the power input, the lamp holder of the apparatus
shall be disconnected from the mains.
7. Only use attachments/accessories specified by the manufacturer.
8. Refer all servicing to qualified service personnel. Servicing is required when
the apparatus has been damaged in any way, such as power-supply cord
or plug is damaged, liquid has been spilled or objects have fallen into the
apparatus, the apparatus has been exposed to rain or moisture, does not
operate normally, or has been dropped.
9. Added weight of the device may cause instability of a free-standing lamp.
10. This device is not intended for use with emergency exit fixtures or
emergency exit lights
11. NOT FOR USE WHERE EXPOSED TO THE WEATHER
12. NOT FOR USE IN TOTALLY ENCLOSED RECESSED LUMINAIRES

4
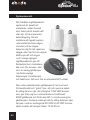
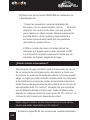
Congratulations
Thank you for choosing a LightSpeaker
®
from ebode
electronics. You have chosen one of the most unique,
patented, audio systems in the world. With proper
installation and operation, you will enjoy years of trouble-
free use. ebode electronics sells numerous products for
use inside or outside your home. To see the complete
ebode electronics product assortment, visit us on the
internet at: www.ebodeelectronics.eu.

5
Table of Contents
System Overview....................................................................................6
What is in this box................................................................................8
Step 1 - Where will you install.........................................................9
Step 2 - Check your connector type...........................................9
Step 3 - Fit your LightSpeaker
®
..................................................10
Step 4 - Setting the zone and stereo switches...................11
Step 5 - Pairing....................................................................................14
Step 6 - Plug in your sources......................................................15
Step 7 - Enjoy your LightSpeakers
®
.........................................16
Operating the transmitter & remote control.......................17
Helpful hints...........................................................................................19
Where to put the transmitter.....................................................20
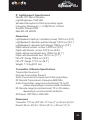
Specifications.......................................................................................23
Possible causes of interference.................................................26
Troubleshooting the remote.........................................................27
Warranty...............................................................................................28
Questions?............................................................................................29
CE Declaration...................................................................................226
Technical Support Information...................................Back Cover

6
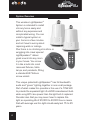
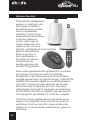
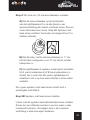
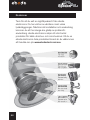
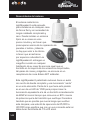
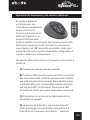
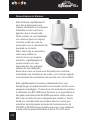
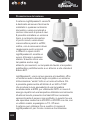
System Overview
This wireless LightSpeaker
®
System is intended to install
into any home easily and
without any expensive and
complicated wiring. You can
install a typical system in
your home in a few minutes
and not have to worry about
repairing walls or ceilings.
Plus there is no climbing into attics or
wriggling into crawl spaces!
LightSpeakers
®
deliver
great sound into any room
in your house. You screw
it in like a bulb into most
recessed fixtures, table
lamps, and pendants, fitting
a standard E27 Edison
screw socket.
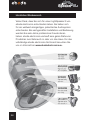
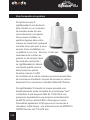
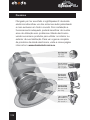
This unique patented LightSpeaker
®
has full bandwidth
audio and “green” lighting together in one small package.
Part of what makes this possible is the use of a 10W LED
to provide the equivalent light of a 60W incandescent bulb
while using 80% less power than the light bulb it replaced.
Consider also that you may never have to replace this
light; an operating life of 25,000 to 40,000 hours means
that with average use this light should easily last 15 to 25
years.

7
Your system can use up to 4 pairs of LightSpeakers
®
to provide audio and lighting to your entire home. You
can even divide your home into two unique areas where
different music sources, sound and lighting control allow
you to add music with integrated “green” lighting to places
you only dreamed of having it before.
There’s no wiring and no big (or small) speaker boxes.
The wireless transmitter can be centrally located which
will provide audio and, together with the remote, allow you
to control your LightSpeakers
®
from anywhere in your
home. The RF remote and the transmitter base station
will control which source you listen to in a room as well as
the level of the sound and the brightness of the light; this
can be done from anywhere in the house, you don’t need
to be near the transmitter.
Plug two separate audio sources into your transmitter
and deliver the music from your AM/FM Radio, TV or
MP3, or any audio source, to any room in your house.
To expand your system, additional LightSpeakers
®
are
available from your local dealer.
This incredible patented system provides even greater
flexibility to you as the owner; since you can take this
system with you if you move; and when you do, it leaves no
trace (holes that need to be covered) that the system was
ever installed and used.
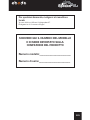
Please take a few moments to copy down the serial
number and model number found on the side of
your product box or on the product itself onto the
‘Questions’ page at the end of this manual.

8
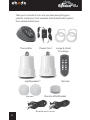
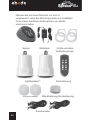
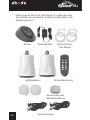
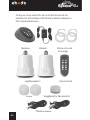
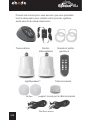
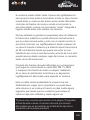
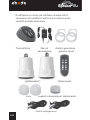
Take just a minute to be sure you have everything you
need to install your first wireless distributed audio system
from ebode electronics.
Transmitter Power Cord Large & Small
Trim Rings
LightSpeakers
®
, Remote
Lenses Remote Wall Bracket
Attachment Cords
A h

9
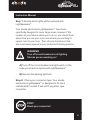
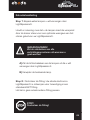
Instruction Manual
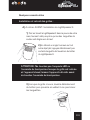
Step 1:
Decide which lights will be replaced with
LightSpeakers
®
.
Your
ebode electronics
LightSpeakers
®
have been
specifically designed to cover large areas, however if the
location of your fixtures allow you to do so, you should think
about how you use your room and where you are likely to
spend most of your time. Then choose the fixtures that
are most evenly spaced to your preferred listening position.
A) Turn off the circuit breaker and light switch, to the
bulbs you intend to replace with LightSpeakers
®
.
B) Remove the existing light bulb.
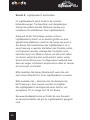
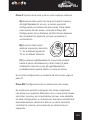
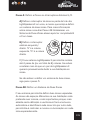
Step 2: Check your connector type. Your ebode
electronics
LightSpeaker
®
is designed to fit into a
standard E27 socket. It will not fit any other type
connector.
WARNING!
Turn off circuit breakers to all lighting
fixtures you are working on!
STOP!
Check your connector!

10
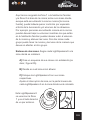
Step 3: Fit your LightSpeaker
®
.
Your LightSpeaker
®
is designed to fit directly into most
recessed fixtures, table lamps and pendants by simply
removing the existing light and, in the same manner as a
light bulb, re-installing your LightSpeaker
®
in its place.
Because of all the technology packed into LightSpeaker,
it is much larger than a normal light bulb, both in length
and width. The best way to use Lightspeaker is in a fitting
where you cannot actually see the sides of the product at
all. As long as the front grille is unrestricted so you can
hear the music and see the light, you do not really want
to see where the sound and light comes from. In general
this means that the ideal is a long, slim lampshade rather
than one short and wide.
Please give this some thought when choosing a fitting for
your LightSpeaker.
Please note - between the front edge of the E27 socket in
your fitting and the front Grille of LightSpeaker you need
to have a shade/fitting that will be at least 15 cm long
and 14 cm wide
At www.ebodeelectronics.eu you can find a selection of
lampmodels that will work with LightSpeaker

11
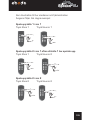
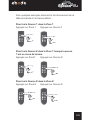
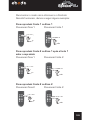
Step 4: Setting the Zone and L/R Stereo Switches.
A) Set the zone switch on the back of the
LightSpeakers
®
to one, unless you are setting up a
two zone system. For more on zones see Step 4B:
Setting up a Two Zone System below after completing
B and C below.
B) Set the left/right stereo switch. “L” if it is the left
speaker, “R” if it is the right speaker.
C) Your LightSpeaker
®
system allows you to install up
to 4 pairs of (or 8 total) speakers. If you are installing
more than one pair of LightSpeakers
®
you will
probably want to divide your home into zones.
If you are not setting up a two zone system, go to Step 5.
Step 4B: Setting up a Two Zone System
Your system allows you to set up two separate zones.
Zones are the different spaces in your home where you
want to listen to music, and are important because, later in
this setup, your Transmitter will automatically seek out and
identify each zone. This in turn will allow you to control the
music and lighting in each zone separately.

12
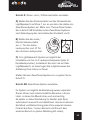
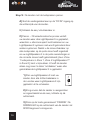
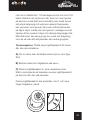
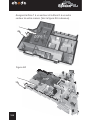
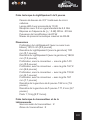
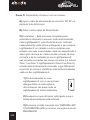
Assign Zone 1 to one area and Zone 2 to the other
unique area. (See below figure 2A)
Figure 2A

13
Here we have assigned Zone 1 to the family room, and
Zone 2 to the kitchen area; these are areas where, even
though you are listening to the same music (the same
source), you may still want to control lighting brightness
and speaker volume separately. For example persons
listening to music in the kitchen may want to turn the
music volume lower while those in the family room may
want the turn the music louder and dim the lights. With
two zones each group can have the music and lights the
way they want them without affecting the other group.
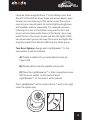
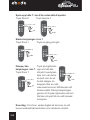
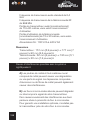
Two-Zone System: Assign each LightSpeaker
®
to the
zone where it will be installed.
A) Create a sketch of your anticipated zones (ie.
Figure 2A).
B) Decide what zone the speaker will go into.
C) Place the LightSpeakers
®
in their respective zones.
Set the zone switch, on the back of each
LightSpeaker
®
, to the zone it will be placed.
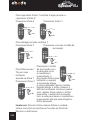
This LightSpeaker
®
will be used in Zone 1 and is the right
side of a stereo pair.

14
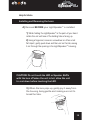
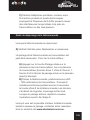
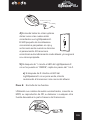
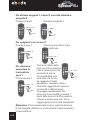
Step 5: Pairing The Transmitter to the speakers
A) Attach the power cord at the “DC IN” connector on
the back of the Transmitter.
B) Turn on the Power Switch.
C) Pairing - This fully automated process will tell the
transmitter where each LightSpeaker
®
is located,
allow you to control each zone separately and make
your LightSpeaker
®
system secure from other nearby
systems. After you have set the zone switch on each
speaker to the correct zone and you have installed
your light speakers into the correct sockets in the
correct zones (i.e. Zone 1 speakers in Zone 1, Zone 2
LightSpeakers™ in Zone 2) the job is nearly finished all
that remains is allowing the transmitter discover where
each of the installed LightSpeakers
®
is located.
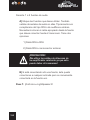
1) To pair your LightSpeakers
®
to your
transmitter, turn off all of the light switches in the
areas where LightSpeakers
®
are located.
2) Be sure Transmitter is plugged in and the
power button is on.
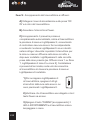
3) Push the button marked “PAIRING”. The PAIRING
LED on the transmitter will begin flashing RED.

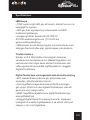
15
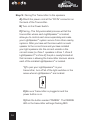
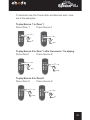
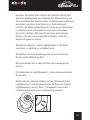
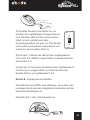
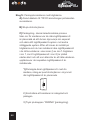
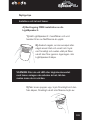
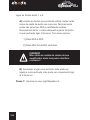
4) Turn on all light switches that your LightSpeakers
®
are connected to. The Small LED
light on the speakers will begin
to flash red and will turn green
when the pairing is complete. The
transmitter will automatically find
each speaker and assign it to its
proper zone.
5) If after 1 minute the LED on the LightSpeaker
®
has not turned “GREEN”, repeat steps 1-4.
a) If after 2 attempts the LED on the
LightSpeaker
®
fails to turn green, try
relocating the Transmitter closer to the
LightSpeaker
®
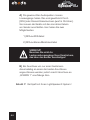
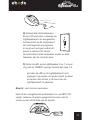
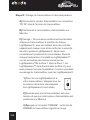
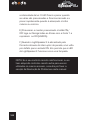
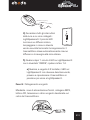
Step 6: Plugging in your sources.
Using the supplied audio cords, plug your MP3, CD Player,
television or other desired sources to the back of the
transmitter.
Attach 1 or 2 audio sources.
LED Blinks during pairing.
MP3

16
A) Locate the sources you want to use. They will have
audio level outputs on them. Typically these are RCA
or stereo headphone type jacks. You will need to have
the proper cable from the source you want to attach
to the Transmitter. You have two choices:
1) RCA to RCA cable
2) RCA to Stereo Mini Plug Cable
B) If you are attaching only one source it may be
attached to either input but may be convenient to
attach to source one.
Step 7: Enjoy your LightSpeakers
®
!
CAUTION!
Do not use the speaker outputs from
your existing amplifier as this can
damage the transmitter!

17
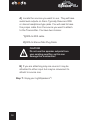
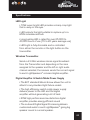
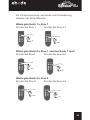
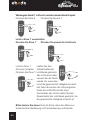
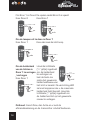
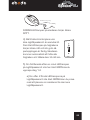
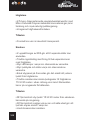
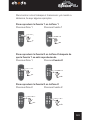
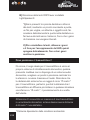
Operating the Transmitter and Remote Control:
The remote control and
the transmitter are
controlled in exactly the
same manner.
When you push a button
on the transmitter the
small LED next to the
button will light up and remain lit until you push another
button affecting either that zone or that source. The
LEDs that are lit will tell what action the remote or
transmitter is currently set to control.
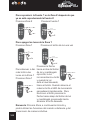
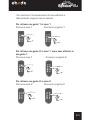
Here are the steps to take to operate the Transmitter
and Remote Control:
A) Press the zone you want to control
B) When the LED next to the button lights, that zone
is active and will be playing the source that is currently
lit. To change to a different source simply press the
source with the “unlit” LED until the LED next to the
source you are choosing lights.
C) Pressing Light once makes the light go On/Off
D) Pressing the + arrow above the light “on” button
will increase the brightness of the light. Pressing the
“-” arrow below the light on/off button will dim the
light. The LED will flash when the arrows are pushed
and will turn red and flash quickly when either the
maximum or minimum brightness is reached.

18
E) Pressing and holding the ON/OFF button turns ON
or OFF all Zones with source 1 playing if turned ON.
F) When Power is applied to a LightSpeaker
®
by the
wall switch the light defaults to the ON state. This
allows the LightSpeaker’s LED to function like a light
bulb.
NOTE: If your remote does not operate, or you have
purchased additional remotes to be used with the
same transmitter, please see the Trouble shooting
section in this manual.

19
Helpful Hints
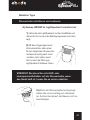
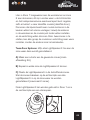
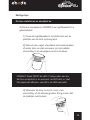
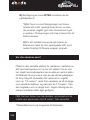
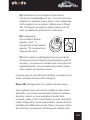
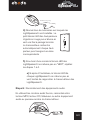
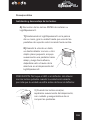
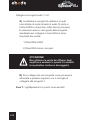
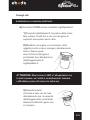
Installing and Removing the Lens:
A) Removal BEFORE your LightSpeaker
®
is installed.
1) While holding the LightSpeaker
®
in the palm of your hand
rotate the unit until one of the holding tabs is facing up.
2) Using a fingernail, common screwdriver or other small
flat object, gently push down and then out on the tab, easing
it out through the opening in the
LightSpeaker
®
housing.
3) When the lens pops up, gently pry it away from
the housing, being gentle and making sure not to
break the tabs.
CAUTION: Do not touch the LED or Speaker Baffle
with the lens off when the unit is hot, allow the unit
to cool down before touching the LED.

20
B) Removal of the lens AFTER your LightSpeaker
®
has
been installed.
1) There are three small indentations around the
lens; with a small tip common screwdriver, nail file,
paper clip or similar object, gently slip the tip into
the indentation and pry the lens outward until the
retaining tabs pull free.
2) To re-install the lens, align the tabs and the
hole for the pairing LED, then push gently until the
locking tabs snap into place.
More Ab
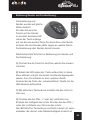
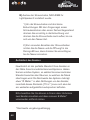
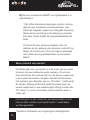
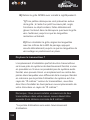
Where to put the transmitter?
Typically, the perfect place for your transmitter is near
your home entertainment system, if you have one. If you
don’t have a home audio system then you can chose
a place that is centrally located to the rooms you will
be transmitting the audio to. Remember the range of
the system is approximately 15 meter* radius circle
of the transmitter, so as long as the distance from the
transmitter to the farthest speaker in any direction is less
than 15 meters*, the placement of the transmitter is up
to you.
Note: There is a maximum of two transmitters in one
home and they need to be 8 meters* apart.
*Range depending on environmental conditions.
La page est en cours de chargement...
La page est en cours de chargement...
La page est en cours de chargement...
La page est en cours de chargement...
La page est en cours de chargement...
La page est en cours de chargement...
La page est en cours de chargement...
La page est en cours de chargement...
La page est en cours de chargement...
La page est en cours de chargement...
La page est en cours de chargement...
La page est en cours de chargement...
La page est en cours de chargement...
La page est en cours de chargement...
La page est en cours de chargement...
La page est en cours de chargement...
La page est en cours de chargement...
La page est en cours de chargement...
La page est en cours de chargement...
La page est en cours de chargement...
La page est en cours de chargement...
La page est en cours de chargement...
La page est en cours de chargement...
La page est en cours de chargement...
La page est en cours de chargement...
La page est en cours de chargement...
La page est en cours de chargement...
La page est en cours de chargement...
La page est en cours de chargement...
La page est en cours de chargement...
La page est en cours de chargement...
La page est en cours de chargement...
La page est en cours de chargement...
La page est en cours de chargement...
La page est en cours de chargement...
La page est en cours de chargement...
La page est en cours de chargement...
La page est en cours de chargement...
La page est en cours de chargement...
La page est en cours de chargement...
La page est en cours de chargement...
La page est en cours de chargement...
La page est en cours de chargement...
La page est en cours de chargement...
La page est en cours de chargement...
La page est en cours de chargement...
La page est en cours de chargement...
La page est en cours de chargement...
La page est en cours de chargement...
La page est en cours de chargement...
La page est en cours de chargement...
La page est en cours de chargement...
La page est en cours de chargement...
La page est en cours de chargement...
La page est en cours de chargement...
La page est en cours de chargement...
La page est en cours de chargement...
La page est en cours de chargement...
La page est en cours de chargement...
La page est en cours de chargement...
La page est en cours de chargement...
La page est en cours de chargement...
La page est en cours de chargement...
La page est en cours de chargement...
La page est en cours de chargement...
La page est en cours de chargement...
La page est en cours de chargement...
La page est en cours de chargement...
La page est en cours de chargement...
La page est en cours de chargement...
La page est en cours de chargement...
La page est en cours de chargement...
La page est en cours de chargement...
La page est en cours de chargement...
La page est en cours de chargement...
La page est en cours de chargement...
La page est en cours de chargement...
La page est en cours de chargement...
La page est en cours de chargement...
La page est en cours de chargement...
La page est en cours de chargement...
La page est en cours de chargement...
La page est en cours de chargement...
La page est en cours de chargement...
La page est en cours de chargement...
La page est en cours de chargement...
La page est en cours de chargement...
La page est en cours de chargement...
La page est en cours de chargement...
La page est en cours de chargement...
La page est en cours de chargement...
La page est en cours de chargement...
La page est en cours de chargement...
La page est en cours de chargement...
La page est en cours de chargement...
La page est en cours de chargement...
La page est en cours de chargement...
La page est en cours de chargement...
La page est en cours de chargement...
La page est en cours de chargement...
La page est en cours de chargement...
La page est en cours de chargement...
La page est en cours de chargement...
La page est en cours de chargement...
La page est en cours de chargement...
La page est en cours de chargement...
La page est en cours de chargement...
La page est en cours de chargement...
La page est en cours de chargement...
La page est en cours de chargement...
La page est en cours de chargement...
La page est en cours de chargement...
La page est en cours de chargement...
La page est en cours de chargement...
La page est en cours de chargement...
La page est en cours de chargement...
La page est en cours de chargement...
La page est en cours de chargement...
La page est en cours de chargement...
La page est en cours de chargement...
La page est en cours de chargement...
La page est en cours de chargement...
La page est en cours de chargement...
La page est en cours de chargement...
La page est en cours de chargement...
La page est en cours de chargement...
La page est en cours de chargement...
La page est en cours de chargement...
La page est en cours de chargement...
La page est en cours de chargement...
La page est en cours de chargement...
La page est en cours de chargement...
La page est en cours de chargement...
La page est en cours de chargement...
La page est en cours de chargement...
La page est en cours de chargement...
La page est en cours de chargement...
La page est en cours de chargement...
La page est en cours de chargement...
La page est en cours de chargement...
La page est en cours de chargement...
La page est en cours de chargement...
La page est en cours de chargement...
La page est en cours de chargement...
La page est en cours de chargement...
La page est en cours de chargement...
La page est en cours de chargement...
La page est en cours de chargement...
La page est en cours de chargement...
La page est en cours de chargement...
La page est en cours de chargement...
La page est en cours de chargement...
La page est en cours de chargement...
La page est en cours de chargement...
La page est en cours de chargement...
La page est en cours de chargement...
La page est en cours de chargement...
La page est en cours de chargement...
La page est en cours de chargement...
La page est en cours de chargement...
La page est en cours de chargement...
La page est en cours de chargement...
La page est en cours de chargement...
La page est en cours de chargement...
La page est en cours de chargement...
La page est en cours de chargement...
La page est en cours de chargement...
La page est en cours de chargement...
La page est en cours de chargement...
La page est en cours de chargement...
La page est en cours de chargement...
La page est en cours de chargement...
La page est en cours de chargement...
La page est en cours de chargement...
La page est en cours de chargement...
La page est en cours de chargement...
La page est en cours de chargement...
La page est en cours de chargement...
La page est en cours de chargement...
La page est en cours de chargement...
La page est en cours de chargement...
La page est en cours de chargement...
La page est en cours de chargement...
La page est en cours de chargement...
La page est en cours de chargement...
La page est en cours de chargement...
La page est en cours de chargement...
La page est en cours de chargement...
La page est en cours de chargement...
La page est en cours de chargement...
La page est en cours de chargement...
La page est en cours de chargement...
La page est en cours de chargement...
La page est en cours de chargement...
La page est en cours de chargement...
La page est en cours de chargement...
La page est en cours de chargement...
La page est en cours de chargement...
La page est en cours de chargement...
La page est en cours de chargement...
La page est en cours de chargement...
La page est en cours de chargement...
La page est en cours de chargement...
La page est en cours de chargement...
La page est en cours de chargement...
La page est en cours de chargement...
La page est en cours de chargement...
La page est en cours de chargement...
-
 1
1
-
 2
2
-
 3
3
-
 4
4
-
 5
5
-
 6
6
-
 7
7
-
 8
8
-
 9
9
-
 10
10
-
 11
11
-
 12
12
-
 13
13
-
 14
14
-
 15
15
-
 16
16
-
 17
17
-
 18
18
-
 19
19
-
 20
20
-
 21
21
-
 22
22
-
 23
23
-
 24
24
-
 25
25
-
 26
26
-
 27
27
-
 28
28
-
 29
29
-
 30
30
-
 31
31
-
 32
32
-
 33
33
-
 34
34
-
 35
35
-
 36
36
-
 37
37
-
 38
38
-
 39
39
-
 40
40
-
 41
41
-
 42
42
-
 43
43
-
 44
44
-
 45
45
-
 46
46
-
 47
47
-
 48
48
-
 49
49
-
 50
50
-
 51
51
-
 52
52
-
 53
53
-
 54
54
-
 55
55
-
 56
56
-
 57
57
-
 58
58
-
 59
59
-
 60
60
-
 61
61
-
 62
62
-
 63
63
-
 64
64
-
 65
65
-
 66
66
-
 67
67
-
 68
68
-
 69
69
-
 70
70
-
 71
71
-
 72
72
-
 73
73
-
 74
74
-
 75
75
-
 76
76
-
 77
77
-
 78
78
-
 79
79
-
 80
80
-
 81
81
-
 82
82
-
 83
83
-
 84
84
-
 85
85
-
 86
86
-
 87
87
-
 88
88
-
 89
89
-
 90
90
-
 91
91
-
 92
92
-
 93
93
-
 94
94
-
 95
95
-
 96
96
-
 97
97
-
 98
98
-
 99
99
-
 100
100
-
 101
101
-
 102
102
-
 103
103
-
 104
104
-
 105
105
-
 106
106
-
 107
107
-
 108
108
-
 109
109
-
 110
110
-
 111
111
-
 112
112
-
 113
113
-
 114
114
-
 115
115
-
 116
116
-
 117
117
-
 118
118
-
 119
119
-
 120
120
-
 121
121
-
 122
122
-
 123
123
-
 124
124
-
 125
125
-
 126
126
-
 127
127
-
 128
128
-
 129
129
-
 130
130
-
 131
131
-
 132
132
-
 133
133
-
 134
134
-
 135
135
-
 136
136
-
 137
137
-
 138
138
-
 139
139
-
 140
140
-
 141
141
-
 142
142
-
 143
143
-
 144
144
-
 145
145
-
 146
146
-
 147
147
-
 148
148
-
 149
149
-
 150
150
-
 151
151
-
 152
152
-
 153
153
-
 154
154
-
 155
155
-
 156
156
-
 157
157
-
 158
158
-
 159
159
-
 160
160
-
 161
161
-
 162
162
-
 163
163
-
 164
164
-
 165
165
-
 166
166
-
 167
167
-
 168
168
-
 169
169
-
 170
170
-
 171
171
-
 172
172
-
 173
173
-
 174
174
-
 175
175
-
 176
176
-
 177
177
-
 178
178
-
 179
179
-
 180
180
-
 181
181
-
 182
182
-
 183
183
-
 184
184
-
 185
185
-
 186
186
-
 187
187
-
 188
188
-
 189
189
-
 190
190
-
 191
191
-
 192
192
-
 193
193
-
 194
194
-
 195
195
-
 196
196
-
 197
197
-
 198
198
-
 199
199
-
 200
200
-
 201
201
-
 202
202
-
 203
203
-
 204
204
-
 205
205
-
 206
206
-
 207
207
-
 208
208
-
 209
209
-
 210
210
-
 211
211
-
 212
212
-
 213
213
-
 214
214
-
 215
215
-
 216
216
-
 217
217
-
 218
218
-
 219
219
-
 220
220
-
 221
221
-
 222
222
-
 223
223
-
 224
224
-
 225
225
-
 226
226
-
 227
227
-
 228
228


Ebode XDOM LIGHTSPEAKER SYSTEM Owner's Manual and Installation Instructions
- Taper
- Owner's Manual and Installation Instructions
- Ce manuel convient également à
dans d''autres langues
- italiano: Ebode XDOM LIGHTSPEAKER SYSTEM
- English: Ebode XDOM LIGHTSPEAKER SYSTEM
- español: Ebode XDOM LIGHTSPEAKER SYSTEM
- Deutsch: Ebode XDOM LIGHTSPEAKER SYSTEM
- Nederlands: Ebode XDOM LIGHTSPEAKER SYSTEM
- português: Ebode XDOM LIGHTSPEAKER SYSTEM
- svenska: Ebode XDOM LIGHTSPEAKER SYSTEM
Documents connexes
-
EDOBE XDOM PAIR OF SPEAKERS Le manuel du propriétaire
-
-
-
Ebode FM-66 Manuel utilisateur
-
Ebode ALDS58 Manuel utilisateur
-
-
Ebode FM Sound Le manuel du propriétaire
-
-
Ebode BTS30 Manuel utilisateur
Autres documents
-
-
Audio Pro LV Sub spécification
-
Audio Pro LV2 spécification
-
Sony SA-IF70 Le manuel du propriétaire
-
Audio Pro Living LV1 Le manuel du propriétaire
-
Caterchef 688266 Manuel utilisateur
-
-
-
Philips Chromacore Optibin ColorBlast TR Guide d'installation
-
Color Kinetics BCX423 3500 4.0W 120V MB 12IN UL Mode d'emploi