
Icon Legend................................4
Warnings and Notices..................5
Pole Assembly............................6
Pole to Base Assembly...............11
Backboard to Rim Assembly.......15
Parts Identifi er..........................i-iv
Final Assembly..........................19
Maintenance Instructions..........25
Warning Sticker........................26
Registration........................28
Warranty................................29
TOOLS REQUIRED TABLE OF CONTENTS
• Requires 1–2 hours to complete assembly steps
• 2+ people recommended for setup
• Videos and help guides available
Scan the code below to see how it all comes together.
http://go.lifetime.com/1270playlist
Pour le français, voir la page 2. Para el español, ver la página 3.
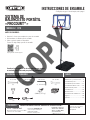
ASSEMBLY INSTRUCTIONS
MODEL #60091
PORTABLE
PROCOURT
™
BASKETBALL SYSTEM
MODEL 1270
Save this instruction in the event that the manufacturer has
to be contacted for replacement parts.
BEFORE ASSEMBLY:
(2)
(1)
(1)
(1) (1)
(2, included)
(280 lb)/(127 kg)
1/2” (13 mm)
3/16” (5 mm)
(1)
(2)
7/16” (11 mm)
(1)
3/8” (10 mm)
CONTACT LIFETIME CUSTOMER SERVICE:
Call: 1-800-225-3865
7:00 am–5:00 pm (Monday–Friday) MST
and 9:00 am–1:00 pm Saturday MST
QUESTIONS?
MODEL# AND PRODUCT ID
(you will need both when contacting us)
Model Number: 1270
Product ID:
For Customer Service in Mainland
Europe and the United Kingdom,
E-mail: [email protected]
Live Chat: www.lifetime.com
(click on “Ask An Expert” tab)
Video Instructions:
www.youtube.com/lifetimeproducts
COPY

AVANT L’ASSEMBLAGE :
• Nécessite 1–2 heures pour compléter les étapes d'assemblage
• Nous recommendons 2+ adultes pour l’assemblage
• Vídeos et guides d’aide sont disponibles
Scannez le code ci-dessous pour voir l’assemblage.
http://go.lifetime.com/1270playlist
For English, see page 1. Para el español, ver la página 3.
INSTRUCTIONS D’ASSEMBLAGE
MODEL #60091
SYSTÈME PORTABLE
DE BASKET-BALL
« PROCOURT
™
»
MODÈLE n° 1270
Légende des icônes.......................4
Avertissements et notifi cations......5
Assemblage du poteau...................6
Assemblage du poteau à la base...11
Assemblage du tableau à
l’anneau...................................15
Identifi cateur de pièces...............i-iv
Assemblage fi nal.........................19
Entretien..............................25
Autocollant d’avertissement.........26
Enregistrement.....................28
Garantie...............................30
OUTILS REQUIS SOMMAIRE
Concervez ces instructions au cas ou vous avez besoin de
contacter le fabricant pour obtenir des pièces de remplacement.
(2)
(1)
(1)
(1) (1)
(2, included)
(127 kg)/ (280 lb)
1/2 po (13 mm)
3/16 po (5 mm)
(1)
(2)
7/16 po (11 mm)
(1)
3/8 po (10 mm)
N° DE MODÈLE ET RÉFÉRENCE DU
PRODUIT (vous aurez besoin des deux lorsque
vous nous contactez)
N° de modèle : 1270
Référence du produit :
CONTACTEZ AUX SERVICES À LA CLIENTÈLE LIFETIME
®
:
Composer le 1-800-225-3865
Du lundi au vendredi 7:00 hr – 17:00 hr (HNR)
et samedi 9:00 hr – 13:00 hr (HNR)
t’Chat en direct: www.lifetime.com
(cliquer sur la languette « Ask An Expert »)
Videos educatifs:
www.youtube.com/lifetimeproducts
Pour nos services à la clientèle du
continent européen et au Royaume-Uni,
E-mail : [email protected]
QUESTIONS ?
COPY

• Requiere 1–2 horas para completar los pasos de ensamble
• Recomendamos 2+ adultos para el ensamble
• Videos y guías de ayuda son disponibles
Escanee el código debajo para ver el ensamble.
http://go.lifetime.com/1270playlist
For English, see page 1. Pour le français, voir la page 2.
INSTRUCCIONES DE ENSAMBLE
MODEL #60091
MODELO n° 1270
Leyenda de íconos......................4
Advertencias y notifi caciones......5
Ensamble del poste.....................6
Ensamble del poste a la base.......11
Ensamble del tablero al aro........15
Identifi cador de piezas..............i-iv
Ensamble fi nal..........................19
Mantenimiento.......................25
Autoadhesivo de advertencia......26
Registro...............................28
Garantía................................31
INSTRUMENTAL REQUERIDO ÍNDICE
Guarde estas instrucciones en el caso que tenga que ponerse
en contacto con el fabricante para piezas de reemplazo.
SISTEMA DE
BALONCESTO PORTÁTIL
«PROCOURT
™
»
ANTES DEL ENSAMBLE:
(2)
(1)
(1)
(1) (1)
(2, included)
(280 lb)/(127 kg)
1/2” (13 mm)
3/16” (5 mm)
(1)
(2)
7/16” (11 mm)
(1)
3/8” (10 mm)
PÓNGASE EN CONTACTO CON LOS SERVICIOS DE CLIENTES LIFETIME
®
:
Llamar : 1-800-225-3865
De lunes hasta viernes 7:00 hr–17:00 hr (MST)
y sábado 9:00 hr–13:00 hr (MST)
Chat en vivo: www.lifetime.com
(cliquee en la lengüeta «Ask An Expert»)
Instrucciones en vídeo:
www.youtube.com/lifetimeproducts
MODEL E ID DEL PRODUCTO
(necesitará los dos al contactarnos)
Número de modelo: 1270
ID del producto:
Para nuestros servicios a
clientes en el continente
europeo y el Reino Unido,
correo eléctronico:
¿PREGUNTAS?
COPY

4
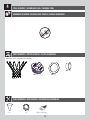
• Indicates the parts to be used for a section.
• Ceci indique les pièces requises pour une section.
• Indica las piezas requeridas para una sección.
• Indicates special heed should be taken when reading.
• Ceci indique que vous devez faire attention à ce que vous lisez.
• Indica que uno debe prestar atención al leer.
• Indicates the hardware to be used for a section.
• Ceci indique la quincaillerie requise pour une section.
• Indica el herraje requerido para una sección.
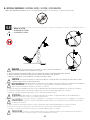
• Indicates the tools to be used for a section.
• Ceci indique les outils requis pour une section.
• Indica el instrumental requerido para una sección.
• Indicates no hardware required for a specifi c page.
• Ceci indique qu’il n’y a pas de quincaillerie requise pour une page particulière.
• Indica que ningún herraje es requerido para una página específi ca.
• Indicates no parts required for a specifi c section.
• Ceci indique qu’il n’y a pas de pièces requises pour une section particulière.
• Indica que ninguna pieza es requerida para una sección específi ca.
• Indicates to use/not to use an electric drill for a specifi c step.
• Ceci indique d’utiliser/de ne pas utiliser pas de perceuse électrique pour une étape particulière.
• Indica usar/no usar un taladro eléctrico para un paso específi co.
ICON LEGEND / LÉGENDE DES ICÔNES / LEYENDA DE ÍCONOS
• Indicates the use of a centerlock nut. A nut with this marking will require some effort to tighten. This
hardware was designed with this feature in order to prevent loosening later.
• Cette image indique l’usage d’un écrou de blocage central. Un écrou avec ce marquage requerra plus
d’effort pour le serrer. Cet écrou a été conçu avec cette fonction afi n d’empêcher son desserrage plus tard.
• Indica el uso de una tuerca de bloque central. Una tuerca con esta marca requerirá un poco de esfuerzo
para apretarlo. Esta tuerca fue diseñado con esta característica con el fi n de evitar su afl ojamiento más tarde.
1186414
8/31/2017
COPY

5
WARNINGS & NOTICES / AVERTISSEMENTS ET AVIS / ADVERTENCIAS Y AVISOS
Most injuries are caused by misuse and/or not following instructions. Use caution when using this product.
To ensure safety, do not attempt to assemble this product without following the instructions carefully. Check entire box and inside all packing
material for parts and/or additional instruction material. Before beginning assembly, read the instructions and identify parts using the hardware
identifi er and parts list in this document. Proper and complete assembly, use and supervision are essential for proper operation and to reduce the
risk of accident or injury. A high probability of serious injury exists if this product is not installed, maintained, and operated properly.
FAILURE TO FOLLOW THESE WARNINGS MAY RESULT IN SERIOUS INJURY OR PROPERTY DAMAGE AND WILL VOID WARRANTY.
Owner must ensure that all players know and follow these rules for safe operation of the system.
• If using a ladder during assembly, use extreme caution.
• Three capable adults are recommended for this operation.
• Check base daily for leakage. Leaks will cause system to fall.
• Assemble the pole sections properly. Failure to do so could cause the pole sections to separate during play or transport.
• Minimum operational height is 6 ft 6 in (1.98m) to the bottom of the backboard.
SAFETY INSTRUCTIONS
La mayoría de las lesiones son causadas por el abuso y/o por el no seguir las instrucciones. Sea cauteloso al usar este producto.
Para su seguridad, no intente ensamblar este producto sin leer y seguir todas las instrucciones cuidadosamente. Revise la caja entera y todos los
materiales de embalaje en busca de piezas y / o material de instrucciones adicional. Antes de comenzar el ensamble, identifi que todas las piezas y el
equipo usando las listas de partes y equipo así como los identifi cadores en este documento. El ensamble correcto y completo, el uso y la supervisión
son esenciales para una orientación apropiada y para reducir el riesgo de un accidente o lesión. Existe una alta probabilidad de sufrir lesiones graves
si este producto no es instalado, mantenido y / o operado correctamente.
EL INCUMPLIMIENTO DE SEGUIR ESTAS ADVERTENCIAS PUEDE OCASIONAR EN LESIONES GRAVES Y/O DAÑO A LA PROPIEDAD Y ANULARÁ LA GARANTÍA.
El propietario debe asegurarse de que todos los jugadores conocen y seguir estas reglas para la operación segura del sistema.
• Si utiliza una escalera durante el ensamble, tenga mucho cuidado.
• Tres adultos competentes son requeridos para ensamblar el producto.
• Compruebe si hay fugas en la base. Las fugas pueden causar que el producto caiga.
• Ensamble las secciones del poste correctamente. De lo contrario, podría provocar que las secciones del poste se separaran
durante el juego o el transporte.
• Altura mínima de operación es 1,98m (6 ft 6 in) a la parte inferior del tablero.
INSTRUCCIONES DE SEGURIDAD
La majorité des accidents résultent d’une mauvaise utilisation et/ou du fait de n’avoir pas suivi les consignes. Observez toutes précautions utiles pendant
l’utilisation de ce produit.
Pour assurer votre sécurité, ne tentez pas d’assembler cet article sans avoir lu et suivi toutes les consignes attentivement. Vérifi ez la totalité de la
boîte et l’intérieur de tous les matériaux d’emballage pour trouver toutes les pièces et/ou matériau contenant des consignes supplémentaires. Avant
de commencer le montage, identifi ez toutes les pièces et tous les accessoires et faites-en l’inventaire en les comparant aux listes et identifi cateurs
de pièces et accessoires contenus dans ce document. Un assemblage correct et complet, ainsi que l’utilisation et la supervision correctes sont des
conditions essentielles à la bonne direction et diminuent les risques d’accident ou de blessure. Une haute probabilité d’accident grave résulte de
mauvaises conditions d’installation, maintenance et/ou utilisation.
LA NON-RESPECT DE CES AVERTISSEMENTS PEUT RÉSULTER EN ACCIDENTS GRAVES OU DOMMAGES MATÉRIELS ET ANNULER LA GARANTIE.
Le propriétaire doit veiller à ce que tous les joueurs connaissent et suivent ces règles pour une exploitation sûre du système.
• Agissez avec la plus grande prudence si vous employez une échelle pour l’assemblage.
• Trois adultes en bonne condition physique sont requis pour assembler ce produit.
• Vérifi ez quotidiennement la base au niveau de fuites. Les fuites peuvent causer la chute du système.
• Assemblez les sections de poteau correctement. La non-observation de cette consigne peut amener les sections de poteau à se séparer
pendant le jeu ou le déplacement.
• La hauteur minimale est 1,98 m (6 pi 6 po) au bas de la planche.
CONSIGNES DE SÉCURITÉ

6
POLE ASSEMBLY / ASSEMBLAGE DU POTEAU / ENSAMBLE DEL POSTE
1
Metal Parts / Pièces en métal / Piezas de metal
Hardware Bag / Sac de quincailleries / Bolsa de herraje
TOOLS REQUIRED / OUTILS REQUIS / INSTRUMENTAL REQUERIDO
PARTS REQUIRED / PIÈCES REQUISES / PIEZAS REQUERIDAS
HARDWARE REQUIRED / QUINCAILLERIE REQUISE / HERRAJE REQUERIDO
(1)
1/2”
(1)
(1)
ALH (x1)
ALF (x1)
ALE (x1)
• Warning Sticker applied to side not shown
• L’Autocollant d’avertissement apliqué au côté n’est pas illustré
• Etiqueta de advertencia aplicada al lado no está ilustrado
AYU (x1)
• Do not remove Top Section (ALH) from Middle Section (ALF)
• Ne pas enlever la Section supérieure (ALH) de la Section du milieu (ALF)
• No retire la Sección superior (ALH) de la Sección intermedio (ALF)
Plastic Parts / Pièces en plastique / Piezas de plástico
(1)
BCO
BCQ
ADS (x1)
1/4” x 3/4”
AYT (x1)
5/16”
AOL (x1)
5/16” x 3 1/4”
CIH (x1) BTS (x1)
CCL (x2)
DXZ (x1)
(x2)

7
TOOLS AND HARDWARE REQUIRED / OUTILS ET QUINCAILLERIE REQUIS / INSTRUMENTAL Y HERRAJE REQUERIDOS
X SECTION 1 (CONTINUED) / SECTION 1 (SUITE) / SECCIÓN 1 (CONTINUACIÓN)
1.1
• If you have trouble with this section, scan the QR code to view a video on how to assemble the Pole.
• Si vous avez des problèmes avec cette section, scannez le code QR au-dessous pour voir un vidéo de
l’assemblage du Poteau.
• Si tiene problemas con esta sección, escanee el código QR debajo para ver un video del ensamblaje del Poste.
• http://go.lifetime.com/procourtpoleassembly
• Use a fl athead screwdriver to pop out the mandrel from the plastic rivet at the top of the Top Pole (ALH). Remove
the Mandrel and Rivet from the Pole Assembly and discard. Do not remove the Top Pole Section (ALH) from the Middle
Pole Section (ALF).
• Utilisez un tournevis plat pour retirer le mandrin de l’extrémité supérieure du Poteau supérieur (ALH). Ensuite, enlevez le
mandrin et le rivet du Poteau supérieur et jetez-le. Ne retirez pas le Poteau supérieur (ALH) du Poteau du melieu (ALF).
• Use un destornillador plano para sacar el mandril al extremo superior del Poste superior (ALH). Entonces, saque
el mandril y el remache del Poste superior y deséchelo. No retire el Poste superior (ALH) del Poste intermedio (ALF).
ALF
ALH
ALF
ALH
ALF
1 2 3
FAUTE DE NE PAS SUIVRE CES AVERTISSEMENTS, VOUS
RISQUEZ DE CAUSER DES BLESSURES GRAVES ET/OU
DES DOMMAGES À L’ÉQUIPEMENT.
SI NO SE OBEDECEN ESTAS ADVERTENCIAS PUEDEN
PRODUCIRSE GRAVES LESIONES Y/O DAÑOS A LA
PROPIEDAD.
Le propriétaire doit s’assurer que tous les joueurs connaissent
HWDSSOLTXHQWOHVUqJOHVVXLYDQWHVD¿QG¶XWLOLVHUO¶pTXLSHPHQWHQ
toute sécurité.
WARNING
(OSURSLHWDULRGHOVLVWHPDGHEHDVHJXUDUVHGHTXHWRGRV
los jugadores conozcan y respeten estas reglas para que el
VLVWHPDVHXVHHQIRUPDVHJXUD
FAILURE TO FOLLOW THESE WARNINGS MAY RESULT IN
SERIOUS INJURY AND/OR PROPERTY DAMAGE.
2ZQHUVPXVWHQVXUHWKDWDOOSOD\HUVNQRZDQGIROORZWKHVH
UXOHVIRUVDIHRSHUDWLRQRIWKHV\VWHP
y2QO\KDQJIURPWKHULPEULHÀ\WRUHJDLQEDODQFH RUDYRLGLQMXULQJ
RWKHUV5HOHDVHWKHULPDVVRRQDVVDIHO\SRVVLEOH
y'XULQJSOD\HVSHFLDOO\ZKHQSHUIRUPLQJGXQNW\SHDFWLYLWLHVNHHS
SOD\HU¶VIDFHDZD\IURPWKHEDFNERDUGULPDQGQHW6HULRXVLQMXU\
FRXOGRFFXULIWHHWKIDFHFRPHLQFRQWDFWZLWKWKHEDFNERDUGULP
RUQHW3OD\HUVKRXOGZHDUDPRXWKJXDUGGXULQJSOD\
y'RQRWVOLGHFOLPERUSOD\RQEDVHRUSROH
y&RPSOHWHO\¿OOEDVH DFFRUGLQJWRPDQXIDFWXUHU¶VLQVWUXFWLRQV
1HYHUOHDYHWKHXQLWVWDQGLQJ LQDQXSULJKWSRVLWLRQZLWKRXW¿UVW
¿OOLQJWKHEDVHZLWKZHLJKWRU WKHV\VWHPZLOOWLSTXLFNO\FDXVLQJ
serious personal injury.
y:KHQDGMXVWLQJKHLJKWRUPRYLQJV\VWHPNHHSKDQGVDQG¿QJHUV
DZD\IURPPRYLQJSDUWV
y'RQRWDOORZFKLOGUHQWRPRYHRUDGMXVWV\VWHP
y'RQRWZHDUMHZHOU\ULQJVZDWFKHVQHFNODFHVHWFGXULQJSOD\
2EMHFWVPD\HQWDQJOHLQQHW
y.HHSRUJDQLFPDWHULDODZD\IURPSROHEDVH*UDVVOLWWHUHWFFRXOG
FDXVHFRUURVLRQDQGRUGHWHULRUDWLRQ
• &XpOJXHVHGHODURVyORHQIRUPDEUHYHSDUDUHFXSHUDUHO
HTXLOLEULRRHYLWDUOHVLRQDUDRWURVMXJDGRUHV6XpOWHVHGHODUROR
PiVSURQWRTXHSXHGDKDFHUORFRQVHJXULGDG
• 'XUDQWH HOMXHJRHVSHFLDOPHQWHDO HPERFDUYLROHQWDPHQWH
GHDOWRODFDUD GHORVMXJDGRUHVGHEHPDQWHQHUVHDOHMDGDGHO
WDEOHURHODUR\ODUHG3XHGHQSURGXFLU VHOHVLRQHVJUDYHVVLORV
GLHQWHVRODFDUDHQWUDQHQFRQWDFWRFRQHOWDEOHURHODURRODUHG
/RVMXJDGRUHVGHEHQXVDUXQSURWHFWRUEXFDOGXUDQWHHOMXHJR
• 1RVHGHVOLFHQRWUHSHQLMXHJXHVREUHODEDVHRHOSRVWH
• /OHQHOD EDVHFRPSOHWDPHQWHVLJXLHQGRODVLQVW UXFFLRQHVGHO
IDEULFDQWH1XQFDG HMHODXQLGDGHQSRVLFLyQ GHXVRVLQKDEHU
OOHQDGRSUHYLDPHQWHODEDVHFRQPDWHULDOGHFRQWUDSHVRSXHVHO
VLVWHPDSRGUtDWXPEDUVHUiSLG DPHQWH\FDXVDUJUDYHVOHVLRQHV
personales.
• 0DQWHQJDODVPDQRV\ORVGHGRVDOHMDGRVGHODVSLH]DVPRYLEOHV
FXDQGRUHJXOHODDOWXUDRGHVSODFHHOVLVWHPD
• 1RGHMHTXHORVQLxRVUHJXOHQQLGHVSODFHQHOVLVWHPD
• 1RXVHMR\DVDQLOORVUHORMHVFROODUHVR JDUJDQWLOODVHWF
GXUDQWHHOMXHJR(VWRVREMHWRVSXHGHQHQJDQFKDUVHHQODUHG
• /DVXSHU¿FLHGRQGHVHFRORTXHODEDVHGHEHHVWDUOLVD\
GHVSURYLVWDGHSLHGUDVJUDYDXRWURVREMHWRV/DV SHUIRUDFLRQHV
SXHGHQRULJLQDUSpUGLGDV \pVWDVSXHGHQKDFHUTXHHOVLVWHPD
VHWXPEH
• 1RSHUPLWDTXHODEDVHGHOSRVWHHQWUHHQFRQWDFWRFRQ
PDWHULDOHVRUJiQLFRV (O SDVWRORVGHVHFKRV DQLPDOHVHWF
SXHGHQFDXVDUFRUURVLyQ\RGHWHULRURV
• &RQWUROHHOSRVWH\ WRGDVODVSLH]DVPHWiOLFDVXQDYH]DOPHV
HQEXVFDGHVLJQRVYLVLEOHVGHFRUURVLyQR[LGDFLyQSLFDGXUDV
HVFDPDGR(OLPLQHWRG RUDVWURGHy[LGR\YXHOYD DSLQWDUFRQ
HVPDOWHSDUDH[WHULRUHV6LHOy[LGRKDSHQHWUDGRFXDOTXLHUSLH]D
GHDFHURUHHPSODFHHVDSLH]DGHLQPHGLDWR
• ,QVSHFFLRQHHOVLVWHPDDQWHVGHFDGDXVRSDUDYHUL¿FDUTXH
HVWpDGHFXDGDPHQWHFRQWUDSHVDGRTXHORVHOHPHQWRVGH¿MDFLyQ
QRHVWpQÀRMRVTXHQRKD\DGHVJDVWHH[FHVLYRLQHVWDELOLGDG
QLVLJQRVGHFRUURVLyQ6LHQFXHQWUDLUUHJXODULGDGHVUHSiUHODV
DQWHVGHXVDUHOVLVWHPD
Nunca juegue con un equipo dañado.
• 1RXVHHOVL VWHPDHQSUHVHQ FLDGHYLHQWRVIX HUWHVRFRQGLFL RQHV
FOLPiWLFDVDGYHUVDV\DTXHSXHGHWXPEDUVH &RORTXHODXQLGDG
HQVXSRVLFLyQGHDOPDFHQDPLHQWR\RHQXQD]RQDDUHVJXDUGR
del viento, lejos de propiedades personales que puedan dañarse
VLHOVLVWHPDVHFDH\GHOtQHDVGHVXPLQLVWURGHHQHUJtD
• 1RXVHHOV LVWHPDSDUDOHYDQWDUQLQJ~QREMHWR(OPHFDQLVP R
HVWiGLVHxDGRSDUDHOHYDU VRODPHQWHHOSHVRGHOWDEOHURFRQ HO
DUR1RFXHOJXHQD GDGHODDJDUUDGHUDHODURHO WDEOHURQLORV
EUD]RVGHHOHYDFLyQ\DTXHHVWRSXHGHGDxDUHOVLVWHPD\DQXODU
ODJDUDQWtD
• Ne vous suspendez pas à l’anneau plus que nécessaire pour
UHWURXYHUYRWUHpTXLOLEUHRX pYLWHUGHEOHVVHUOHVDXWUHVMRXHXUV
5HOkFKH]O¶DQQHDXDXVVLW{WTXHSRVVLEOH
/RUVG¶XQ PDWFKSDUWLFXOLqUHPHQWGDQVOHFDVGHV VPDVKVOH
YLVDJHGXMRXHXUQH GRLWSDVIDLUHIDFHDXSDQQHDXj O¶DQQHDX
QLDX¿OHW/H MRXHXUULVTXHGHJUDYHVEOHVVXUHVVLVHVGHQWV RX
son visage entrent en contact avec le panneau, l’anneau, ou le
¿OHW/HVMRXHXUVGRLYHQWWRXMRXUVSRUWHUXQSURWqJHGHQWVORUVTX¶LOV
jouent.
1HJOLVVH]SDVQHJULPSH]SDVHW QHMRXH]SDVVXUODEDVHRX
le poteau.
5HPSOLVVH] FRPSOqWHPHQWODEDVH VHORQOHVLQVWUXFWLRQV GX
IDEULFDQW1HODLVVH]MDPDLVO¶XQLWpGHERXWGHSOHLQSLHGVDQVDYRLU
G¶DERUGUHPSOLOD EDVHDYHFXQSRLGV RXO¶pTXLSHPHQWSRXUUDLW
EDVFXOHUUDSLGHPHQWHWFDXVHUGHJUDYHVEOHVVXUHV
/RUVTXH YRXVDMXVWH]OD KDXWHXURXORUVTXH YRXVGpSODFH]
O¶pTXLSHPHQWJDUGH]YRVPDLQVHWGRLJWVORLQGHVSLqFHVPRELOHV
1HSHUPHWWH] SDVDX[ HQIDQWVGH GpSODFHURX G¶DMXVWHU
O¶pTXLSHPHQW
1HSRUWH]SDVGHELMRX[EDJXHVPRQWUHVFROOLHUVHWFORUVTXH
YRXVMRXH]&HVREMHWVSRXUUDLHQWV¶DFFURFKHUDX¿OHW
/DVXUIDFHVXUODTXHOOHHVWSRVpHOD EDVHGRLWrWUHOLVVHHWVDQV
JUDYLHURXWRXWDXWUH REMHWTXLSRXUUDLWWURXHUOD EDVHHQWUDvQDQW
DLQVLXQHIXLWHFHTXLSRXUUDLWIDLUHEDVFXOHUO¶pTXLSHPHQW
/DEDVH QHGRLWSDVQRQ SOXVrWUHSRVpHVXU DXFXQW\SHGH
PDWLqUHRUJDQLTXH/¶KHUEHOHVGpFKHWVHWFSHXYHQWHQWUDvQHUOD
FRUURVLRQHWODGpWpULRUDWLRQGHO¶pTXLSHPHQW
8QHIRLV SDUPRLVYpUL¿H]TXHOH3RWHDX HWWRXWHVOHVSLqFHV
HQPpWDOQHPRQWUHQWSDVGHVLJQHVGHFRUURVLRQURXLOOHSLTUHV
pFDLOODJH(QOHYH] WRXWHODURXLOOH HWUHSHLJQH]FRPSOqWHPHQW
DYHFXQHSHLQWXUHSRXUH[WpULHXU 6LODURXLOOHDSpQpWUpXQHGHV
SLqFHVHQDFLHUYRXV GHYUH]UHPSODFHULPPpGLDWHPHQWODSLqFH
en question.
$FKDTXHIRLVTXHYRXVDOOH]XWLOLVHUO¶pTXLSHPHQWYpUL¿H]G¶DERUG
O¶pTXLOLEUHODSRVVLELOLWpGHSLqFHVGHVVHUUpHVRXXVpHVODVWDELOLWp
GHO¶pTXLSHPHQWHWWRXWVLJQHGHFRUURVLRQRXUpSDUDWLRQQpFHVVDLUH
avant utilisation.
1HMRXH]MDPDLVDYHFXQpTXLSHPHQWHQGRPPDJp
1¶XWLOLVH] SDVO¶pTXLSHPHQWORUVGH IRUWHVUDIDOHVGHYHQW RX
GH PDXYDLVWHPSV /¶pTXLSHPHQWSRXUUDLW EDVFXOHU3ODFH]
O¶pTXLSHPHQWGDQVXQHQGURLWDEULWpGXYHQWRXORLQGHVVWUXFWXUHV
TX¶LOSRXUUDLWHQGRPPDJHUV¶LOEDVFXODLWHWORLQGHV¿OVpOHFWULTXHV
1¶XWLOLVH]SDV O¶pTXLSHPHQWSRXUOHYHURXVRXOHYHU TXRLTXHFH
VRLW6RQPpFDQLVPH DpWpFRQoXXQLTXHPHQW SRXUVRXWHQLUOH
SRLGVGXSDQQHDXHW GHO¶DQQHDX1¶DFFURFKH]ULHQDXPDQFKH
jO¶DQQHDXDXSDQQHDXQLDX[OHYLHUVVRXV SHLQHG¶HQGRPPDJHU
O¶pTXLSHPHQWHWG¶DQQXOHUODJDUDQWLH
ADVERTENCIA
AVERTISSEMENT
Portable Base - 6.5” x 10”
#FS16400
10/12/2004
www.lifetime.com
y6XUIDFHEHQHDWKWKHEDVHPXVWEHVPRRWKDQGIUHHRI JUDYHORU
RWKHUREMHFWV3XQFWXUHVFDXVHOHDNDJHDQGFRXOGFDXVHV\VWHP
to tip over.
y2QFHDPRQWKFKHFNSROHDQGDOOPHWDOSDUWVIRUVLJQVRIFRUURVLRQ
UXVWSLWWLQJFKLSSLQJ&RPSOHWHO\UHPRYHUXVWDQGUHSDLQWZLWK
H[WHULRUHQDPHO,IUXVWKDVSHQHWUDWHGDQ\VWHHOSDUWUHSODFHWKDW
SDUWLPPHGLDWHO\
y&KHFNV\VWHPEHIRUHHDFKXVHIRUSURSHUEDOODVWORRVHKDUGZDUH
H[FHVVLYHZHDULQVWDELOLW\DQG VLJQVRIFRUURVLRQDQGUHSDLU
EHIRUHXVH
y1HYHUSOD\RQGDPDJHGHTXLSPHQW
y'RQRWXVHV\VWHPGXULQJZLQG\RUVHYHUHZHDWKHU6\VWHPPD\
WLSRYHU3ODFHV\VWHPLQDQDUHDSURWHFWHGIURPWKHZLQGRULQDQ
DUHDDZD\IURPSURSHUW\WKDWPD\EHGDPDJHGLIWKHV\VWHPIDOOV
DQGIURPRYHUKHDGSRZHUOLQHV
y'RQRWXVHWKHV\VWHPWROLIWRUKRLVWDQ\WKLQJ7KHPHFKDQLVPLV
GHVLJQHGWROLIWRQO\WKHZHLJKWRIWKHEDFNERDUGDQGULP'RQRW
KDQJDQ\WKLQJIURPWKHKDQGOHULPEDFNERDUGRU OLIWHUDUPVDV
WKLVZLOOGDPDJHWKHV\VWHPDQGYRLGWKHZDUUDQW\
ALH
• If the Top Pole and Middle Pole become separated, insert the
top of the Top Pole up through the bottom of the Middle Pole.
• Si se séparent les Sections supérieure et du milieu,
insérez l’extrémité supérieure de la Section supérieure dans
l’extrémité inférieure de la Section du milieu.
• Si se separan las Secciones superior e intermedio,
inserte el extremo superior de la Sección superior en el
extremo inferior de la Sección intermedia.
!
(1)
Mandrel
Mandril
Mandrin
Rivet
Remache
ALF

8
TOOLS AND HARDWARE REQUIRED / OUTILS ET QUINCAILLERIE REQUIS / INSTRUMENTAL Y HERRAJE REQUERIDOS
X SECTION 1 (CONTINUED) / SECTION 1 (SUITE) / SECCIÓN 1 (CONTINUACIÓN)
1.2
• Slide the Top Pole (ALH) far enough out of the Middle
Pole (ALF) so that it does not obstruct the holes at
the bottom of the Middle Pole. Then attach the
hardware indicated in the location shown.
• Tirez l’extrémité de la Section supérieure du
poteau (ALH) de la Section du milieu du poteau (ALF)
suffi samment éloignée pour que n’obstrue pas
de trous à l’extrémité inférieure de la Section du
milieu. Ensuite, attachez les accessoires indiqués à
l’emplacement illustré.
• Tire el extremo de la Sección superior del poste (ALH)
por la Sección intermedia del poste (ALF) apenas lo
sufi ciente para que no obstruya los agujeros
al extremo inferior de la Sección intermedia.
Entonces, sujete los accesorios indicados a la
ubicación illustrada.
1.3
ALH
ALF
AYU
AYU
AYT
AOL
• The crimped side of the Top Pole (ALH) must be on the
same side as the Warning Sticker (AMT) on the Middle
Pole.
• Vérifi er que le côté gaufré de la Section de poteau
supérieure (ALH) est sur le même côté que l’Autocollant
d’avertissement (AMT) sur la Section du milieu.
• Asegúrese de que el extremo aplanado de la Sección
superior (ALH) quede del mismo lado que la Etiqueta
adhesiva de advertencia (AMT) en la Sección intermedia del
poste.
BTS (x1)
DXZ (x1)
AOL (x1)
AYT (x1)
DXZ
BTS
(x2)

9
TOOLS AND HARDWARE REQUIRED / OUTILS ET QUINCAILLERIE REQUIS / INSTRUMENTAL Y HERRAJE REQUERIDOS
X SECTION 1 (CONTINUED) / SECTION 1 (SUITE) / SECCIÓN 1 (CONTINUACIÓN)
1.4
ADS (x1)
CIH
(1)
!
• The Screw should be fl ush with the Pole, and will
spin freely once installed.
• La Vis doit être au ras du Poteau, mais elle
tournera librement une fois installée.
• El Tornillo debe quedar a ras con el Poste, mas
girará libremente una vez esté instalado.
• STOP! Make sure all parts on the Pole assembly are
oriented as shown before continuing to the next
step.
• ARRÊT ! Orientez tous les pièces du Poteau comme
illustré avant de continuer à l’étape suivante.
• ¡PARE! Oriente todas las partes del Poste como se
muestra antes de continuar al próximo paso.
1.5
• Align the hole in the Middle Pole (ALF) with the
slot in the Bottom Pole (ALE). and install the Domed
Countersunk Washer (CIH) with the hardware shown.
• Alignez le trou de la Section de poteau du milieu (ALF)
sur la fente de la Section inférieure (ALE) et glissez
la Section du milieu par-dessus de la Section
inférieure, et installez la Rondelle fraisée (CIH) à l’aide
des accessoires indiqués.
• Alinee el agujero de la Sección intermedia (ALF)
con la ranura de la Sección inferior del poste (ALE) y
deslice la Sección intermedia sobre la Sección
inferior, e instale la Rondana frasada (CIH) usando los
accesorios indicados.
ALE
ADS
ALF
CIH
CIH (x1)
Warning Sticker
Autocollant d’avertissement
Etiqueta de advertencia
Adjustment Knob
Poignée de réglage
Pomo de ajusto
Crimped Side of Pole
Côté serti du poteau
Lado crimpado del poste
Barrel Nut
écrou de canon
Tuerca Cilíndrica

10
TOOLS AND HARDWARE REQUIRED / OUTILS ET QUINCAILLERIE REQUIS / INSTRUMENTAL Y HERRAJE REQUERIDOS
X SECTION 1 (CONTINUED) / SECTION 1 (SUITE) / SECCIÓN 1 (CONTINUACIÓN)
• Do not hit your feet with the Pole sections, as serious
injury could occur.
• Ne pas frapper vos pies avec le Poteau sous risque
de blessures graves.
• El Tornillo debe quedar a ras con el Poste, mas girará
libremente una vez esté instalado.
(1)
6x
• THIS STEP CANNOT BE REVERSED! Strike the end of the Pole Assembly on a piece of scrap wood or cardboard fi ve
to six times.
• CETTE ÉTAPE NE PEUT PAS ÊTRE INVERSÉE ! Frappez l’extrémité de l’Assemblage de poteau sur un bois de rebut
cinq à six fois.
• ¡ESTE PASO NO PUEDE REVERTIRSE! Golpee el extremo del Ensamblaje de poste en un pedazo de madera o cartón
cinco a seis veces.
1.6
!
WARNING / AVERTISSEMENT / ADVERTENCIA
The Poles must be seated together! Even if the Poles cover the slots before seating, they must
be struck on a hard surface five to six times! Failure to seat the Poles correctly could allow the
Poles to separate during use, which could lead to serious personal injuries or property damage.
¡Los postes deben quedar asentados de manera conjunta! Incluso si los postes cubren las ranuras
antes de quedar asentados, ¡deben ser golpeados sobre una superficie dura de cinco a seis
veces! Si no se asientan correctamente los postes, eso podría permitir que los postes se separen
durante el uso, lo que podría provocar graves lesiones personales o daños a la propiedad.
Les poteaux doivent s’enclencher les uns les autres! Même si les poteaux recouvrent les
fentes avant de s’enclencher, vous devez les frapper sur un morceau de bois cinq à six fois!
Un mauvais enclenchement des poteaux peut entraîner leur séparation lors de l’utilisation, et
causer des blessures graves et endommager matériel.
!

11
POLE TO BASE ASSEMBLY / ASSEMBLAGE DU POTEAU A LA BASE / ENSAMBLE DEL POSTE A LA BASE
2
Metal Part / Pièce en métal / Pieza de metal
TOOLS REQUIRED / OUTILS REQUIS / INSTRUMENTAL REQUERIDO
PARTS REQUIRED / PIÈCES REQUISES / PIEZAS REQUERIDAS
HARDWARE REQUIRED / QUINCAILLERIE REQUISE / HERRAJE REQUERIDO
AAE (x2)
ABN (x2)
DXZ (x1)
BTS (x1)
ABD (x4)
AAO (x2)
EEO (x2)
ALI
(x2)
AJC (x1)
AJE (x1)
AMU (x2)
AJM (x1)
Plastic Parts / Pièces en plastique / Piezas de plástico
(2)
1/2”
15 ”
3/4
7”
EEO-3/16”
(2)
* The Axle (AJE) is located in the parts bag.
L’essieu (AJE) est situé dans le sac des pièces.
El eje (AJE) se encuentra en la bolsa de partes.
BCQ
Hardware Bag / Sac de quincailleries / Bolsa de herraje

12
TOOLS AND HARDWARE REQUIRED / OUTILS ET QUINCAILLERIE REQUIS / INSTRUMENTAL Y HERRAJE REQUERIDOS
X SECTION 2 (CONTINUED) / SECTION 2 (SUITE) / SECCIÓN 2 (CONTINUACIÓN)
ALI
AAE
ABD
AJM
ABD
AAO
2.1 2.2
AAE (x2)
ABD (x4)
AAO (x2)
• Attach the fl attened end of a Pole Brace (ALI) to
the Base (AJM) with the hardware shown. Only
fi nger tighten the hardware for now.
• Attachez l’extrémité aplatie d’un Tirant du poteau
(ALI) à la Base (AJM) à l’aide des accessoires
illustrés. Ne serrez les accessoires qu’à la main en ce
moment.
• Sujete el extremo aplanado del Tirante del poste
(ALI) a la Base (AJM) usando los accesorios
ilustrados. Sólo apriete a mano los accesorios en este
momento.
• Repeat the last step to attach the remaining
Pole Brace (ALI).
• Répétez cette étape pour attacher le Tirant du
poteau (ALI) restant.
• Repita este paso para sujetar el Tirante del poste
(ALI) restante.
• If you have trouble with this section, scan the QR code to view a video on how to assemble the Pole.
• Si vous avez des problèmes avec cette section, scannez le code QR au-dessous pour voir un vidéo de
l’assemblage du Poteau.
• Si tiene problemas con esta sección, escanee el código QR debajo para ver un video del ensamblaje del Poste.
• http://go.lifetime.com/procourtpoletobase

13
TOOLS AND HARDWARE REQUIRED / OUTILS ET QUINCAILLERIE REQUIS / INSTRUMENTAL Y HERRAJE REQUERIDOS
X SECTION 2 (CONTINUED) / SECTION 2 (SUITE) / SECCIÓN 2 (CONTINUACIÓN)
• Slide the Large Axle (AJC) through the Wheels (AMU) and the holes at the end of the Bottom Pole (ALE) as shown. Slide the
Small Axle (AJE) through the second set of holes near the end of the Bottom Pole. Then, slide a Spacer (ABN) onto each
end of the Large Axle, and position them against the Wheels.
• Glissez le Grand Essieu (AJC) à travers les Roues (AMU) et les trous dans l’extrémité du Poteau inférieur (ALE) comme illustré.
Glissez le Petit Essieu (AJC) à travers le deuxième jeu de trous près l’extrémité du Poteau inférieur. Ensuite, glissez les
Pièces d’écartement (ABN) sur chaque extrémité de le Grand essieu, et positionnez-les contre les Roues.
• Deslice el Eje grande (AJC) por las Ruedas (AMU) y los agujeros al extremo del Poste inferior (ALE) como se muestra.
Deslice el Eje pequeño (AJE) por el segundo juego de agujeros cerca el extremo del Poste inferior. Entonces, deslice los
Espaciadores (ABN) en cada extremo del Eje grande, y ubíquelos contra las Ruedas.
2.3
AMU
ALE
ALE
AMU
AJE
ABN
ABN
AJC
AJC
ABN (x2)
AJC
AJM
AJE
• Place the Pole assembly on the ground with the Hex Knob
on the Middle Pole facing upward. Position the Large Axle (AJC)
under the bottom slots of the Base (AJM) as shown, and step
onto the Base so the Axle snaps into the slots. Then, rotate
the Pole assembly upward so that the Small Axle (AJE) snaps
into the upper slots of the Base as shown.
• Mettez l’Assemblage du
poteau sur le sol avec le
Bouton hexagonal sur
le Poteau du milieu vers
le haut. Positionnez le Grand Essieu
(AJC) en dessous les fentes inférieures de la
Base (AJM) comme illustré, et marchez sur la Base pour
que l’Essieu s’enclenche dans les fentes. Ensuite, tournez
l’Assemblage du poteau vers le haut pour que le Petit Essieu
(AJE) s’enclenche dans les fentes supérieures de la Base
comme illustré.
• Coloque el Conjunto del poste en el suelo con el Pomo
hexagonal hacia arriba. Ubique el Eje grande (AJC) debajo las
ranuras en la parte inferior de la Base (AJM) como se muestra,
y pise en la Base para que el Eje se sienta en las ranuras.
Entonces, rote el Ensamblaje del poste para arriba para que
el Eje pequeño (AJE) se sienta en las ranuras superiores de la
Base como se muestra.
2.4
* The Axle (AJE) is located in the parts bag.
L’essieu (AJE) est situé dans le sac des pièces.
El eje (AJE) se encuentra en la bolsa de partes.

14
TOOLS AND HARDWARE REQUIRED / OUTILS ET QUINCAILLERIE REQUIS / INSTRUMENTAL Y HERRAJE REQUERIDOS
X SECTION 2 (CONTINUED) / SECTION 2 (SUITE) / SECCIÓN 2 (CONTINUACIÓN)
• Tip the system forward and rest the Pole on the ground. Do not stand the system up until it is fi lled with either sand or water later in
the assembly. Tighten the hardware shown.
• Faites basculer le système en avant et posez le Poteau sur la terre. Ne remettez pas debout le système jusqu’à ce qu’il soit rempli
de l’eau ou de sable plus tard dans l’assemblage. Serrez les accessoires indiqués.
• Incline el sistema hacia delante y coloque el Poste en el suelo. No ponga vertical el sistema hasta llenarlo con agua o arena más
tarde en el ensamble. Apriete los accesorios indicados.
2.6
2.5
• Attach the end of the Pole Braces to the Bottom Pole with the hardware shown.
• Attachez les extrémités des Tirants du poteau à la Section inférieur du poteau à l’aide des accessoires indiqués.
• Sujete los extremos de los Tirantes del poste a la Sección inferior del poste usando los accesorios indicados.
BTS
DXZ
ALE
ALI
ALI
3/16”
DXZ (x1)
BTS (x1)
EEO (x2)
1/2” (x2)

15
BACKBOARD TO RIM ASSEMBLY / ASSEMBLAGE DU TABLEAU À L’ANNEAU / ENSAMBLE DEL TABLERO AL ARO
3
BCR
Metal Parts / Pièces en métal / Piezas de metal
Hardware Bag / Sac d’accessoires / Bolsa de accesorios
TOOLS REQUIRED / OUTILS REQUIS / HERRAMIENTAS REQUERIDAS
PARTS REQUIRED / PIÈCES REQUISES / PIEZAS REQUERIDAS
HARDWARE REQUIRED / ACCESSOIRES REQUIS / ACCESORIOS REQUERIDOS
AJJ (x1)
AJK (x1)
AJI (x1)
AOX (x1)
(2)
1/2” (13 mm)
APG (x2)
AAC (x2)
ABK (x4)
ABD (x4)
Plastic Parts / Pièces en plastique / Piezas de plástico
APK (x1)
APN (x2)
ALX (x1)
ADQ (x2)
(1)
3/8” (10 mm)

16
X SECTION 3 (CONTINUED) / SECTION 3 (SUITE) / SECCIÓN 3 (CONTINUACIÓN)
TOOLS AND HARDWARE REQUIRED / OUTILS ET ACCESSOIRES REQUIS / HERRAMIENTAS Y ACCESORIOS REQUERIDOS
3.1 3.2
• Secure the Left and Right Backboard Brackets (AJJ & AJK)
to the Top Pole (ALH) with the hardware shown.
• Attachez les Supports du tableau droit et gauche (AJJ et
AJK) à la Section supérieure du poteau (ALH) à l’aide des
accessoires indiqués.
• Sujete los Soportes del tablero derecho e izquierdo (AJJ
y AJK) a la Sección superior del poste (ALH) usando los
accesorios indicados.
1/2” (13 mm)
(x2)
APK
AJJ
AJK
Notch
Encoche
Muesca
APK (x1)
APG (x2)
• The U-Bolt (APK) must rest in the notches of the
Backboard Brackets as shown.
• Le Boulon en « U » (APK) doit rester dans les encoches
des Supports du Tableau comme illustré.
• El Perno en «U» (APK) debe quedarse en las muescas
de los Soportes del Tablero como se muestra.
APN (x2)
APG
APG
APN
APN
AJJ
AJK
ALH
!
• Do not overtighten the hardware.
• Ne pas trop serrer les accessoires.
• No apriete demasiado los accesorios.
AAO (x2)
• If you have trouble with this section, scan the code below to view a video on its assembly.
• Si vous avez des problèmes avec cette section, scannez le code QR en dessous pour voir un vidéo de
l’assemblage.
• Si tiene problemas con esta sección, escanee el código QR debajo para ver un video del ensamblaje.
• http://go.lifetime.com/procourtpoletobase

i
This page intentionally left blank
Cette page est intentionnellement laissée en blanc
Esta página ha sido dejada en blanco intencionalmente
Remove This Section / Enlevez Cette Section / Reitire Esta Sección
PARTS IDENTIFIER / IDENTIFICATEUR DE PIÈCES / IDENTIFICADOR DE PIEZAS

ii
PARTS IDENTIFIER / IDENTIFICATEUR DE PIÈCES / IDENTIFICADOR DE PIEZAS
Metal Part / Pieza de metal / Pièce en métal
Remove This Section / Enlevez Cette Section / Reitire Esta Sección
ALH (x1)
ALF (x1)
ALE (x1)
ALI (x2)
AJC (x1)
1/2” x 15 3/4”
12.7mm x 400mm
AJE (x1)
1/2” x 7”
12.7mm x 178mm
15 ”
3/4
7”
AJJ (x1)
AJK (x1)
AOX (x1)
ALX (x1)
• Warning Sticker applied to side not shown
• L’Autocollant d’avertissement apliqué au côté n’est pas illustré
• Etiqueta de advertencia aplicada al lado no está ilustrado
• Do not remove Top Section (ALH) from Middle Section (ALF)
• Ne pas enlever la Section supérieure (ALH) de la Section du milieu (ALF)
• No retire la Sección superior (ALH) de la Sección intermedio (ALF)
* The Axle (AJE) is located in the parts bag.
L’essieu (AJE) est situé dans le sac des pièces.
El eje (AJE) se encuentra en la bolsa de partes.

iii
PARTS IDENTIFIER / IDENTIFICATEUR DE PIÈCES / IDENTIFICADOR DE PIEZAS
HARDWARE REQUIRED / ACCESSOIRES REQUIS / ACCESORIOS REQUERIDOS
Plastic Parts/ Piezas de plástico / Pièces en plastique
Remove This Section / Enlevez Cette Section / Reitire Esta Sección
AJI (x1)
AKZ (x1)
AMU (x2)
BCO BCQ BCR
AYU (x1)
AJM (x1)
AEF (x1)
FIQ (x1)
FIR (x1)

iv
This page intentionally left blank
Cette page est intentionnellement laissée en blanc
Esta página ha sido dejada en blanco intencionalmente
Remove This Section / Enlevez Cette Section / Reitire Esta Sección
PARTS IDENTIFIER / IDENTIFICATEUR DE PIÈCES / IDENTIFICADOR DE PIEZAS
La page est en cours de chargement...
La page est en cours de chargement...
La page est en cours de chargement...
La page est en cours de chargement...
La page est en cours de chargement...
La page est en cours de chargement...
La page est en cours de chargement...
La page est en cours de chargement...
La page est en cours de chargement...
La page est en cours de chargement...
La page est en cours de chargement...
La page est en cours de chargement...
La page est en cours de chargement...
La page est en cours de chargement...
La page est en cours de chargement...
La page est en cours de chargement...
-
 1
1
-
 2
2
-
 3
3
-
 4
4
-
 5
5
-
 6
6
-
 7
7
-
 8
8
-
 9
9
-
 10
10
-
 11
11
-
 12
12
-
 13
13
-
 14
14
-
 15
15
-
 16
16
-
 17
17
-
 18
18
-
 19
19
-
 20
20
-
 21
21
-
 22
22
-
 23
23
-
 24
24
-
 25
25
-
 26
26
-
 27
27
-
 28
28
-
 29
29
-
 30
30
-
 31
31
-
 32
32
-
 33
33
-
 34
34
-
 35
35
-
 36
36


dans d''autres langues
- English: Lifetime 1270 Owner's manual
- español: Lifetime 1270 El manual del propietario
Documents connexes
-
Lifetime 1270 Le manuel du propriétaire
-
-
-
-
-
-
Lifetime 90824 Le manuel du propriétaire
-
-
-