
www.awox.com
User Guide | 1
EN
AwoX SmartPLUG™
Bluetooth-controllable power plug

www.awox.com
2 | AwoX SmartPLUG
EN
AwoX SmartPLUG™
User guide
© 2015 AwoX. All rights reserved. AwoX SmartPLUG, AwoX, the AwoX logo and
other AwoX marks are owned by AwoX. iPhone, iPad, and iPod are trademarks
of Apple, Inc., registered in the U.S and other countries. Android is a trademark
of Google Inc. The Bluetooth® word mark and logos are owned by the
Bluetooth® SIG, Inc. Smartphone not included. Product photos are non-
contractual. CE compliance declaration available on www.awox.com. Rev 1.

www.awox.com
User Guide | 3
EN
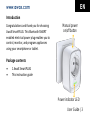
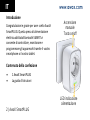
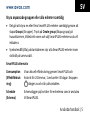
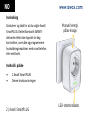
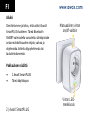
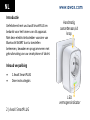
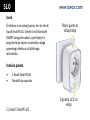
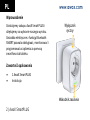
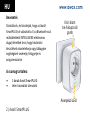
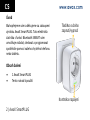
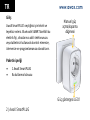
Introduction
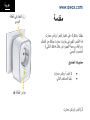
Congratulations and thank you for choosing
AwoX SmartPLUG. This Bluetooth SMART
enabled electrical power plug enables you to
control, monitor, and program appliances
using your smartphone or tablet.
Package contents
1 AwoX SmartPLUG
This instruction guide
Manual power
on/off button
Power indicator LED

www.awox.com
4 | AwoX SmartPLUG
EN
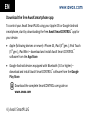
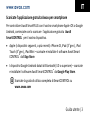
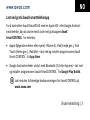
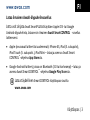
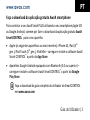
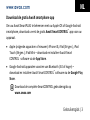
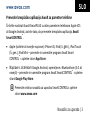
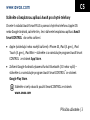
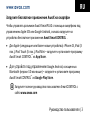
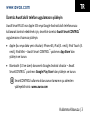
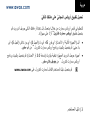
Download the free AwoX smartphone app
To control your AwoX SmartPLUG using your Apple iOS or Google Android
smartphone, start by downloading the free AwoX SmartCONTROL™ app for
your device.
Apple (following devices or newer): iPhone 4S, iPad (3rd gen.), iPod Touch
(5th gen.), iPad Mini – download and install AwoX Smart CONTROL™
software from the App Store.
Google Android devices equipped with Bluetooth (3.0 or higher) –
download and install AwoX SmartCONTROL™ software from the Google
Play Store.
Download the complete SmartCONTROL user guide on
www.awox.com

www.awox.com
User Guide | 5
EN
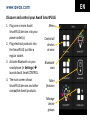
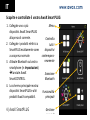
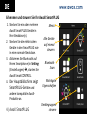
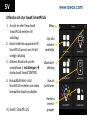
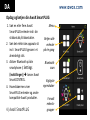
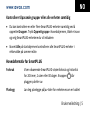
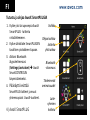
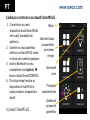
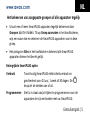
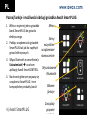
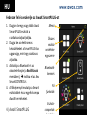
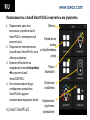
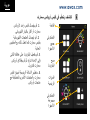
Discover and control your AwoX SmartPLUG
1. Plug one or more AwoX
SmartPLUG devices into your
power outlet(s).
2. Plug electrical products into
the SmartPLUG just like a
regular socket.
3. Activate Bluetooth on your
smartphone (in Settings)
launch AwoX SmartCONTROL.
4. The main screen shows
SmartPLUG devices and other
compatible AwoX products.
Menu
Control all
devices
at once
Bluetooth
scan
Main
features
Manage
device
groups

www.awox.com
6 | AwoX SmartPLUG
EN
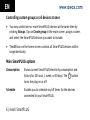
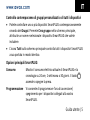
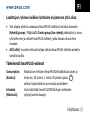
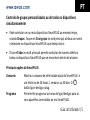
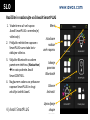
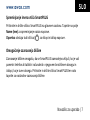
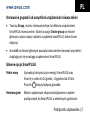
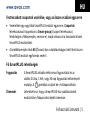
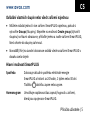
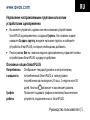
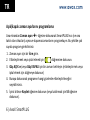
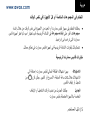
Controlling custom groups or all devices at once
You may control one or more SmartPLUG devices at the same time by
creating Groups. Tap on Create group in the main screen, assign a name,
and select the SmartPLUG devices you want to include.
The All icon on the home screen controls all SmartPLUG devices within
range identically.
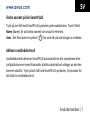
Main SmartPLUG options
Consumption
Shows current SmartPLUG electricity consumption and
history for 24 hours, 1 week, or 30 days. The button
turns the plug on or off.
Schedule
Enables you to schedule on/off times for the devices
connected to your SmartPLUG.

www.awox.com
User Guide | 7
EN
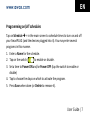
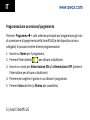
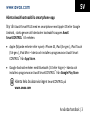
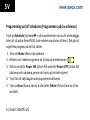
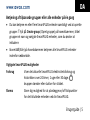
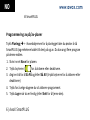
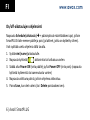
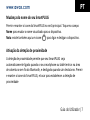
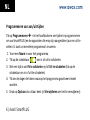
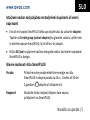
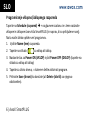
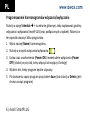
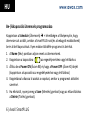
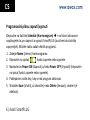
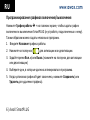
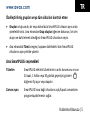
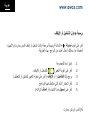
Programming on/off schedules
Tap on Schedule + in the main screen to schedule times to turn on and off
your SmartPLUG (and the devices plugged into it). You may enter several
programs in this manner.
1. Enter a Name for the schedule.
2. Tap on the switch ( ) to enable or disable.
3. Set a time to Power ON and/or Power OFF (tap the switch to enable or
disable)
4. Tap to choose the days on which to activate the program.
5. Press Save when done (or Delete to remove it).

www.awox.com
8 | AwoX SmartPLUG
EN
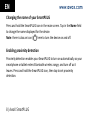
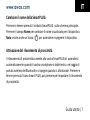
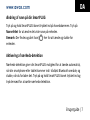
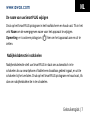
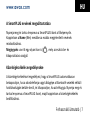
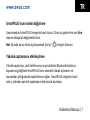
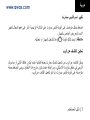
Changing the name of your SmartPLUG
Press and hold the SmartPLUG icon in the main screen. Tap in the Name field
to change the name displayed for the device.
Note: there is also an icon ( ) here to turn the device on and off.
Enabling proximity detection
Proximity detection enables your SmartPLUG to turn on automatically as your
smartphone or tablet enters Bluetooth wireless range, and turn off as it
leaves. Press and hold the SmartPLUG icon, then tap to set proximity
detection.

www.awox.com
User Guide | 9
EN
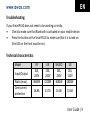
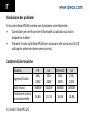
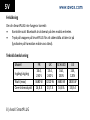
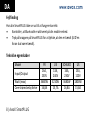
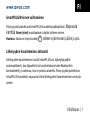
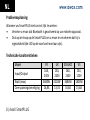
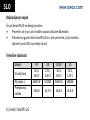
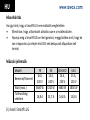
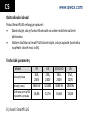
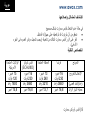
Troubleshooting
If your SmartPLUG does not seem to be working correctly:
Check to make sure that Bluetooth is activated on your mobile device.
Press the button on the SmartPLUG to make sure that it is turned on
(the LED on the front must be on).
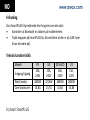
Technical characteristics
Model
FR
UK
SHUKO
US
Input/Output
16A,
230V
13A,
240V
16A,
230V
15A,
120V
Watts (max)
3680W
3210W
3680W
1800W
Overcurrent
protection
16.8A
13.7A
16.8A
15.8A


www.awox.com
Mode d'emploi | 1
FR
AwoX SmartPLUG™
Mode d'emploi
© 2015 AwoX. Tous droits réservés. AwoX SmartPLUG, AwoX, le logo AwoX et
les autres marques AwoX sont la propriété d'AwoX. iPhone, iPad et iPod sont
des marques déposées d'Apple, Inc., aux États-Unis et dans d'autres pays.
Android est une marque déposée de Google Inc. La marque et le logo
Bluetooth® sont la propriété de Bluetooth® SIG, Inc. Smartphone vendu
séparément. Photos non contractuelles. Déclaration de conformité CE
disponible sur www.awox.com. Version 1.

www.awox.com
2 | AwoX SmartPLUG
FR
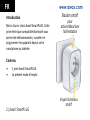
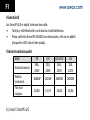
Introduction
Merci d'avoir choisi AwoX SmartPLUG. Cette
prise électrique compatible Bluetooth vous
permet de télécommander, surveiller et
programmer les appareils depuis votre
smartphone ou tablette.
Contenu
1 prise AwoX SmartPLUG
Le présent mode d'emploi
Bouton on/off
pour
activer/désactiver
l'alimentation
Voyant lumineux
on/off

www.awox.com
Mode d'emploi | 3
FR
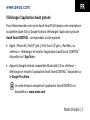
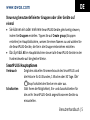
Téléchargez l'application AwoX gratuite
Pour télécommander votre prise AwoX SmartPLUG depuis votre smartphone
ou tablette Apple iOS ou Google Android, téléchargez l'application gratuite
AwoX SmartCONTROL™ correspondant à votre appareil :
Apple : iPhone 4S, iPad (3e gén.), iPod Touch (5e gén.), iPad Mini, ou
ultérieurs – téléchargez et installez l'application AwoX Smart CONTROL™
disponible sur l'App Store.
Appareils Google Android compatibles Bluetooth (3.0 ou ultérieur) –
téléchargez et installez l'application AwoX SmartCONTROL™ disponible sur
le Google Play Store.
Le mode d'emploi complet de l'application SmartCONTROL est
disponible sur www.awox.com

www.awox.com
4 | AwoX SmartPLUG
FR
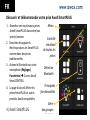
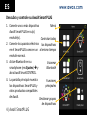
Découvrir et télécommander votre prise AwoX SmartPLUG
1. Branchez une ou plusieurs prises
AwoX SmartPLUG dans votre/vos
prise(s) secteur.
2. Branchez des appareils
électriques dans les SmartPLUG
comme dans des prises
traditionnelles.
3. Activez le Bluetooth sur votre
smartphone (Réglages/
Paramètres) Ouvrez AwoX
SmartCONTROL.
4. La page d'accueil affiche les
prises SmartPLUG et autres
produits AwoX compatibles.
Menu
Contrôle
simultané
de toutes les
prises
Détection
Bluetooth
Principales
fonctionnalités
Gérer
des groupes
de prises

www.awox.com
Mode d'emploi | 5
FR
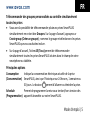
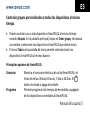
Télécommander des groupes personnalisés ou contrôle simultanément
toutes les prises
Vous avez la possibilité de télécommander plusieurs prises SmartPLUG
simultanément en créant des Groupes. Sur la page d'accueil, appuyez sur
Create group (Créer un groupe) ; nommez le groupe et sélectionnez les prises
SmartPLUG que vous souhaitez inclure.
Sur la page d'accueil, l'icône All (Tous) permet de télécommander
simultanément toutes les prises SmartPLUG situées dans le champ de votre
smartphone ou tablette.
Principales options
Consumption
(Consommation)
Indique la consommation électrique actuelle de la prise
SmartPLUG, ainsi que l'historique sur 24 heures, 1 semaine ou
30 jours. Le bouton permet d'allumer ou éteindre la prise.
Schedule
(Programmation)
Permet de programmer la mise sous tention/hors tension des
appareils branchés sur votre SmartPLUG.

www.awox.com
6 | AwoX SmartPLUG
FR
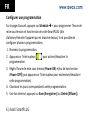
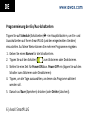
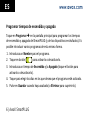
Configurer une programmation
Sur la page d'accueil, appuyez sur Schedule + pour programmer l'heure de
mise sous tension et hors tension de votre SmartPLUG (afin
d'allumer/éteindre l'appareil qui est branché dessus). Il est possible de
configurer plusieurs programmations.
1. Nommez la programmation.
2. Appuyez sur l'interrupteur ( ) pour activer/désactiver la
programmation.
3. Réglez l'heure de mise sous tension (Power ON) et/ou de hors tension
(Power OFF) (puis appuyez sur l'interrupteur pour enclencher/désactiver
cette programmation).
4. Choisissez les jours correspondant à cette programmation.
5. Une fois terminé, appuyez sur Save (Enregistrer) (ou Delete [Effacer]).

www.awox.com
Mode d'emploi | 7
FR
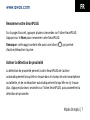
Renommer votre SmartPLUG
Sur la page d'accueil, appuyez plusieurs secondes sur l'icône SmartPLUG.
Appuyez sur le Nom pour renommer votre SmartPLUG.
Remarque : cette page contient elle aussi une icône ( ) qui permet
d'activer/désactiver la prise.
Activer la détection de proximité
La détection de proximité permet à votre SmartPLUG de s'activer
automatiquement lorsqu'elle se trouve dans le champ de votre smartphone
ou tablette, et de se désactiver automatiquement lorsqu'elle ne s'y trouve
plus. Appuyez plusieurs secondes sur l'icône SmartPLUG, puis paramétrez la
détection de proximité.

www.awox.com
8 | AwoX SmartPLUG
FR
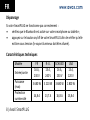
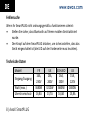
Dépannage
Si votre SmartPLUG ne fonctionne pas correctement :
vérifiez que le Bluetooth est activé sur votre smartphone ou tablette ;
appuyez sur le bouton on/off de votre SmartPLUG afin de vérifier qu'elle
est bien sous tension (le voyant lumineux doit être allumé).
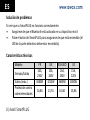
Caractéristiques techniques
Modèle
FR
R.-U.
SCHUKO
USA
Entrée/sortie
16 A,
230 V
13 A,
240 V
16 A,
230 V
15 A,
120 V
Puissance
(max)
3 680 W
3 210 W
3 680 W
1 800 W
Protection
surintensité
16,8 A
13,7 A
16,8 A
15,8 A

www.awox.com
Guida utente | 1
IT
AwoX SmartPLUG™
Guida utente
© 2015 AwoX. Tutti i diritti riservati. AwoX SmartPLUG, AwoX, il logo AwoX e
altri marchi AwoX sono di proprietà di AwoX. iPhone, iPad, e iPod sono marchi
commerciali Apple, Inc., registrati negli U.S. e in altri paesi. Android è un
marchio di Google Inc. Il marchio denominativo Bluetooth® e i logo sono
proprietà di Bluetooth® SIG, Inc. Smartphone non fornito. Le fotografie dei
prodotti non costituiscono elemento contrattuale. Dichiarazione di conformità
CE disponibile su www.awox.com Rev 1.

www.awox.com
2 | AwoX SmartPLUG
IT
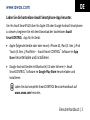
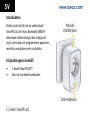
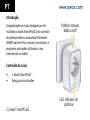
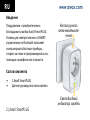
Introduzione
Congratulazioni e grazie per aver scelto AwoX
SmartPLUG. Questa presa di alimentazione
elettrica abilitata Bluetooth SMART vi
consente di controllare, monitorare e
programmare gli apparecchi tramite il vostro
smartphone o il vostro tablet.
Contenuto della confezione
1 AwoX SmartPLUG
La guida d'istruzioni
Accensione
manuale
Tasto on/off
LED indicazione
alimentazione
La page est en cours de chargement...
La page est en cours de chargement...
La page est en cours de chargement...
La page est en cours de chargement...
La page est en cours de chargement...
La page est en cours de chargement...
La page est en cours de chargement...
La page est en cours de chargement...
La page est en cours de chargement...
La page est en cours de chargement...
La page est en cours de chargement...
La page est en cours de chargement...
La page est en cours de chargement...
La page est en cours de chargement...
La page est en cours de chargement...
La page est en cours de chargement...
La page est en cours de chargement...
La page est en cours de chargement...
La page est en cours de chargement...
La page est en cours de chargement...
La page est en cours de chargement...
La page est en cours de chargement...
La page est en cours de chargement...
La page est en cours de chargement...
La page est en cours de chargement...
La page est en cours de chargement...
La page est en cours de chargement...
La page est en cours de chargement...
La page est en cours de chargement...
La page est en cours de chargement...
La page est en cours de chargement...
La page est en cours de chargement...
La page est en cours de chargement...
La page est en cours de chargement...
La page est en cours de chargement...
La page est en cours de chargement...
La page est en cours de chargement...
La page est en cours de chargement...
La page est en cours de chargement...
La page est en cours de chargement...
La page est en cours de chargement...
La page est en cours de chargement...
La page est en cours de chargement...
La page est en cours de chargement...
La page est en cours de chargement...
La page est en cours de chargement...
La page est en cours de chargement...
La page est en cours de chargement...
La page est en cours de chargement...
La page est en cours de chargement...
La page est en cours de chargement...
La page est en cours de chargement...
La page est en cours de chargement...
La page est en cours de chargement...
La page est en cours de chargement...
La page est en cours de chargement...
La page est en cours de chargement...
La page est en cours de chargement...
La page est en cours de chargement...
La page est en cours de chargement...
La page est en cours de chargement...
La page est en cours de chargement...
La page est en cours de chargement...
La page est en cours de chargement...
La page est en cours de chargement...
La page est en cours de chargement...
La page est en cours de chargement...
La page est en cours de chargement...
La page est en cours de chargement...
La page est en cours de chargement...
La page est en cours de chargement...
La page est en cours de chargement...
La page est en cours de chargement...
La page est en cours de chargement...
La page est en cours de chargement...
La page est en cours de chargement...
La page est en cours de chargement...
La page est en cours de chargement...
La page est en cours de chargement...
La page est en cours de chargement...
La page est en cours de chargement...
La page est en cours de chargement...
La page est en cours de chargement...
La page est en cours de chargement...
La page est en cours de chargement...
La page est en cours de chargement...
La page est en cours de chargement...
La page est en cours de chargement...
La page est en cours de chargement...
La page est en cours de chargement...
La page est en cours de chargement...
La page est en cours de chargement...
La page est en cours de chargement...
La page est en cours de chargement...
La page est en cours de chargement...
La page est en cours de chargement...
La page est en cours de chargement...
La page est en cours de chargement...
La page est en cours de chargement...
La page est en cours de chargement...
La page est en cours de chargement...
La page est en cours de chargement...
La page est en cours de chargement...
La page est en cours de chargement...
La page est en cours de chargement...
La page est en cours de chargement...
La page est en cours de chargement...
La page est en cours de chargement...
La page est en cours de chargement...
La page est en cours de chargement...
La page est en cours de chargement...
La page est en cours de chargement...
La page est en cours de chargement...
La page est en cours de chargement...
La page est en cours de chargement...
La page est en cours de chargement...
La page est en cours de chargement...
La page est en cours de chargement...
La page est en cours de chargement...
La page est en cours de chargement...
La page est en cours de chargement...
La page est en cours de chargement...
La page est en cours de chargement...
La page est en cours de chargement...
La page est en cours de chargement...
La page est en cours de chargement...
-
 1
1
-
 2
2
-
 3
3
-
 4
4
-
 5
5
-
 6
6
-
 7
7
-
 8
8
-
 9
9
-
 10
10
-
 11
11
-
 12
12
-
 13
13
-
 14
14
-
 15
15
-
 16
16
-
 17
17
-
 18
18
-
 19
19
-
 20
20
-
 21
21
-
 22
22
-
 23
23
-
 24
24
-
 25
25
-
 26
26
-
 27
27
-
 28
28
-
 29
29
-
 30
30
-
 31
31
-
 32
32
-
 33
33
-
 34
34
-
 35
35
-
 36
36
-
 37
37
-
 38
38
-
 39
39
-
 40
40
-
 41
41
-
 42
42
-
 43
43
-
 44
44
-
 45
45
-
 46
46
-
 47
47
-
 48
48
-
 49
49
-
 50
50
-
 51
51
-
 52
52
-
 53
53
-
 54
54
-
 55
55
-
 56
56
-
 57
57
-
 58
58
-
 59
59
-
 60
60
-
 61
61
-
 62
62
-
 63
63
-
 64
64
-
 65
65
-
 66
66
-
 67
67
-
 68
68
-
 69
69
-
 70
70
-
 71
71
-
 72
72
-
 73
73
-
 74
74
-
 75
75
-
 76
76
-
 77
77
-
 78
78
-
 79
79
-
 80
80
-
 81
81
-
 82
82
-
 83
83
-
 84
84
-
 85
85
-
 86
86
-
 87
87
-
 88
88
-
 89
89
-
 90
90
-
 91
91
-
 92
92
-
 93
93
-
 94
94
-
 95
95
-
 96
96
-
 97
97
-
 98
98
-
 99
99
-
 100
100
-
 101
101
-
 102
102
-
 103
103
-
 104
104
-
 105
105
-
 106
106
-
 107
107
-
 108
108
-
 109
109
-
 110
110
-
 111
111
-
 112
112
-
 113
113
-
 114
114
-
 115
115
-
 116
116
-
 117
117
-
 118
118
-
 119
119
-
 120
120
-
 121
121
-
 122
122
-
 123
123
-
 124
124
-
 125
125
-
 126
126
-
 127
127
-
 128
128
-
 129
129
-
 130
130
-
 131
131
-
 132
132
-
 133
133
-
 134
134
-
 135
135
-
 136
136
-
 137
137
-
 138
138
-
 139
139
-
 140
140
-
 141
141
-
 142
142
-
 143
143
-
 144
144
-
 145
145
-
 146
146


dans d''autres langues
- italiano: Awox SMP-B16-GR Guida utente
- English: Awox SMP-B16-GR User guide
- español: Awox SMP-B16-GR Guía del usuario
- русский: Awox SMP-B16-GR Руководство пользователя
- Nederlands: Awox SMP-B16-GR Gebruikershandleiding
- português: Awox SMP-B16-GR Guia de usuario
- dansk: Awox SMP-B16-GR Brugervejledning
- polski: Awox SMP-B16-GR instrukcja
- čeština: Awox SMP-B16-GR Uživatelská příručka
- svenska: Awox SMP-B16-GR Användarguide
- Türkçe: Awox SMP-B16-GR Kullanici rehberi
- suomi: Awox SMP-B16-GR Käyttöohjeet


