La page est en cours de chargement...

Installation and Operation Manual
www.morningstarcorp.com
MORNINGSTAR
World’s Leading Solar Controllers & Inver ters
S
UN
S
AVER
PV SYSTEM CONTROLLERS
SEALED
OR
FLOODED
SELECT
LOAD
BATTERY
SOLAR
Remove
Jumper
Wire for
Flooded
Battery
{
12 V
BATTERY STATUSTEMP. SENSORCHARGING STATUS
!
See Operator’s
Manual
Nominal Rating
12 Volts dc
Max. Input 30 V
Solar 20.0 A
Battery 20.0 A
Load 20.0 A
Max. Ambient 65 ºC
indoor use only
Use 75 ºC Copper
Conductors Only
CONFORMS TO ISA 12.12.01
CERTIFIED TO CAN/CSA STD
C22.2 NO.213-1992
Class I, Division 2
Groups A,B,C,D
Hazardous Loc.
Temp. Code: T5
RoHS
MORNINGSTAR
S S
20L
UN AVER-
SOLAR CONTR OLLER SS-20L-1 2V
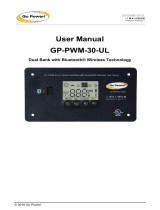
SunSaver Models Included in this Manual:
• SS-6-12V / SS-6L-12V
• SS-10-12V
• SS-10L-12V / SS-10L-24V
• SS-20L-12V / SS-20L-24V

MORNINGSTAR CORPORATION
3
2
SunSaver Dimensions
Inches [Millimeters]
Specication Summary
Ratings SS-6/6L SS-10/10L SS-20L
System Voltage 12 V 12 or 24V 12 or 24V
Min. Battery Voltage 6 V 6 V 6 V
Max. Solar Voltage 30 V 30 or 60V 30 or 60V
Max. Solar Current 6 .5 A 10 A 20 A
Max. Load Current 6 A 10 A 20 A
See Section 7.0 for full technical specications
** Array voltage should never exceed maximum input voltage. Refer to the
solar module documentation to determine the highest expected array V
oc
as
dened by the lowest expected ambient temperature for the system location.
CONTENTS
1.0 Safety Information 4
2.0 General Information 10
2.1 Overview 10
2.2 Features 11
2.3 Regulatory Information 12
3.0 Installation Instructions 15
3.1 General Installation Notes 15
3.2 User Selections 17
3.3 Mounting 20
3.4 Wiring 22
4.0 Operation 31
4.1 LED Indications 31
4.2 Battery Charging Information 33
4.3 Load Control Information 35
4.4 Protections 37
4.5 Inspection and Maintenance 39
5.0 Troubleshooting 40
5.1 Error Indications 40
5.2 Common Problems 41
6.0 Warranty and Claim Procedure 42
7.0 Technical Specications 44

MORNINGSTAR CORPORATION
5
1.0 SAFETY INFORMATION
4
1.0
SAVE THESE INSTRUCTIONS.
This manual contains important safety, installation and operating
instructions for the SunSaver solar controller.
The following symbols are used throughout this manual to
indicate potentially dangerous conditions or mark important safety
instructions:
WARNING:
Indicates a potentially dangerous condition. Use
extreme caution when performing this task.
!
CAUTION:
Indicates a critical procedure for safe and proper
operation of the controller.
NOTE:
Indicates a procedure or function that is important for
the safe and proper operation of the controller.
Safety Information
• Read all of the instructions and cautions in the manual before
beginning installation.
• There are no user serviceable parts inside the SunSaver. Do
not disassemble or attempt to repair the controller.
• Disconnect all sources of power to the controller before
installing or adjusting the SunSaver.
• There are no fuses or disconnects inside the SunSaver. Do
not attempt to repair.
• Install external fuses/breakers as required.
WARNING:
These servicing instructions are for use by qualied
personnel only. To reduce the risk of electric shock,
do not perform any servicing other than that specied
in the operating instructions unless you are qualied
to do so.
WARNING:
EXPLOSION HAZARD - DO NOT DISCONNECT WHILE
CIRCUIT IS LIVE UNLESS AREA IS KNOWN TO BE NON-
HAZARDOUS.
!
CAUTION:
A BATTERY CAN PRESENT A RISK OF ELECTRICAL
SHOCK, BURN FROM HIGH SHORT-CIRCUIT
CURRENT, FIRE OR EXPLOSION FROM VENTED GASES.
OBSERVE PROPER PRECAUTIONS
!
CAUTION:
To reduce the risk of re, connect only to a circuit
provided with a maximum branch-circuit overcurrent
protection rating not to exceed the model current rating
on page 2 and in accordance with the National Electrical
Code, ANSI/NFPA 70.
CAUTION:
Unit has no battery removal protection.
Disconnecting battery during charging may cause a
brief spike in load voltage (above the 15V
regulation limit) which may damage sensitive equipment.
1
NOTE:
PROPER DISPOSAL OF BATTERIES IS REQUIRED.
REFER TO YOUR LOCAL CODES FOR DISPOSAL
REQUIREMENTS
.0 Important Safety Information 4
!
1.0 IMPORTANT SAFETY INSTRUCTIONS

MORNINGSTAR CORPORATION
7
1.0 SAFETY INFORMATION
6
1.0
!
ATTENTION:
Pour diminuer le risque d’incendie, ne connectez
l’alimentation qu’à un circuit équipé d’une protection
maximum par dérivation contre les surintensités ne
dépassant pas le courant nominal du modèle de la
page 2, conformément à la norme du Code National de
l’Électricité (NEC), ANSI/NFPA 70.
ATTENTION:
Unité bénécie d’aucune protection de retrait de batterie.
Débrancher la batterie pendant la charge peut entraîner
un bref pic de tension de charge (au-dessus du 15V limite
de règlement) qui peuvent endommager les équipement
sensibles.
Installation Safety Precautions
WARNING:
This unit is not provided with a GFDI device. This
charge controller must be used with an external
GFDI device as required by the Article 690 of
the National Electrical Code for the installation
location.
• Mount the SunSaver indoors. Prevent exposure to the
elements and do not allow water to enter the controller.
• Install the SunSaver in a location that prevents casual
contact. The SunSaver heatsink can become very hot during
operation.
• Use insulated tools when working with batteries.
• Avoid wearing jewelry during installation.
• The battery bank must be comprised of batteries of same
type, make, and age.
• Do not smoke in the vicinity of the battery bank.
• Mount the controller at least 3 ft (1 m) away from vented
batteries unless separated by a barrier or located in a
separate compartment.
!
Informations de sécurité
• Lisez toutes les instructions et les avertissements gurant
dans le manuel avant de commencer l’installation.
• Le SunSaver ne contient aucune pièce réparable par
l’utilisateur. Ne démontez pas ni ne tentez de réparer le
contrôleur.
• Déconnectez toutes les sources d’alimentation du contrôleur
avant d’installer ou de régler le SunSaver.
• Le SunSaver ne contient aucun fusible ou interrupteur. Ne
tentez pas de réparer.
• Installez des fusibles/coupe-circuits externes selon le besoin.
AVERTISSEMENT:
Ces instructions d’entretien sont exclusivement réservé-
es à des techniciens qualiés. Pour réduire le risque de
choc électrique, ne réalisez aucun entretien autre que
celui stipulé dans les instructions de fonctionnement, à
moins que vous ne possédiez les qualications néces-
saires en la matière.
!
ATTENTION:
UNE BATTERIE PEUT PRÉSENTER UN RISQUE ÉLEVÉ
DE CHOC ÉLECTRIQUE, DE BRÛLURES SUITE À UN
COURANT DE COURT-CIRCUIT ÉLEVÉ, À UN INCENDIE
OU À UNE EXPLOSION PROVENANT DE GAZ REJETÉS
DANS L’AIR. VEUILLEZ PRENDRE LES PRÉCAUTIONS
NÉCESSAIRES.
AVERTISSEMENT:
RISQUE D’EXPLOSION. NE PAS DEBRANCHER TANT
QUE LE CIRCUIT EST SOUS TENSION, A MOINS QU’lL
NE S’AGISSE D’UN EMPLACEMENT NON DANGEREUX.

1.0 SAFETY INFORMATION
8
MORNINGSTAR CORPORATION
1.0
9
• Power connections must remain tight to avoid excessive
heating from a loose connection.
• Use properly sized conductors and circuit interrupters
• This charge controller is to be connected to DC circuits only.
These DC connections are identied by the symbol below:
Direct Current Symbol
Précautions de sécurité d’installation
AVERTISSEMENT:
L’appareil n’est pas fourni avec un dispositif GFDI.
Ce contrôleur de charge doit être utilisé avec un
dispositif GFDI externe tel que requis par l’Article
690 du Code électrique national de l’emplacement de
l’installation.
• Montez le SunSaver à l’intérieur. Empêchez l’exposition aux
éléments et la pénétration d’eau dans le contrôleur.
• Installez le SunSaver dans un endroit qui empêche le con-
tact occasionnel. Le dissipateur de chaleur SunSaver peut
devenir très chaude pendant le fonctionnement
• Utilisez des outils isolés pour travailler avec les batteries.
• Évitez le port de bijoux pendant l’installation.
• Le groupe de batteries doit être constitué de batteries du
même type, fabricant et âge.
• Ne fumez pas à proximité du groupe de batteries.
• Monter le régulateur au moins 3 pi (1 m) de batteries ventilés
sauf séparées par une barrière ou situé dans un comparti-
ment séparé.
• Les connexions d’alimentation doivent rester serrées pour
éviter une surchauffe excessive d’une connexion desserrée.
• Utilisez des conducteurs et des coupe-circuits de dimensions
adaptées.
• Ce contrôleur de charge ne doit être connecté qu’à des cir-
cuits en courant continu. Ces connexions CC sont identiées
par le symbole ci-dessous:
Symbole courant continu

MORNINGSTAR CORPORATION
11
10
2.1 Overview
Thank you for selecting the SunSaver solar charge
controller. The SunSaver is an advanced PWM solar battery
charger and load controller for stand-alone PV systems.
The SunSaver battery charging process has been
optimized for long battery life and improved system
performance. Self-diagnostics and electronic error protection
prevent damage when installation mistakes or system faults
occur.
Although the SunSaver is very simple to install and use,
please take the time to read this operator’s manual and
become familiar with the controller.
2.2 Features
The features of the SunSaver are shown in Figure 1 below.
An explanation of each feature is provided.
SEALED
OR
FLOODED
SELECT
LOAD
BATTERY
SOLAR
Remove
Jumper
Wire for
Flooded
Battery
{
12 V
BATTERY STATUSTEMP. SENSORCHARGING STATUS
!
See Operator’s
Manual
Nominal Rating
12 Volts dc
Max. Input 30 V
Solar 6.5 A
Battery 6.5 A
Load 10.0 A
indoor use only
Use Copper
Conductors Only
CONFORMS TO UL STD 1604
CERTIFIED TO CAN/CSA STD
C22.2 NO.213-M1987
Class 1 Division 2
Groups A,B,C,D
Hazardous Loc.
For the Risk of Explosion Only
Operating Temp. Code: T5
MORNINGSTAR
S S
6
UN AVER-
SOLAR CONTROLLER SS-6-12V
1
2
6
54
3
Figure 1. SunSaver features.
1 - Status LED
An LED indicator that shows charging status and also
indicates when a solar input fault condition exists.
2 - Power Terminal Block
Power terminations for system Solar, Battery, and Load
connections.
3 - Battery Select Jumper
A removable jumper to select the battery type.
4 - Local Temperature Sensor
Measures ambient temperature. Battery regulation is
adjusted based on ambient temperature changes.
2
2 .0
2.0 GENERAL INFORMATION
2.0 GENERAL INFORMATION

MORNINGSTAR CORPORATION
132.0 GENERAL INFORMATION12
5 - Battery Status LEDs
Provides approximate battery state-of-charge indication
and also indicates when a system or load fault condition
exists.
6 - Mounting Holes
Four (4) mounting holes
2.3 Regulatory Information
NOTE:
This section contains important information for safety
and regulatory requirements.
The SunSaver controller should be installed by a qualied
technician according to the electrical regulations of the
country in which the product will be installed.
SunSaver controllers comply with the following EMC
standards:
• Immunity: EN61000-6-2:1999
• Emissions: EN55022:1994 with A1 and A3 Class B1
• Safety: EN60335-1 and EN60335-2-29 (battery
chargers)
FCC requirements:
This device complies with Part 15 of the FCC rules.
Operation is subject to the following two conditions: (1)
This device may not cause harmful interference, and (2)
this device must accept any interference received, including
interference that may cause undesired operation.
Changes or modications not expressly approved by
Morningstar for compliance could void the user’s authority to
operate the equipment.
Note:
This equipment has been tested and found to comply
with the limits for a Class B digital device, pursuant to Part
15 of the FCC rules. These limits are designed to provide
reasonable protection against harmful interference in a
residential installation. This equipment generates, uses, and
can radiate radio frequency energy and, if not installed and
used in accordance with the instruction manual, may cause
harmful interference to radio communication. However,
there is no guarantee that interference will not occur in a
particular installation. If this equipment does cause harmful
interference to radio or television reception, which can be
determined by turning the equipment on and off, the user is
encouraged to try to correct the interference by one or more
of the following measures:
• Re-orient or relocate the receiving antenna.
• Increase the separation between the equipment and
receiver.
• Connect the equipment into an outlet on a circuit
different from that to which the receiver is connected.
• Consult the dealer or an experienced radio/TV
technician for assistance.
2
2 .0

MORNINGSTAR CORPORATION
15
2.0 GENERAL INFORMATION14
This Class B digital apparatus complies with Canadian
ICES-003.
Cet appareil numerique de la classe B est conforme a la
norme NMB-003 du Canada.
3.0 INSTALLATION INSTRUCTIONS
3.1 General Installation Notes
• Read through the entire installation section before
beginning installation.
• Be very careful when working with batteries. Wear
eye protection. Have fresh water available to wash
and clean any contact with battery acid.
• Use insulated tools and avoid placing metal objects
near the batteries.
• Explosive battery gases may be present during
charging. Be certain there is sufcient ventilation to
release the gases.
• Do not install in locations where water can enter the
controller.
• Loose power connections and/or corroded wires
may result in resistive connections that melt wire
insulation, burn surrounding materials, or even cause
re. Ensure tight connections and use cable clamps
to secure cables and prevent them from swaying in
mobile applications.
• The SunSaver charging algorithm is compatible with
lead-acid or NiCd batteries. NiMH, Li-ion, and other
battery chemistries are not compatible with the
SunSaver charging algorithm.
• The SunSaver Battery connection may be wired
to one battery or a bank of batteries. The following
instructions refer to a singular battery, but it is implied
that the battery connection can be made to either one
battery or a group of batteries in a battery bank.
2
3 .0

MORNINGSTAR CORPORATION
17
3.0 INSTALLATION
16
Installation in Hazardous Locations
THIS EQUIPMENT IS ONLY SUITABLE FOR USE IN CLASS
I, DIVISION 2, GROUPS A,B,C and D OR NON-HAZARDOUS
LOCATIONS.
CAUTION:
For hazardous locations, device must be
installed inside an appropriately type rated tool secured
enclosure. Consult with local authority having jurisdiction for
type rating required.
ATTENTION:
Pour les endroits dangereux, le dispositif doit être
installé à l’intérieur un convenablement qualication de type
outil sécurisé enceinte. Consultez les autorités locales
compétentes pour la qualication de type requise.
!
3.2 User Selections
Select a Battery Type
The SunSaver provides a Battery Select Jumper to
choose the battery type. See Section 7.0 Technical
Specications for detailed charging information for each
battery type.
The battery select jumper is secured in the terminal block
between terminal #6 and terminal #7 as shown in gure 2a.
The second column in table 1 species whether the jumper
should be removed or remain in place, depending on the
desired battery type.
Battery Type Battery Jumper Absorption Float Equalize
Sealed Inserted 14.10V 13.70V N/A
Flooded/
AGM
1
Removed 14.60V 13.70V 14.90V
1. Flooded/AGM absorption value effective with unit serial nos.
2038 0001 and higher
Table 1. Battery Type selection
Figure 2a. Removing the Battery Select jumper.
2
3 .0
!

MORNINGSTAR CORPORATION
19
3.0 INSTALLATION
18
Choose Regulation Method (optional)
Choose between Pulse Width Modulation (PWM) charging
or Slow Switching charging. PWM charging is the default
regulation method and is the method recommended for most
systems.
Slow Switching regulation should only be selected if noise
or interference exists in the system due to PWM charging.
This regulation method limits the switching frequency to 10
Hz (maximum), which can eliminate noise issues in some
systems.
PWM charging is selected by default. To enable Slow
Switching regulation do the following:
1. Remove all four screws that secure the faceplate on
the SunSaver. See Figure 2b.
2. Gently pry the faceplate off the SunSaver.
Occasionally, epoxy encapsulant will cause the
faceplate to stick. Use a small at-head screw driver
to separate the faceplate from the SunSaver body.
See Figure 2c.
3. A loop of wire protrudes from the epoxy. Cut the loop
with wire clippers to switch the regulation method to
Slow Switching. See Figure 2d.
4. Tape the cut ends with electrical tape to prevent
contact with the faceplate.
5. Replace the faceplate and secure with the four
screws.
Figure 2b. Remove faceplate screws.
Figure 2c. Remove faceplate.
CUT
Figure 2d. Cut the Regulation Select wire loop.
2
3 .0

MORNINGSTAR CORPORATION
21
3.0 INSTALLATION
20
3.3 Mounting
!
CAUTION: Equipment Damage or Risk of Explosion
Never install the SunSaver in an enclosure with vented/
ooded batteries. Battery fumes are ammable and will
corrode and destroy the SunSaver circuits.
!
CAUTION: Equipment Damage
When installing the SunSaver in an enclosure, ensure
sufcient ventilation. Installation in a sealed enclo-
sure will lead to over-heating and a decreased product
lifetime.
!
PRUDENCE: Endommagement de l’équipement ou
risque d’explosion
N’installez jamais le SunSaver dans une enceinte avec
des batteries à évent/à électrolyte liquide. Les vapeurs
des batteries sont inammables et corroderont et détru-
iront les circuits du SunSaver.
!
PRUDENCE: Endommagement de l’équipement
Assurez une ventilation sufsante en cas d’installation
du SunSaver dans une enceinte. L’installation dans une
enceinte hermétique entraîne une surchauffe et une
réduction de la durée de vie du produit.
Step 1: Choose Mounting Location
Locate the SunSaver on a vertical surface protected from
direct sun, high temperatures, and water. The unit should
be located in the same ambient temperature as the battery.
Locate the controller within 10 ft (3 M) of the battery bank.
Mounting the controller on a horizontal surface does not
provide optimal airow and could lead to overheating.
Step 2: Check for Clearance
Place the SunSaver in the location where it will be
mounted. Verify that there is sufcient room to run wires and
that there is ample room above and below the controller for
air ow.
WARM AIR
COOL AIR
AT LEAST
2” (51 mm)
AT LEAST
2” (51 mm)
SEALED
OR
FLOODED
SELECT
LOAD
BATTERY
SOLAR
Remove
Jumper
Wire for
Flooded
Battery
{
12 V
BATTERY STATUSTEMP. SENSORCHARGING STATUS
!
See Operator’s
Manual
Nominal Rating
12 Volts dc
Max. Input 30 V
Solar 20.0 A
Battery 20.0 A
Load 20.0 A
Max. Ambient 65 ºC
indoor use only
Use 75 ºC Copper
Conductors Only
CONFORMS TO ISA 12.12.01
CERTIFIED TO CAN/CSA STD
C22.2 NO.213-1992
Class I, Division 2
Groups A,B,C,D
Hazardous Loc.
Temp. Code: T5
RoHS
MORNINGSTAR
S S
20L
UN AVER-
SOLAR CONTROLLER SS-20L-12V
Figure 3. Mounting and cooling.
Step 3: Mark Holes
Use a pencil or pen to mark the four (4) mounting hole
locations on the mounting surface.
Step 4: Drill Holes
Remove the controller and drill 3/32” (2.5 mm) holes in the
marked locations.
Step 5: Secure Controller
Place the controller on the surface and align the mounting
holes with the drilled holes in step 4. Secure the controller in
place using mounting screws (not included).
2
3 .0

MORNINGSTAR CORPORATION
23
3.0 INSTALLATION
22
3.4 Wiring
NOTE: A recommended connection order has been
provided for maximum safety during installation. When
disconnecting, solar input must be removed rst before
disconnecting battery. See caution below.
NOTE: The SunSaver is a negative ground controller.
Any one negative conductor can be earth grounded as
required. Grounding is recommended, but not required
for correct operation.
NOTE:
To comply with the NEC, the SunSaver must be installed
using wiring methods in accordance with Article 690 of
the latest edition of the National Electric Code, NFPA 70.
NOTE:
The total current draw of all system loads connected
to the SunSaver LOAD terminals cannot exceed the
controller’s load current rating.
NOTE:
For mobile applications, be sure to secure all wiring.
Use cable clamps to prevent cables from swaying when
the vehicle is in motion. Unsecured cables create loose
and resistive connections which may lead to excessive
heating and/or re.
WARNING:
EXPLOSION HAZARD - DO NOT DISCONNECT WHILE
CIRCUIT IS LIVE UNLESS AREA IS KNOWN TO BE NON-
HAZARDOUS.
AVERTISSEMENT:
RISQUE D’EXPLOSION. NE PAS DEBRANCHER TANT
QUE LE CIRCUIT EST SOUS TENSION, A MOINS QU’lL
NE S’AGISSE D’UN EMPLACEMENT NON DANGEREUX.
CAUTION: Unit has no battery removal protection.
Disconnecting battery during charging may cause a brief
spike in load voltage (above the 15V regulation limit)
which may damage sensitive equipment.
!
ATTENTION:
Unité bénécie d’aucune protection de retrait de batterie.
Débrancher la batterie pendant la charge peut entraîner
un bref pic de tension de charge (au-dessus du 15V limite
de règlement) qui peuvent endommager les équipement
sensibles.
Step 1: Load Wiring
The SunSaver load output connection will provide battery
voltage to system loads such as lights, pumps, motors,
and electronic devices. See Section 4.3 Load Control
Information for more details about load control.
LOAD
POSITIVE (+)
LOAD
NEGATIVE (-)
FUSE
SEALED
OR
FLOODED
SELECT
LOAD
BATTERY
SOLAR
Remove
Jumper
Wire for
Flooded
Battery
{
12 V
BATTERY STATUSTEMP. SENSORCHARGING STATUS
!
See Operator’s
Manual
Nominal Rating
12 Volts dc
Max. Input 30 V
Solar 20.0 A
Battery 20.0 A
Load 20.0 A
Max. Ambient 65 ºC
indoor use only
Use 75 ºC Copper
Conductors Only
CONFORMS TO ISA 12.12.01
CERTIFIED TO CAN/CSA STD
C22.2 NO.213-1992
Class I, Division 2
Groups A,B,C,D
Hazardous Loc.
Temp. Code: T5
RoHS
MORNINGSTAR
S S
20L
UN AVER-
SOLAR CONTRO LLER SS-20L-12 V
Figure 4. Load wiring.
Connect load positive (+) and negative (-) load wires to
the system load(s) or load distribution panel as shown in
gure 4. Refer to the wire gauge chart on page 30 of this
manual for correct wire size. Use 75 °C copper wire.
If required, the negative load connection may be
earth grounded. Use appropriate gauge wire and proper
grounding methods for the installation site.
!
2
3 .0

MORNINGSTAR CORPORATION
25
3.0 INSTALLATION
24
An in-line fuse holder should be wired in series in the load
positive (+) wire as shown. DO NOT INSERT A FUSE AT
THIS TIME. A circuit breaker may be used in lieu of a fuse.
Keep the breaker in the open (disconnected) position at this
time.
If wiring the load connection to a distribution panel, each
load circuit should be fused separately. The total load draw
should not exceed the the SunSaver’s maximum load rating.
Step 2: Battery Wiring
WARNING: Shock Hazard
Fuses, circuit breakers, and disconnect switches
should never open grounded system conductors. Only
GFDI devices are permitted to disconnect grounded
conductors.
AVERTISSEMENT: Risque de décharge électrique
Les fusibles, coupe-circuits et interrupteurs ne doivent
jamais ouvrir les conducteurs du système mis à la terre.
Seuls les dispositifs GFDI sont autorisés à déconnecter
les conducteurs reliés mis à la terre.
The nominal battery voltage must match the SunSaver
voltage rating. For 12V SunSaver models, only a 12V
battery may be used. Connect only 24V batteries (or two
12V batteries in series) to 24V SunSaver models.
Before connecting the battery, measure the battery
voltage. Battery voltage must be greater than 6 volts to
power the SunSaver (12V or 24V models).
Connect the battery to the SunSaver. Refer to the wire
gauge chart on page 43 of this manual for correct wire size.
Use 75 °C copper wire.
If required, the negative battery connection may be
earth grounded. Use appropriate gauge wire and proper
grounding methods for the installation site.
Wire an in-line fuse holder no more than 6 inches (150
2
3 .0
mm) from the battery positive terminal. DO NOT INSERT
A FUSE AT THIS TIME. A circuit breaker may be used in
lieu of a fuse. Keep the breaker in the open (disconnected)
position at this time.
CAUTION: Unit has no battery removal protection.
Disconnecting battery during charging may cause a brief
spike in load voltage (above the 15V regulation limit) which
may damage sensitive equipment.
ATTENTION:
Unité bénécie d’aucune protection de retrait de batterie.
Débrancher la batterie pendant la charge peut entraîner
un bref pic de tension de charge (au-dessus du 15V limite
de règlement) qui peuvent endommager les équipement
sensibles.
NOTE:
Battery circuit fuse / breaker not included. Fuse must be
purchased separately.
SEALED
OR
FLOODED
SELECT
LOAD
BATTERY
SOLAR
Remove
Jumper
Wire for
Flooded
Battery
{
12 V
BATTERY STATUSTEMP. SENSORCHARGING STATUS
!
See Operator’s
Manual
Nominal Rating
12 Volts dc
Max. Input 30 V
Solar 20.0 A
Battery 20.0 A
Load 20.0 A
Max. Ambient 65 ºC
indoor use only
Use 75 ºC Copper
Conductors Only
CONFORMS TO ISA 12.12.01
CERTIFIED TO CAN/CSA STD
C22.2 NO.213-1992
Class I, Division 2
Groups A,B,C,D
Hazardous Loc.
Temp. Code: T5
RoHS
MORNINGSTAR
S S
20L
UN AVER-
SOLAR CONTROLLER SS-20L-12V
6 in (150 mm)
MAX.
BATTERY
NEGATIVE (-)
BATTERY
POSITIVE (+)
+
-
FUSE
12V / 24V
BATTERY
EARTH
GROUND
Figure 5. Battery wiring.
!
!

MORNINGSTAR CORPORATION
27
3.0 INSTALLATION
26
3.0
Step 3: Solar Wiring
WARNING: Shock Hazard
The solar PV array can produce open-circuit voltages
in excess of 40 Vdc when in sunlight. Verify that the
solar input breaker or disconnect has been opened
(disconnected) before installing the system wires.
AVERTISSEMENT: Risque de décharge électrique
Le réseau PV solaire peut produire des tensions de cir-
cuit ouvert supérieures à 40 V cc à la lumière du soleil.
Vériez que le coupe-circuit ou l’interrupteur d’entrée
solaire a été ouvert (déconnexion) avant d’installer les
câbles du système.
WARNING: Risk of Damage
Connecting the solar array to the battery terminal will
permanently damage the SunSaver.
AVERTISSEMENT : Risque d’endommagement
La connexion du réseau solaire sur la borne de la bat-
terie endommagera le SunSaver de façon permanente.
The nominal solar module voltage must match the
SunSaver voltage rating. For 12V SunSaver models, only
a 12 V nominal solar module having a maximum open
circuit voltage of 30V may be used. Connect only 24V
nominal solar modules (or two 12V arrays in series) to 24V
SunSaver models. The maximum open circuit voltage of the
24V array must be less than 60V.
SEALED
OR
FLOODED
SELECT
LOAD
BATTERY
SOLAR
Remove
Jumper
Wire for
Flooded
Battery
{
12 V
BATTERY STATUSTEMP. SENSORCHARGING STATUS
!
See Operator’s
Manual
Nominal Rating
12 Volts dc
Max. Input 30 V
Solar 20.0 A
Battery 20.0 A
Load 20.0 A
Max. Ambient 65 ºC
indoor use only
Use 75 ºC Copper
Conductors Only
CONFORMS TO ISA 12.12.01
CERTIFIED TO CAN/CSA STD
C22.2 NO.213-1992
Class I, Division 2
Groups A,B,C,D
Hazardous Loc.
Temp. Code: T5
RoHS
MORNINGSTAR
S S
20L
UN AVER-
SOLAR CONTRO LLER SS-20L-12 V
12 Volt
MODULE
12 Volt
MODULE
SOLAR
POSITIVE (+)
SOLAR
NEGATIVE (-)
(+)
(+)
(-)
(-)
12V OR 24V NOMINAL
(DEPENDS ON MODEL)
EARTH
GROUND
Figure 6. Solar input wiring.
NOTE:
Higher voltage PV modules designed for on-grid PV
applications should not be used with the SunSaver or
any PWM controller. Only use high voltage modules with
maximum power point tracking (MPPT) controllers.
Connect the solar module(s) to the SunSaver. Refer to the
wire gauge chart on page 30 of this manual for correct wire
size. Use 75 °C copper wire.
If required, the negative solar connection may be
earth grounded. Use appropriate gauge wire and proper
grounding methods for the installation site.
Step 4: Conrm Wiring
Re-check the wiring in steps 1 through 3. Conrm
correct polarity at each connection. Verify that all seven (7)
SunSaver power terminals are tightened.

MORNINGSTAR CORPORATION
29
3.0 INSTALLATION
28
3.0
SEALED
OR
FLOODED
SELECT
LOAD
BATTERY
SOLAR
Remove
Jumper
Wire for
Flooded
Battery
{
12 V
BATTERY STATUSTEMP. SENSORCHARGING STATUS
!
See Operator’s
Manual
Nominal Rating
12 Volts dc
Max. Input 30 V
Solar 20.0 A
Battery 20.0 A
Load 20.0 A
Max. Ambient 65 ºC
indoor use only
Use 75 ºC Copper
Conductors Only
CONFORMS TO ISA 12.12.01
CERTIFIED TO CAN/CSA STD
C22.2 NO.213-1992
Class I, Division 2
Groups A,B,C,D
Hazardous Loc.
Temp. Code: T5
RoHS
MORNINGSTAR
S S
20L
UN AVER-
SOLAR CONTRO LLER SS-20L-12 V
2
1
3
(+)
(+)
(+)
Figure 7. System Wiring Review.
Step 5: Install the Terminal Cover
The terminal cover prevents contact with the power
terminals when energized. UL / ETL Listed systems must
install the terminal cover. The terminal cover installation is
optional for systems that are not listed to UL / ETL.
Begin by removing the two (2) lower faceplate screws as
shown in gure 8a. Set the screws aside.
Figure 8a. Remove 2 faceplate screws.
Next, place the terminal cover over the terminal block as
shown in Figure 8b. The cover mounting holes should align
with the two (2) faceplate screw holes.
Figure 8b. Place the Terminal Block Cover.
Last, secure the terminal cover with the two (2) screws
included with the cover.
Figure 8c. Secure the Terminal Block Cover with 2 screws.

MORNINGSTAR CORPORATION
31
3.0 INSTALLATION
30
Step 6: Install Fuses or Close Breakers
Install a properly sized DC-rated fuse in each fuse holder
in the following order:
1. Load circuit
2. Battery circuit
3. Solar circuit
Refer to the fuse table on page 46 for appropriate fuse sizes
If using circuit breakers, close the load breaker rst
followed by the battery breaker, then the solar breaker.
Step 7: Conrm Power-up
The SunSaver should begin the power-up LED sequence
when battery power is applied. Observe that the Battery
Status LEDs blink in sequence one time.
If the SunSaver does not power up or a ashing LED error
sequence exists, refer to Section 5.0 Troubleshooting.
4.0 OPERATION
4.1 LED Indications
STATUS LED
The Status LED indicates charging status and any
existing solar input error conditions. The Status LED is on
when charging during the day and off at night. The Status
LED will ash red whenever an error condition(s) exists.
Table 2 lists the Status LED indications.
Color Indication
Operating
State
None Off (with heartbeat¹) Night
Green
On Solid
( with heartbeat² )
Charging
Red Flashing Error
Red
On Solid
( with heartbeat
2
)
Critical Error
¹ Status LED heartbeat indication flickers ON briefly every 5 seconds
² Status LED heartbeat indication flickers OFF briefly every 5 seconds
Table 2. Status LED denitions
For more information on Status LED errors, see Section
5.1 Error Indications.
4.0

MORNINGSTAR CORPORATION
33
4.0 OPERATION
32
4.0
BATTERY SOC LEDS
Three (3) battery “state-of-charge” (SOC) LEDs indicate
the level of charge on the battery. The SOC indication is
based only on battery voltage setpoints, which only provides
an approximation of the actual state-of-charge of the battery.
Table 3 lists the SOC LED indications.
SOC
LED
Indication Battery Status Load Status
Green
Fast Flashing
(2 Flash / sec)
Full Battery:
Equalize Charge
Load On
Green
Med. Flashing
(1 Flash / sec)
Full Battery:
Absorption Charge
Load On
Green
Slow Flashing
(1 Flash / 2 sec)
Full Battery:
Float Charge
Load On
Green On solid Battery Nearly Full Load On
Yellow On solid Battery Half Full Load On
Red
Flashing
(1 Flash / sec)
Battery Low
LVD Warning
(Load On)
Red On solid Battery Empty
LVD
(Load Off)
None No LEDS On Battery Missing Load Off
Table 3. Battery SOC LED denitions
NOTE:
An error condition exists if multiple Battery SOC LEDs
are ashing. See Section 5.1 Error Indications for more
information.
4.2 Battery Charging Information
The SunSaver has a 4-stage battery charging algorithm
for rapid, efcient, and safe battery charging. Figure 9
shows the sequence of the stages.
NIGHT
NIGHT
BULK
CHARGE
ABSORPTION
FLOAT
EQUALIZE
VOLTAGE
TIME
Figure 9. SunSaver charging algorithm.
Bulk Charge
In this stage, the battery voltage has not yet reached
absorption voltage and 100% of available solar power is
used to recharge the battery.
Absorption
When the battery has recharged to the Absorption voltage
setpoint, constant-voltage regulation is used to prevent
heating and excessive battery gassing.
Float
After the battery is fully charged the SunSaver reduces
the battery voltage to a oat charge which is sometimes
called a trickle charge.
Depending on battery history, the battery remains in the

MORNINGSTAR CORPORATION
35
4.0 OPERATION
34
absorption stage for 3 or 4 hours before transitioning to the
oat stage.
Equalize (ooded battery type only)
The SunSaver will equalize a ooded battery for three
(3) hours every 28 days. Equalize charging raises the
battery voltage above the standard absorption voltage so
that the electrolyte gases. This process prevents electrolyte
stratication and equalizes the individual cell voltages within
the battery.
WARNING: Risk of Explosion
Equalizing vented batteries produces explosive gases.
The battery bank must be properly ventilated.
!
CAUTION: Equipment Damage
Excessive overcharging and gassing too vigorously
can damage the battery plates and cause shedding of
active material from the plates. An equalization that is
too high or for too long can be damaging. Review the
requirements for the particular battery being used in
your system.
AVERTISSEMENT: Risque d’explosion
Les batteries à évent et compensation produisent des
gaz explosifs. Le groupe de batteries doit être correcte-
ment ventilé.
!
ATTENTION: Endommagement de l’équipement
Une surcharge excessive et un dégagement gazeux
trop vigoureux peuvent endommager les plaques de
batteries et provoquer l’élimination du matériau actif des
plaques. Une compensation trop élevée ou trop longue
peut provoquer des dégâts. Examinez les exigences
pour la batterie particulière utilisée dans votre système.
Dead Battery Charging
The SunSaver has a special charging function to recover
batteries that have discharged too low. If the terminal
voltage of the battery is greater than 1 Volt, the SunSaver
will detect the battery and provide approximately 85%
of available charge current until the battery reaches the
minimum operating voltage of the controller. When the
battery has recharged to the minimum operating voltage of
the SunSaver, 100% of available charge current will ow to
the battery and normal operation will resume.
4.3 Load Control Information
The primary purpose of the load control function is to
disconnect system loads when the battery has discharged
to a low state-of-charge and reconnect system loads when
the battery is sufciently recharged. System loads may be
lights, pumps, motors, DC appliances, and other electronic
devices. The total current draw of all loads must not exceed
the SunSaver maximum load rating.
NOTE:
Do not wire an AC inverter of any size to the load termi-
nals of the SunSaver. Damage to the load control circuit
may result. Connect inverters directly to the battery or
battery bank.
Load Control Settings
Load control is fully automatic. The load will be
disconnected and reconnected based upon the Low Voltage
Disconnect (LVD) and Low Voltage Reconnect (LVR) voltage
thresholds. The LVD and LVR thresholds are listed in the
back of the manual.
LVD Warning
As the battery discharges the Battery Status LEDs will
transition from green to yellow and then from yellow to
ashing red. The ashing red indication is a warning that a
low voltage disconnect event will occur soon. The amount of
time between a green SOC indication and load disconnect
4.0

MORNINGSTAR CORPORATION
37
4.0 OPERATION
36
will depend on many factors including:
• rate of discharge (amount of load draw)
• capacity of the battery
• health of the battery
• LVD set-point
If the battery discharges to the LVD set-point the load will
disconnect and a solid red Battery Status LED indication will
be displayed.
General Load Control Notes
• Only SS-6L/10L/20L models provide load control.
• Regulated voltage due to temperature compensation
is limited to a maximum of 15V (30V @ 24V nominal).
This protects certain DC loads that may be damaged
by high regulated input voltage.
• The load connection is NOT a regulated voltage
output. The load terminal voltage is approximately the
same as battery voltage unless the controller is in LVD
condition (load turned off).
• Do not wire multiple SunSaver load outputs together in
parallel to power DC loads with a current draw greater
than the lowest rated controller’s maximum load rating.
Equal current sharing cannot be guaranteed and an
over-load condition will likely occur on one or more
controllers.
• Exercise caution when connecting loads with specic
polarity to a live load circuit. A reverse polarity con
-
nection may damage the load. Always re-check load
connections before applying power.
• The SunSaver will go straight to LVD on start-up if the
battery voltage is at or below 11.7V / 23.4V.
4.0
4.4 Protections
Solar Overload
(Charging Status LED: Red ashing) If the solar current
exceeds the maximum solar rating, the SunSaver will
stop charging until the solar current returns to within its
operational rating. See Section 7.0 Technical Specications
for more information.
Load Overload
(Battery Status LEDs: G&R - Y sequencing) If the load
current exceeds the maximum load current rating, the
SunSaver will disconnect the load.
The SunSaver will attempt to reconnect the load two
(2) times approximately 10 seconds apart. If the overload
remains after the rst two (2) attempts, the fault must be
cleared by removing and reapplying power.
Solar Short Circuit
(Charging Status LED: off) Solar input power wires are
short-circuited. Charging automatically resumes when the
short is cleared.
Load Short Circuit
(Battery Status LEDs: G&R - Y sequencing) Fully
protected against load wiring short-circuits. After two (2)
automatic load reconnect attempts (10 seconds apart), the
fault must be cleared by removing and reapplying power.
PV Reverse Polarity
(Charge Status LED: off) Fully protected against reverse
solar connection. No damage to the controller will result.
Correct the mistake to resume normal operation.

4.0 OPERATION
38
MORNINGSTAR CORPORATION
39
4.0
Battery Reverse Polarity
(No LED indication) Fully protected against reverse
battery connection. No damage to the controller will result.
Correct the mistake to resume normal operation.
Damaged Local Temperature Sensor
(Battery Status LED: R - Y - G sequencing, Charge Status
LED: R on solid) The local ambient temperature sensor
is short-circuited or damaged. Charging stops to avoid
over- or under-charging. This is a critical error. Contact your
authorized Morningstar dealer for service.
Damaged Internal Temperature Sensor
(Battery Status LED: R - Y - G sequencing, Charge Status
LED: R on solid) The internal heatsink temperature sensor
is damaged. This is a critical error. Contact your authorized
Morningstar dealer for service.
High Temperature
(Battery Status LED: R - Y sequencing) The heatsink
temperature has exceeded 85 °C and the solar and load is
disconnected. The SunSaver will automatically reconnect
when the heatsink cools to 80 °C.
High Voltage Disconnect
(Battery Status LED: R - G sequencing) The battery
voltage has exceeded the controller’s maximum regulation
limit. The solar and load will be disconnected until
the battery voltage decreases to the SunSaver’s High
Voltage Reconnect threshold. See Section 7.0 Technical
Specications for more information.
4.5 Inspection and Maintenance
The following inspections and maintenance tasks are
recommended at least two times per year for best controller
performance.
• Tighten all terminals. Inspect for loose, broken, or
corroded connections.
• Verify that all wire clamps and tie-downs are secure.
• Check that the controller is mounted in a clean,
protected environment; free of dirt, insects, nests,
and corrosion.
• If applicable, check enclosure ventilation and air ow
holes for obstructions.
• Verify LED indication is consistent with the present
system conditions.
1/25