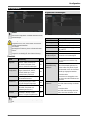
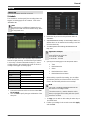
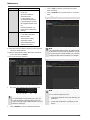
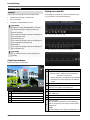
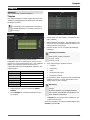
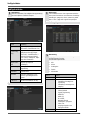
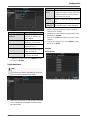
Abus TVVR36000 Manuel utilisateur
- Catégorie
- Enregistreurs vidéo numériques (DVR)
- Taper
- Manuel utilisateur

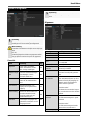
ABUS 4-Kanal Netzwerk-Videorekorder
TVVR36000
D Bedienungsanleitung
User guide
Gebruikershandleiding
Notice d’utilisation
Betjeningsvejledning
E Manual de instrucciones
Инструкция по эксплуатации
Version 1.0


Deutsch
Nederlands
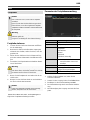
Diese Bedienungsanleitung enthält wichtige Hinweise zur
Inbetriebnahme und Handhabung.
Achten Sie hierauf, auch wenn Sie dieses Produkt an
Dritte weitergeben.
Heben Sie deshalb diese Bedienungsanleitung zum
Nachlesen auf!
Eine Auflistung der Inhalte finden Sie im Inhaltsverzeich-
nis mit Angabe der entsprechenden Seitenzahlen.
Deze gebruikershandleiding bevat belangrijke
opmerkingen over de ingebruikneming en bediening.
Houd hier rekening mee, ook als u dit product aan derden
doorgeeft.
Bewaar daarom de gebruikershandleiding om deze na te
kunnen lezen!
U vindt een opsomming van de inhoud in de
inhoudsopgave met vermelding van de betreffende
paginanummers
English
Dansk
This user guide contains important information on starting
operation and using the device.
Make sure that this user guide is handed over when the
product is given to other persons.
Keep this user guide to consult later.
A list of contents with the corresponding page number
can be found in the index.
Denne betjeningsvejledning indeholder vigtige
henvisninger til idriftsættelse og håndtering.
Vær også opmærksom på dette, hvis produktet gives
videre til en tredje person.
Opbevar derfor denne betjeningsvejledning til senere
brug!
I indholdsfortegnelsen findes der en liste over indholdet
med angivelse af de pågældende sidetal.
Français
Español
Les recommandations contenues dans cette notice
d’utilisation sont importantes pour la mise en service et
l'utilisation du produit.
Nous vous prions de bien vouloir les respecter. Si vous
étiez amené à revendre le produit, nous vous prions de
bien vouloir transmettre cette notice au nouvel acquéreur.
Nous vous recommandons également de conserver cette
notice d'utilisation afin de pouvoir la consulter à tout mo-
ment.
Le sommaire disponible donne un aperçu du contenu et
renvoie aux pages correspondantes.
Este manual de instrucciones contiene indicaciones
importantes para el manejo y la puesta en
funcionamiento del producto.
Téngalas también en cuenta si entrega la máquina a
terceros.
Por ello, consérvelas en un lugar adecuado para su
posterior lectura.
En el índice encontrará un listado de los contenidos con
las páginas donde podrá consultarlos.
Русский
Данная инструкция по эксплуатации содержит важные
указания по вводу в эксплуатацию и обращению с
продуктом.
Примите это во внимание, также при передаче
продукта в пользование третьим лицам.
По этой причине сохраните данную инструкцию для
повторного прочтения!
Вся информация отражена в Содержании с указанием
соответствующих номеров страниц.
La page charge ...
La page charge ...
La page charge ...
La page charge ...
La page charge ...
La page charge ...
La page charge ...
La page charge ...
La page charge ...
La page charge ...
La page charge ...
La page charge ...
La page charge ...
La page charge ...
La page charge ...
La page charge ...
La page charge ...
La page charge ...
La page charge ...
La page charge ...
La page charge ...
La page charge ...
La page charge ...
La page charge ...
La page charge ...
La page charge ...
La page charge ...
La page charge ...
La page charge ...
La page charge ...
La page charge ...
La page charge ...
La page charge ...
La page charge ...
La page charge ...
La page charge ...
La page charge ...
La page charge ...

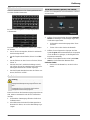
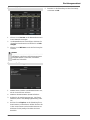
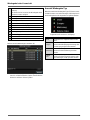
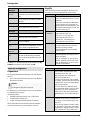
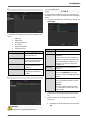
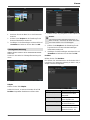
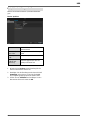
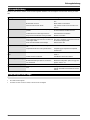
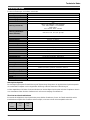
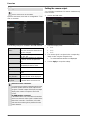
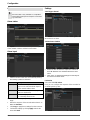
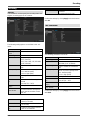
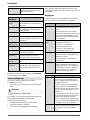
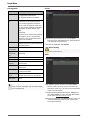
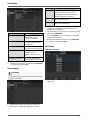
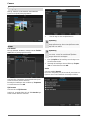
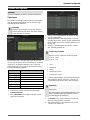
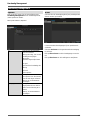
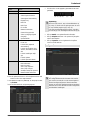
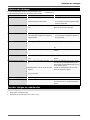
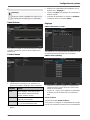
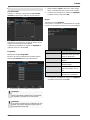
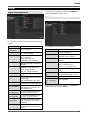
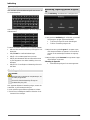
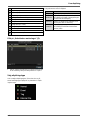
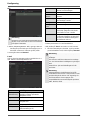
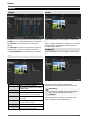
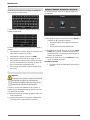
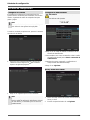
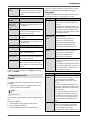
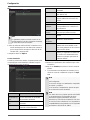
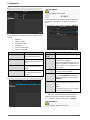
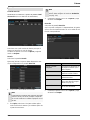
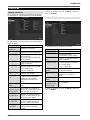
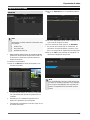
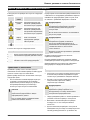
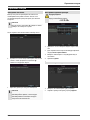
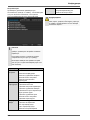
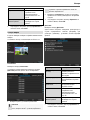
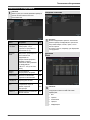
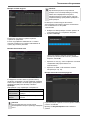
Kodierung
42
Kodierung
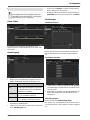
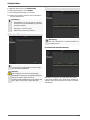
TAB Aufzeichnung
Mittels des Zeitplans werden die Aufzeichnungszeiten
bzw. „Auslöser“ (Aufzeichnungstyp) für die Kameras ein-
gerichtet.
In diesem Untermenü stehen Ihnen folgende Einstel-
lungsmöglichkeiten zur Verfügung:
Kamera
Einzustellende Kamera
Encoding Para-
meter
Einzustellender Stream
Stream Typ
Vordefinierter Stream Video
Auflösung
Auto, WD1(960x480)
4CIF(704x576),
2CIF(704 x 288), CIF(352x288),
QCIF(176x144)
Bitrate
Auswahl einer variablen bzw.
konstanten Bitrate
Videoqualität
verschiedene Qualitätsstufen
+++: mittlere Qualität
++++++: hohe Qualität
Bildrate
Einstellungen der Bildrate für
den Stream
Max. Bitrate-
Modus
Auswahl des Modus für die Ein-
stellungen der Bitrate
Benutzerdef. (32 – 3072)
Max. Bitrate
(Kbps)
Einstellungen der maximalen Bit-
rate
Bestätigen Sie die Einstellungen mit einem Klick auf An-
wenden und verlassen Sie das Menü mit OK.
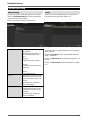
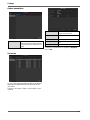
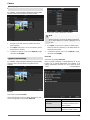
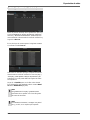
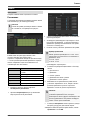
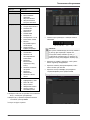
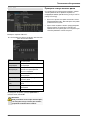
TAB Substream
Folgende Parameter sind einstellbar:
Kamera
Einzustellende Kamera
Stream Typ
Vordefinierter Stream Video
Auflösung
Auto, 4CIF(704x576),
CIF(352x288), QCIF(176x144)
Bitrate Typ
Auswahl einer variablen bzw.
konstanten Bitrate
Video-Qualität
verschiedene Qualitätsstufen
+++: mittlere Qualität
++++++: hohe Qualität
Bildrate
Einstellungen der Bildrate für den
Stream
Max. Bitrate-
Modus
Allgemein,
Benutzerdef. (32 - 3072
Max. Bitrate
(Kbps)
Anzeige der maximalen Bitrate
Max. Bitrate Be-
reich empfohlen
Empfohlene Bitrate in Abhängig-
keit der eingestellten Auflösung,
Bildrate, etc.
Vorlaufzeit
Zeit in Sekunden, die vor einem
Alarm aufgezeichnet wird
Nachlaufzeit
Zeit in Sekunden, die nach einem
Alarm aufgezeichnet wird
Abgelaufene Zeit
(Markierung)
Einstellung der längsten Aufbe-
wahrungszeit für aufgezeichnete
Dateien.
Audio aufnehmen
Aktiviert:
Aufzeichnung mit Audio Daten
La page charge ...
La page charge ...
La page charge ...
La page charge ...
La page charge ...
La page charge ...

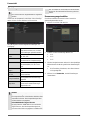
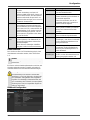
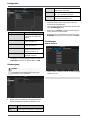
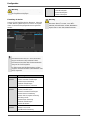
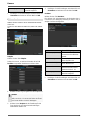
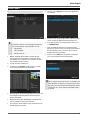
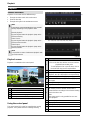
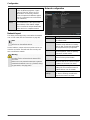
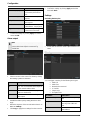
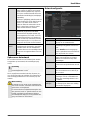
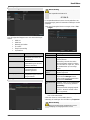
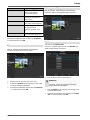
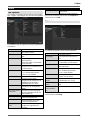
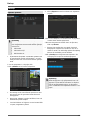
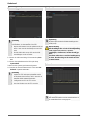
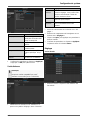
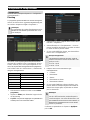
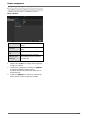
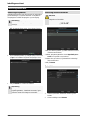
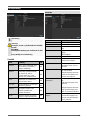
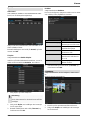
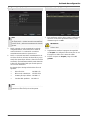
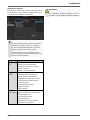
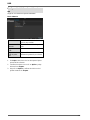
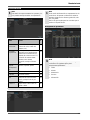
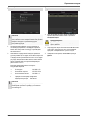
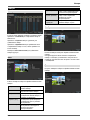
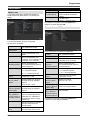
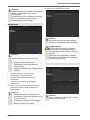
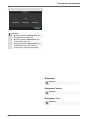
Wartung
49
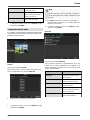
Wartung
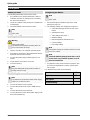
Hinweis
Das Menü dient zur Gerätewartung und sollte nur
von erfahrenen Benutzern bedient werden.
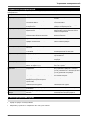
Menü
Einstellung
S.
System Info
Geräteinformationen (Serien-
nummer, Firmwarestatus etc.)
49
Protokoll
Suche
In der Protokoll Suche
(=Logdatei) kann nach be-
stimmten Kriterien z.B. Alarm,
Ausnahme, Bedienung oder In-
formation nach Aufzeichnungen
oder Informationen
(S.M.A.R.T.-Festplattenstatus)
gesucht werden.
49
Import/Export
Einstellungen exportieren, im-
portieren
50
Update
Firmware-Update durchführen
50
Standard
System-Reset
51
Netzwerk
Anzeige der Übertragungs- und
Empfangsrate des Rekorders
48
S.M.A.R.T
Prüfung der Festplatte auf Feh-
ler
49
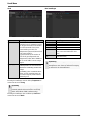
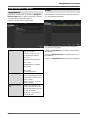
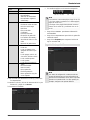
System Info
Hinweis
Im Informationsmenü werden die technischen Da-
ten des Gerätes sowie Informationen zu den ver-
schiedenen Einstellungen der Kameras, Aufzeich-
nung, Alarm, Netzwerk und HDD dargestellt.
Dies ist z.B. hilfreich bei Support-Anfragen.
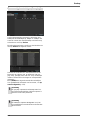
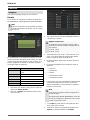
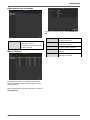
Protokoll Suche
Hinweis
Die Suche nach „Ereignissen“ kann nach folgen-
den Haupttypen/Ereignissen/Parametern erfolgen:
Alle
Alarm
Warnung
Vorgang
Information
Filter1
Filter2
Alle
-
Alarm
Alle
Bewegungserkennung
starten/beenden
Sabotageüberwachung
starten/beenden
Warnung
Alle
Videosignalverlust
Illegales Anmelden
HDD voll
HDD Fehler
IP Konflikt
Netzwerk getrennt
Ausnahme Aufzeichnung
Video Ein-/ausgangsignal
ungleich
Aufzeichnungspuffer
Vorgang
Alle
Power On
Lokal: Nicht geplantes Her-
unterfahren
Lokal: Herunterfahren,
Neustart, Anmelden, Ab-
La page charge ...
La page charge ...
La page charge ...
La page charge ...
La page charge ...
La page charge ...
La page charge ...
La page charge ...
La page charge ...
La page charge ...
La page charge ...

ABUS -
4-Kanal Netzwerk-Videorekorder
TVVR36000
Hersteller
ABUS Security-Center GmbH & Co. KG
Linker Kreuthweg 5
86444 Affing (Germany)

ABUS 4-channel network recorder
TVVR36000
User guide
Version 1.0
La page charge ...

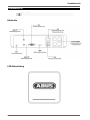
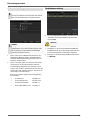
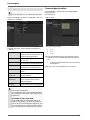
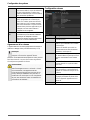
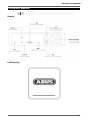
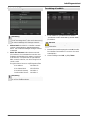
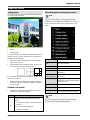
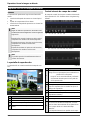
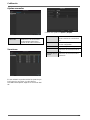
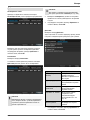
Device overview
64
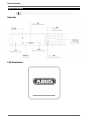
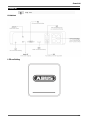
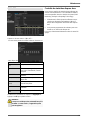
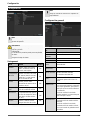
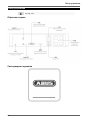
Device overview
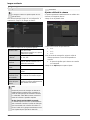
Rearside
LED illumination
See page 66.

System operation
65
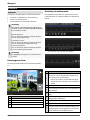
System operation
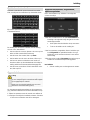
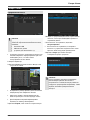
General information
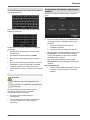
The device can be controlled as follows:
Using the USB mouse
Connections on the rear of the device
Note
Pay attention to the overview on page 65.
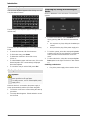
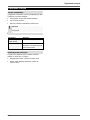
No.
Name
Function
1
AUDIO IN: Cinch audio input
2
VGA:
VGA monitor connection (9-pin), video output
signal
3
LAN:
Ethernet LAN connection
4
RJ45 connections:
Connection of up to four PoE cameras
5
USB:
USB connections for operating with a mouse
and data export
6
HDMI
HDMI monitor connection
7
AUDIO OUT:
Cinch audio output (synchronised with the
video output)
8
POWER SUPPLY
48 V DC connection for power supply
La page charge ...
La page charge ...
La page charge ...
La page charge ...

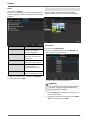
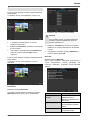
Quick guide
70
Quick guide
Before you start
The following preparatory steps must be made:
1.
Pay attention to the general information, safety in-
formation and notes on setting up and connecting
the device (see page 67).
2.
Check the contents of the package for completeness
and damages.
3.
Insert the batteries into the remote control.
Note
Pay attention to the information in the separate
quick guide.
Installing the HDD
Warning
Switch off the device and disconnect it from the
mains power supply.
Pay attention to the required earthing of the de-
vice to avoid static discharge.
1.
Install a hard drive, see separate quickstart guide.
2.
First make a connection to the motherboard with the
blue data cable (small connector).
3.
Connect the power supply cable (large 5-pin con-
nector).
4.
Check that the connections are secure.
5.
Close the housing.
Note
Only use HDD’s that are approved for video re-
cording and 24/7 usage.
Establishing the connections
Note
Pay attention to the minimum radius when laying
cables. Do not kink the cable.
1.
Connect all cameras to the recorder.
2.
Connect the monitor to the VGA or HDMI connec-
tion.
3. Connect the mouse to the USB port.
4. Connect the device to the mains power supply, it will
then start automatically.
Configuring the device
Note
Pay attention to the information in the separate
quick guide.
Proceed through the individual steps in the setup
wizard (see page 73).
The following settings are configured in sequence:
Select the language selection for the user in
terface
Administrator setup
Time settings (date, time ...)
Network settings
HDD management (initialisation etc.)
Camera settings
Recording settings
Note
Subsequent changes to the date and time can lead
to the loss of data!
Note
Check the ABUS homepage (www.abus.com) if
for this device any firmware updates are avail-
able and install these
Pay attention to the menu overview on page 85, plus
the notes and explanations on basic system opera-
tion on page.
Pay attention to the notes on the following:
Live view
P. 75
Playback
P. 78
Data export
P. 101
Troubleshooting
P. 108
La page charge ...
La page charge ...
La page charge ...
La page charge ...
La page charge ...
La page charge ...
La page charge ...
La page charge ...
La page charge ...
La page charge ...
La page charge ...
La page charge ...
La page charge ...
La page charge ...
La page charge ...

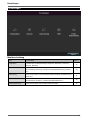
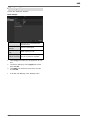
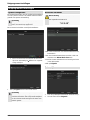
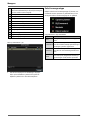
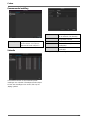
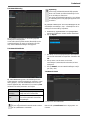
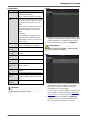
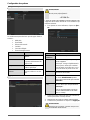
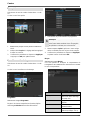
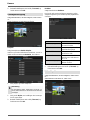
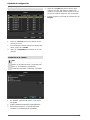
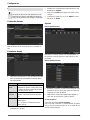
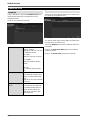
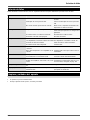
Main menu
86
Menu description
Menu
description
page
Configuration
Used for managing all device settings (General, Network, Live View, Excep-
tion, User).
82
Camera
Menu for setting camera parameters (OSD configuration, image mode, mo-
tion recognition, Private Zone, Tamper Monitoring, Video Loss).
90
Record
Menu to set recording parameters (time plan, camera resolution, camera
stream etc.).
94
HDD
Used for initialising or managing installed HDD (assigning read/write func-
tions, cameras, network HDD management etc.).
97
Manual Management
Menu for setting manual recordings.
99

Configuration
87
Configuration
Note
The “Configuration” menu is used to manage all
device settings.
Warning
Ensure that the date and time are set correctly.
IMPORTANT:
Subsequent changes to the settings can lead
to data loss!
Ensure a data backup has been made in good
time beforehand.
Overview
Menu
Setting
Page
General
Language, video, time, date,
mouse pointer, password, time
zones and other settings
82
Network
Required network settings
(manual IP, DHCP, PPPOE,
DDNS etc.) and network status
overview
83
Alarm
Settings for the alarm I/Os of
the network camera
83
Live cast
Display settings and assign-
ment of the event output
85
Warning
Behaviour of the device in ex-
ceptional cases
(HDD full, network disconnect-
ed etc.)
88
User
Adding and changing users,
assigning authorisation rights
88
Note
Pay attention to the instructions in the corre-
sponding sections.
General
“General” tab
Setting
Language
Language on the OSD
Resolution
Resolution on the monitor
Time Zone
GMT (Greenwich Mean Time)
Date Format
MM-DD-YYYY, DD-MM-YYYY,
YYYY-MM-DD
System Date/Time
Date and time
Mouse Pointer
Speed
Set on the scroll bar (left =
low speed; right = high speed)
Enable Wizard
Box ticked:
Wizard will appear after restart of
the device.
Enable ID Authen-
tification
Box not ticked:
In order to enter a menu no pass-
word has to be entered. At access
by network the password has to
be entered.
Box ticked:
Password must be entered in or-
der to use the menu.
Activating LED
status bar
Box not ticked:
The LED status display is deac-
tivated.
Box ticked:
The LED status display glows blue
when the recorder is on.
Activate remote
access
Box ticked:
Access for remote configuration is
activated for technical support.
La page charge ...
La page charge ...

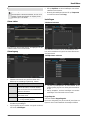
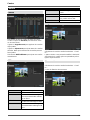
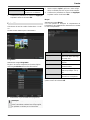
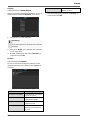
Configuration
90
TAB General
Parameter
Setting
NIC Typ
Set the transmission speed of the in-
stalled network card here.
Tip: 10M/100/1000M self adaptive
Enable DHCP
Tick the box if the IP addresses are
assigned dynamically via DHCP in
the network.
DHCP activated: Subsequent entry
fields are inactive (parameters as-
signed via DHCP).
Note:
If the IP addresses are assigned
manually, ensure that DHCP is not
active (box not ticked).
IPv4 Adress
Address of the network device in the
network (manual assignment)
IPv4
Subnet Mask
Usually 255.255.255.0
IPv4 Default
Gateway
Address of the gateway for Internet
access
IPv6 address 1
Local (local link) IPv6 address
IPv6 address 2
Global (global unicatst) IPv6 address
IPv6 standard
gateway
IPv6 address of the gateway for In-
ternet access.
MAC Adress
Hardware address of the installed
network card
MTU (Bytes)
Describes the max. size of the largest
protocol data .
Preferred DNS
Server
Address of the Domain Name Server
(usually the IP address of the gate-
way)
Alternate DNS
IP address of the alternative DNS
server
Note
In certain modes some of these settings cannot be
selected.
PPPOE
1.
Tick the PPPOE box, enter the user name (Internet
access ID) and password, then confirm the pass-
word.
2.
Confirm the settings by pressing Apply.
Warning
Use PPPOE only if there is no router available.
DDNS
1.
To use the ABUS DDNS function, you must first set
up an account under www.abus-server.com. Please
note the FAQs on the website when doing this.
2.
Tick the “Enable DDNS” box, enter ‘ABUS DDNS’ as
the “DDNS Type”, then enter www.abus-server.com
or “62.153.88.107” under “Server Address”.
3.
Confirm the settings by pressing Apply. The IP ad-
dress of your Internet connection is now updated on
the server every minute.
La page charge ...
La page charge ...
La page charge ...
La page charge ...
La page charge ...
La page charge ...
La page charge ...
La page charge ...
La page charge ...
La page charge ...
La page charge ...

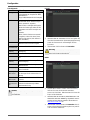
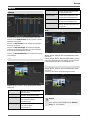
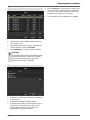
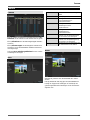
Encoding
102
Encoding
Record
The schedule is used to specify the recording times and
triggers (recording type) for the cameras.
The following setting options are available in this sub-
menu:
Camera
Camera to be set
Encoding Para-
meter
Stream to be set
Stream Type
Predefined video stream
Resolution
Auto, WD1 (960x480)
4CIF (704x576),
2CIF (704 x 288), CIF (352x288),
QCIF (176x144)
Bit rate
Select a variable or constant bit
rate
Video Quality
There are various quality levels:
+++: medium quality
++++++: high quality
Frame rate
Setting for the stream frame
rate
Max. bit rate mo-
de
Select the mode for setting the
bit rate
User def. (32 – 3072)
Max. bit rate
(kbps)
Setting for the maximum bit rate
Recommended
max. bit rate
Recommended bit rate depend-
ing on the set resolution, frame
rate, etc.
Lead time
Recording period before an
alarm (in seconds)
Overrun time
Recording period after an alarm
(in seconds)
Mark elapsed ti-
me
Setting for the longest retention
time for recorded files.
Record audio
Activated:
Recording with audio data
Confirm the settings by clicking Apply and exit the menu
with OK.
TAB Substream
The following parameters can be set:
Camera
Camera to be set
Stream Type
Predefined video stream
Resolution
Auto, 4CIF (704x576), CIF
(352x288), QCIF (176x144)
Bit Rate Type
Select a variable or constant bit
rate
Video Quality
There are various quality levels:
+++: medium quality
++++++: high quality
Frame rate
Setting for the stream frame rate
Max. bit rate mo-
de
General,
user def. (32 – 3072
Max. bit rate
(kbps)
Display of the maximum bit rate
Recommended
max. bit rate
192~320 (kbps)
Confirm the settings by clicking Apply and exit the menu
with Back.
La page charge ...
La page charge ...
La page charge ...
La page charge ...
La page charge ...
La page charge ...

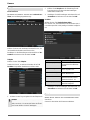
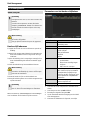
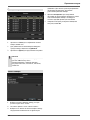
Maintenance
109
Maintenance
Note
This menu is used for device maintenance, and
should only be operated by experienced users.
Menu
Setting
P.
System Info
Device information (serial num-
ber, firmware status etc.)
103
Log Search
A search of recordings or in-
formation (S.M.A.R.T. HDD sta-
tus) can be made in the log file
according to certain criteria
(alarms, exceptions, operation
or information).
103
Import/Export
Used to export or import the
settings
104
Upgrade
Carries out a firmware upgrade
104
Default
System reset
105
Network
Displays the transmission and
reception rate of the recorder
105
S.M.A.R.T
Hard disk drive test for errors
49
System Info
Note
The information menu shows the technical data
for the device and information on the various set-
tings of the cameras, recording, alarm, network
and HDD.
This can be useful for support queries, for exam-
ple.
Log Search
Note
An event search can be made according to the fol-
lowing main types, events and parameters:
All
Alarm
Exception
Operation
Information
Filter1
Filter2
All
-
Alarm
All
Alarm Input/Output
Start/Stop Motion Detection
Start/Stop Tamper-proof
Exception
All
Video Loss Signal
Video Signal Exception
Illegal Login
HDD Full
HDD Error
IP Conflicted
Network Disconnected
Exception recording
Video input/output signal
not equal
La page charge ...
La page charge ...
La page charge ...
La page charge ...
La page charge ...
La page charge ...

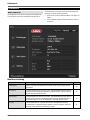
Technical data
116
Technical data
Subject is to alterations and errors. The dimensions are approximate values.
ABUS digital recorder
TVVR36000
Video compression
H.264
Camera inputs
6 (4x PoE + 2x IP)
Monitor outputs
1 x VGA, 1 x HDMI
Operating mode
Triplex
Resolution (live view)
VGA:
1080P: 1920*1080/60 Hz, 1280*1024/60 Hz,
720P: 1280*720/60 Hz,1024*768/60 Hz
Resolution @ frame rate per
camera (recording)
WD1, 4CIF, 2CIF, CIF, QCIF @ 25 fps
Total frame rate
100 fps
Compression levels
6
Post-alarm memory
0–30 sec. / 5–900 sec.
Storage medium
1 x 2.5“ SATA HDD
Data backup
1 x USB 2.0
Views
1 / 2 / 4
Recording modes
Manual, schedule, motion detection, alarm
Search modes
By event, date and time, S.M.A.R.T.
User levels
2 (max. 31 users)
Network access
1 x RJ45 10/100 Mbps
Parallel network access
128 camera connections
Network functions
Live view, playback, data export
DDNS
√
NTP
√
Alarms
Acoustic warning, OSD signal, e-mail
Control
USB mouse
OSD languages
German, English, French, Dutch, Danish,
Italian, Polish, Spanish, Swedish, Russian
Power supply
48 VDC, 1,5 A, 50~60 Hz
Power consumption
<10 W (without HDD and PoE power supply)
Operating temperature
-10 °C ~ +55 °C
Dimensions (W x H x D)
200 x 45 x 200 mm
Weight
≤ 0.8 kg (without HDD)
Certifications
CE
HDD storage capacity
In addition to the actual storage capacity of the installed HDD, the required storage space for recording and surveil-
lance depends on the set resolution and frame rate of the recording.
On the included CD you can find a program in order to calculate the required amount of memory. In addition you find
this software for download on our homepage.
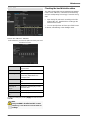
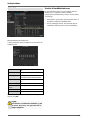
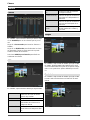
Overview monitor output combination
It is possible to connect a SPOT monitor. Use the table below to find out what combinations are possible. A tick indi-
cates that the combination is possible, a cross shows that it is not.
VGA
+
HDMI
VGA
only
HDMI
only
La page charge ...
La page charge ...
La page charge ...
La page charge ...

ABUS 4-channel network recorder
TVVR36000
Manufacturer:
ABUS Security-Center GmbH & Co. KG
Linker Kreuthweg 5
86444 Affing (Germany)

ABUS 4-kanaals netwerk-videorecorder
TVVR36000
Gebruikershandleiding
Version 1.0
La page charge ...

Overzicht
124
Overzicht
Achterkant
LED-verlichting
Zie p. 125.

Bediening van het systeem
125
Bediening van het systeem
Algemeen
U kunt de recorder op de volgende manieren bedienen:
USB-muis
Aansluitingen aan de achterkant
Opmerking
Neem het overzicht op p. 117 in acht.
Nr.
Benaming
Functie
1
AUDIO IN: Cinch audio-ingang
2
VGA:
Monitoraansluiting VGA (9 pins), videouit-
gangssignaal
3
LAN:
Ethernet-LAN aansluiting
4
RJ45 aansluitingen:
Aansluiting van max. vier PoE-camera’s
5
USB:
USB-aansluitingen voor de bediening via
muis en voor de gegevensexport
6
HDMI
HDMI monitor aansluiting
7
AUDIO OUT:
audiouitgang cinch (gesynchroniseerd
met de video-uitgang)
8
STROOMVOORZIENING
48 V DC stroomaansluiting
La page charge ...
La page charge ...
La page charge ...
La page charge ...
La page charge ...
La page charge ...
La page charge ...
La page charge ...
La page charge ...
La page charge ...
La page charge ...
La page charge ...
La page charge ...
La page charge ...
La page charge ...
La page charge ...
La page charge ...
La page charge ...
La page charge ...
La page charge ...
La page charge ...
La page charge ...
La page charge ...
La page charge ...
La page charge ...
La page charge ...
La page charge ...
La page charge ...
La page charge ...
La page charge ...
La page charge ...
La page charge ...
La page charge ...
La page charge ...
La page charge ...
La page charge ...
La page charge ...
La page charge ...
La page charge ...
La page charge ...
La page charge ...
La page charge ...
La page charge ...
La page charge ...
La page charge ...
La page charge ...
La page charge ...
La page charge ...
La page charge ...
La page charge ...
La page charge ...
La page charge ...
La page charge ...
La page charge ...
La page charge ...
La page charge ...
La page charge ...
La page charge ...
La page charge ...
La page charge ...
La page charge ...
La page charge ...
La page charge ...
La page charge ...
La page charge ...
La page charge ...
La page charge ...
La page charge ...
La page charge ...
La page charge ...
La page charge ...
La page charge ...
La page charge ...
La page charge ...
La page charge ...
La page charge ...
La page charge ...
La page charge ...
La page charge ...
La page charge ...
La page charge ...
La page charge ...
La page charge ...
La page charge ...
La page charge ...
La page charge ...
La page charge ...
La page charge ...
La page charge ...
La page charge ...
La page charge ...
La page charge ...
La page charge ...
La page charge ...
La page charge ...
La page charge ...
La page charge ...
La page charge ...
La page charge ...
La page charge ...
La page charge ...
La page charge ...
La page charge ...
La page charge ...
La page charge ...
La page charge ...
La page charge ...
La page charge ...
La page charge ...
La page charge ...
La page charge ...
La page charge ...
La page charge ...
La page charge ...
La page charge ...
La page charge ...
La page charge ...
La page charge ...
La page charge ...
La page charge ...
La page charge ...
La page charge ...
La page charge ...
La page charge ...
La page charge ...
La page charge ...
La page charge ...
La page charge ...
La page charge ...
La page charge ...
La page charge ...
La page charge ...
La page charge ...
La page charge ...
La page charge ...
La page charge ...
La page charge ...
La page charge ...
La page charge ...
La page charge ...
La page charge ...
La page charge ...
La page charge ...
La page charge ...
La page charge ...
La page charge ...
La page charge ...
La page charge ...
La page charge ...
La page charge ...
La page charge ...
La page charge ...
La page charge ...
La page charge ...
La page charge ...
La page charge ...
La page charge ...
La page charge ...
La page charge ...
La page charge ...
La page charge ...
La page charge ...
La page charge ...
La page charge ...
La page charge ...
La page charge ...
La page charge ...
La page charge ...
La page charge ...
La page charge ...
La page charge ...
La page charge ...
La page charge ...
La page charge ...
La page charge ...
La page charge ...
La page charge ...
La page charge ...
La page charge ...
La page charge ...
La page charge ...
La page charge ...
La page charge ...
La page charge ...
La page charge ...
La page charge ...
La page charge ...
La page charge ...
La page charge ...
La page charge ...
La page charge ...
La page charge ...
La page charge ...
La page charge ...
La page charge ...
La page charge ...
La page charge ...
La page charge ...
La page charge ...
La page charge ...
La page charge ...
La page charge ...
La page charge ...
La page charge ...
La page charge ...
La page charge ...
La page charge ...
La page charge ...
La page charge ...
La page charge ...
La page charge ...
La page charge ...
La page charge ...
La page charge ...
La page charge ...
La page charge ...
La page charge ...
La page charge ...
La page charge ...
La page charge ...
La page charge ...
La page charge ...
La page charge ...
La page charge ...
La page charge ...
La page charge ...
La page charge ...
La page charge ...
La page charge ...
La page charge ...
La page charge ...
La page charge ...
La page charge ...
La page charge ...
La page charge ...
La page charge ...
La page charge ...
La page charge ...
La page charge ...
La page charge ...
La page charge ...
La page charge ...
La page charge ...
La page charge ...
La page charge ...
La page charge ...
La page charge ...
La page charge ...
La page charge ...
La page charge ...
La page charge ...
La page charge ...
La page charge ...
La page charge ...
La page charge ...
La page charge ...
La page charge ...
La page charge ...
La page charge ...
La page charge ...
La page charge ...
La page charge ...
La page charge ...
La page charge ...
La page charge ...
La page charge ...
La page charge ...
La page charge ...
La page charge ...
La page charge ...
La page charge ...
La page charge ...
La page charge ...
La page charge ...
La page charge ...
La page charge ...
La page charge ...
La page charge ...
La page charge ...
La page charge ...
La page charge ...
La page charge ...
La page charge ...
La page charge ...
La page charge ...
La page charge ...
La page charge ...
La page charge ...
La page charge ...
La page charge ...
La page charge ...
La page charge ...
La page charge ...
La page charge ...
La page charge ...
La page charge ...
La page charge ...
La page charge ...
-
 1
1
-
 2
2
-
 3
3
-
 4
4
-
 5
5
-
 6
6
-
 7
7
-
 8
8
-
 9
9
-
 10
10
-
 11
11
-
 12
12
-
 13
13
-
 14
14
-
 15
15
-
 16
16
-
 17
17
-
 18
18
-
 19
19
-
 20
20
-
 21
21
-
 22
22
-
 23
23
-
 24
24
-
 25
25
-
 26
26
-
 27
27
-
 28
28
-
 29
29
-
 30
30
-
 31
31
-
 32
32
-
 33
33
-
 34
34
-
 35
35
-
 36
36
-
 37
37
-
 38
38
-
 39
39
-
 40
40
-
 41
41
-
 42
42
-
 43
43
-
 44
44
-
 45
45
-
 46
46
-
 47
47
-
 48
48
-
 49
49
-
 50
50
-
 51
51
-
 52
52
-
 53
53
-
 54
54
-
 55
55
-
 56
56
-
 57
57
-
 58
58
-
 59
59
-
 60
60
-
 61
61
-
 62
62
-
 63
63
-
 64
64
-
 65
65
-
 66
66
-
 67
67
-
 68
68
-
 69
69
-
 70
70
-
 71
71
-
 72
72
-
 73
73
-
 74
74
-
 75
75
-
 76
76
-
 77
77
-
 78
78
-
 79
79
-
 80
80
-
 81
81
-
 82
82
-
 83
83
-
 84
84
-
 85
85
-
 86
86
-
 87
87
-
 88
88
-
 89
89
-
 90
90
-
 91
91
-
 92
92
-
 93
93
-
 94
94
-
 95
95
-
 96
96
-
 97
97
-
 98
98
-
 99
99
-
 100
100
-
 101
101
-
 102
102
-
 103
103
-
 104
104
-
 105
105
-
 106
106
-
 107
107
-
 108
108
-
 109
109
-
 110
110
-
 111
111
-
 112
112
-
 113
113
-
 114
114
-
 115
115
-
 116
116
-
 117
117
-
 118
118
-
 119
119
-
 120
120
-
 121
121
-
 122
122
-
 123
123
-
 124
124
-
 125
125
-
 126
126
-
 127
127
-
 128
128
-
 129
129
-
 130
130
-
 131
131
-
 132
132
-
 133
133
-
 134
134
-
 135
135
-
 136
136
-
 137
137
-
 138
138
-
 139
139
-
 140
140
-
 141
141
-
 142
142
-
 143
143
-
 144
144
-
 145
145
-
 146
146
-
 147
147
-
 148
148
-
 149
149
-
 150
150
-
 151
151
-
 152
152
-
 153
153
-
 154
154
-
 155
155
-
 156
156
-
 157
157
-
 158
158
-
 159
159
-
 160
160
-
 161
161
-
 162
162
-
 163
163
-
 164
164
-
 165
165
-
 166
166
-
 167
167
-
 168
168
-
 169
169
-
 170
170
-
 171
171
-
 172
172
-
 173
173
-
 174
174
-
 175
175
-
 176
176
-
 177
177
-
 178
178
-
 179
179
-
 180
180
-
 181
181
-
 182
182
-
 183
183
-
 184
184
-
 185
185
-
 186
186
-
 187
187
-
 188
188
-
 189
189
-
 190
190
-
 191
191
-
 192
192
-
 193
193
-
 194
194
-
 195
195
-
 196
196
-
 197
197
-
 198
198
-
 199
199
-
 200
200
-
 201
201
-
 202
202
-
 203
203
-
 204
204
-
 205
205
-
 206
206
-
 207
207
-
 208
208
-
 209
209
-
 210
210
-
 211
211
-
 212
212
-
 213
213
-
 214
214
-
 215
215
-
 216
216
-
 217
217
-
 218
218
-
 219
219
-
 220
220
-
 221
221
-
 222
222
-
 223
223
-
 224
224
-
 225
225
-
 226
226
-
 227
227
-
 228
228
-
 229
229
-
 230
230
-
 231
231
-
 232
232
-
 233
233
-
 234
234
-
 235
235
-
 236
236
-
 237
237
-
 238
238
-
 239
239
-
 240
240
-
 241
241
-
 242
242
-
 243
243
-
 244
244
-
 245
245
-
 246
246
-
 247
247
-
 248
248
-
 249
249
-
 250
250
-
 251
251
-
 252
252
-
 253
253
-
 254
254
-
 255
255
-
 256
256
-
 257
257
-
 258
258
-
 259
259
-
 260
260
-
 261
261
-
 262
262
-
 263
263
-
 264
264
-
 265
265
-
 266
266
-
 267
267
-
 268
268
-
 269
269
-
 270
270
-
 271
271
-
 272
272
-
 273
273
-
 274
274
-
 275
275
-
 276
276
-
 277
277
-
 278
278
-
 279
279
-
 280
280
-
 281
281
-
 282
282
-
 283
283
-
 284
284
-
 285
285
-
 286
286
-
 287
287
-
 288
288
-
 289
289
-
 290
290
-
 291
291
-
 292
292
-
 293
293
-
 294
294
-
 295
295
-
 296
296
-
 297
297
-
 298
298
-
 299
299
-
 300
300
-
 301
301
-
 302
302
-
 303
303
-
 304
304
-
 305
305
-
 306
306
-
 307
307
-
 308
308
-
 309
309
-
 310
310
-
 311
311
-
 312
312
-
 313
313
-
 314
314
-
 315
315
-
 316
316
-
 317
317
-
 318
318
-
 319
319
-
 320
320
-
 321
321
-
 322
322
-
 323
323
-
 324
324
-
 325
325
-
 326
326
-
 327
327
-
 328
328
-
 329
329
-
 330
330
-
 331
331
-
 332
332
-
 333
333
-
 334
334
-
 335
335
-
 336
336
-
 337
337
-
 338
338
-
 339
339
-
 340
340
-
 341
341
-
 342
342
-
 343
343
-
 344
344
-
 345
345
-
 346
346
-
 347
347
-
 348
348
-
 349
349
-
 350
350
-
 351
351
-
 352
352
-
 353
353
-
 354
354
-
 355
355
-
 356
356
-
 357
357
-
 358
358
-
 359
359
-
 360
360
-
 361
361
-
 362
362
-
 363
363
-
 364
364
-
 365
365
-
 366
366
-
 367
367
-
 368
368
-
 369
369
-
 370
370
-
 371
371
-
 372
372
-
 373
373
-
 374
374
-
 375
375
-
 376
376
-
 377
377
-
 378
378
-
 379
379
-
 380
380
-
 381
381
-
 382
382
-
 383
383
-
 384
384
-
 385
385
-
 386
386
-
 387
387
-
 388
388
-
 389
389
-
 390
390
-
 391
391
-
 392
392
-
 393
393
-
 394
394
-
 395
395
-
 396
396
-
 397
397
-
 398
398
-
 399
399
-
 400
400
-
 401
401
-
 402
402
-
 403
403
-
 404
404
-
 405
405
-
 406
406
-
 407
407
-
 408
408
-
 409
409
-
 410
410
-
 411
411
-
 412
412
-
 413
413
-
 414
414
-
 415
415
-
 416
416
-
 417
417
-
 418
418
-
 419
419
-
 420
420
-
 421
421
-
 422
422
-
 423
423


Abus TVVR36000 Manuel utilisateur
- Catégorie
- Enregistreurs vidéo numériques (DVR)
- Taper
- Manuel utilisateur
dans d''autres langues
- English: Abus TVVR36000 User manual
- español: Abus TVVR36000 Manual de usuario
- Deutsch: Abus TVVR36000 Benutzerhandbuch
- русский: Abus TVVR36000 Руководство пользователя
- Nederlands: Abus TVVR36000 Handleiding
- dansk: Abus TVVR36000 Brugermanual
Documents connexes
-
Abus TVVR41110 Manuel utilisateur
-
Abus TVVR41210 Manuel utilisateur
-
Abus TVVR36000 Mode d'emploi
-
Abus TVVR30004 Manuel utilisateur
-
Abus TVVR25000 Information produit
-
Abus TVVR35011 Manuel utilisateur
-
-
-
Abus TVIP52502 Manuel utilisateur
-
Abus 4043158166620 Le manuel du propriétaire
Autres documents
-
Eminent EM6110 Manuel utilisateur
-
Trendnet TV-NVR104 Quick Installation Guide
-
D-Link ShareCenter DNS-315 Quick Installation Manual
-
TEAC HD-35NAS Manuel utilisateur
-
Alecto DVB-100 Le manuel du propriétaire
-
Eneo MSR-24N080004A Quick Installation Manual
-
ACTi ENR-110 ENR120 ENR-130 Quick Guide d'installation
-
Genius DVR-FHD570 Manuel utilisateur
-
-
Sony SNT-V304 Manuel utilisateur