Contents
CHAPTER 1: READ ME FIRST ..................................................................................................................................................... 1
ADVISORY CONVENTIONS ................................................................................................................................................................... 1
SAFETY INFORMATION ....................................................................................................................................................................... 1
HANDLING AND MAINTENANCE ........................................................................................................................................................... 4
DECLARATION OF CONFORMITY (DOC) ................................................................................................................................................. 6
CHAPTER 2: GETTING STARTED ................................................................................................................................................ 8
UNPACKING ..................................................................................................................................................................................... 8
DESCRIPTION OF PARTS ................................................................................................................................................................... 10
HOTKEY FOR SPECIFIC FUNCTIONS ..................................................................................................................................................... 12
FIRST-TIME OPERATION ................................................................................................................................................................... 13
POWERING ON / OFF ...................................................................................................................................................................... 15
CHAPTER 3: SETTING UP WINDOWS FOR THE FIRST TIME ...................................................................................................... 16
SETTING UP WINDOWS EMBEDDED STANDARD 7 (WS7P) ..................................................................................................................... 16
SETTING UP WINDOWS 7 ULTIMATE/PROFESSIONAL ............................................................................................................................. 19
SETTING UP WINDOWS EMBEDDED 8 STANDARD ................................................................................................................................. 24
SETTING UP WINDOWS EMBEDDED 8.1 INDUSTRY PRO ......................................................................................................................... 29
SETTING UP WINDOWS 10 IOT ENTERPRISE ........................................................................................................................................ 34
CHAPTER 4: OPERATING THE DEVICE ..................................................................................................................................... 36
HOTTAB INTRODUCTION .................................................................................................................................................................. 36
SHORTCUTS ................................................................................................................................................................................... 37
CAMERA ....................................................................................................................................................................................... 38
DEVICE ON/OFF ........................................................................................................................................................................... 40
Using the Wireless LAN (Wi-Fi) feature ................................................................................................................................. 40
Using the Wireless WAN (3G/LTE) feature ............................................................................................................................ 41
Using the GPS feature ........................................................................................................................................................... 42
Using the Bluetooth feature .................................................................................................................................................. 43
Turn on/off the LED Indicators .............................................................................................................................................. 43
Using the Barcode Reader feature ........................................................................................................................................ 44
Turn on/off the GPS Ext. Antenna ......................................................................................................................................... 52
Turn on/off the Light Sensor ................................................................................................................................................. 52
Change Touchscreen Modes ................................................................................................................................................. 53
Using the Expansion Module feature .................................................................................................................................... 57
SETTINGS ...................................................................................................................................................................................... 58
CHAPTER 5: FREQUENTLY USED SETTINGS ............................................................................................................................. 60
SCREEN RESOLUTION SCALING AND SETTING ........................................................................................................................................ 60
REPLACING HOT SWAPPABLE BATTERY................................................................................................................................................ 64
USING RECOVERY WIZARD TO RESTORE COMPUTER .............................................................................................................................. 65
DOCKING CONNECTOR PIN DEFINITION ............................................................................................................................................... 67
EXPANSION PORT PIN DEFINITION ..................................................................................................................................................... 67
COM PORT DEFINITION .................................................................................................................................................................. 68
PAIRING WITH A WIRELESS BLUETOOTH BARCODE SCANNER WITH BLUETOOTH SERIAL PORT PROFILE ............................................................ 70
CHAPTER 6: TROUBLESHOOTING............................................................................................................................................ 76
TROUBLESHOOTING (BASIC) ............................................................................................................................................................. 76


 Winmate M101B Series Manuel utilisateur
 Winmate M101PR Manuel utilisateur
 Winmate M101P-ME Manuel utilisateur
 Winmate M101M8 Series Manuel utilisateur
 Winmate M101BU Series Manuel utilisateur
 Winmate M101S Manuel utilisateur
 Winmate M900P Manuel utilisateur
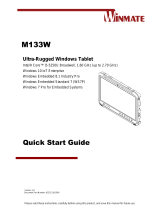 Winmate M133W Guide de démarrage rapide
 Winmate M116PT Manuel utilisateur