
DVD Player| Lecteur DVD
NS-FSDVD
User Guide | Guide de l’utilisateur


1
www.insignia-products.com
Insignia
NS-FSDVD
DVD Player
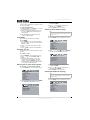
Contents
Introduction. . . . . . . . . . . . . . . . . . . . . . . . . . . . . . .1
Safety information. . . . . . . . . . . . . . . . . . . . . . . . . .1
Features . . . . . . . . . . . . . . . . . . . . . . . . . . . . . . . . .2
Playable discs . . . . . . . . . . . . . . . . . . . . . . . . . . . . . . . . 2
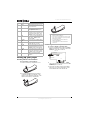
Front . . . . . . . . . . . . . . . . . . . . . . . . . . . . . . . . . . . . . . . 2
Back . . . . . . . . . . . . . . . . . . . . . . . . . . . . . . . . . . . . . . . 3
Remote control . . . . . . . . . . . . . . . . . . . . . . . . . . . . . . . 3
Setting up your player. . . . . . . . . . . . . . . . . . . . . . .4
Installing remote control batteries. . . . . . . . . . . . . . . . . 4
Connecting a TV with composite video. . . . . . . . . . . . . 4
Connecting a TV with S-Video . . . . . . . . . . . . . . . . . . . 5
Connecting a TV with component video . . . . . . . . . . . . 5
Using your player . . . . . . . . . . . . . . . . . . . . . . . . . .5
Turning your player on or off . . . . . . . . . . . . . . . . . . . . . 5
Using the remote control. . . . . . . . . . . . . . . . . . . . . . . . 5
Selecting the video output mode . . . . . . . . . . . . . . . . . 5
Selecting the TV type . . . . . . . . . . . . . . . . . . . . . . . . . . 6
Selecting the TV system. . . . . . . . . . . . . . . . . . . . . . . . 6
Selecting the digital audio out mode. . . . . . . . . . . . . . . 6
Playing a disc . . . . . . . . . . . . . . . . . . . . . . . . . . . . . . . . 6
Controlling disc playback . . . . . . . . . . . . . . . . . . . . . . . 6
Adjusting the volume . . . . . . . . . . . . . . . . . . . . . . . . . . 7
Adjusting the video . . . . . . . . . . . . . . . . . . . . . . . . . . . . 7
Selecting a camera angle . . . . . . . . . . . . . . . . . . . . . . . 7
Creating a playlist . . . . . . . . . . . . . . . . . . . . . . . . . . . . . 7
Repeating a chapter, title, or DVD . . . . . . . . . . . . . . . . 7
Creating a playback loop . . . . . . . . . . . . . . . . . . . . . . . 8
Using ZOOM. . . . . . . . . . . . . . . . . . . . . . . . . . . . . . . . . 8
Searching on a disc . . . . . . . . . . . . . . . . . . . . . . . . . . . 8
Selecting the on-screen menu language . . . . . . . . . . . 8
Selecting a DVD subtitle language . . . . . . . . . . . . . . . . 8
Selecting the DVD audio language . . . . . . . . . . . . . . . . 8
Selecting the DVD menu language. . . . . . . . . . . . . . . . 9
Turning Last Memory on or off . . . . . . . . . . . . . . . . . . . 9
Turning the screen saver on or off . . . . . . . . . . . . . . . . 9
Setting the parental password . . . . . . . . . . . . . . . . . . . 9
Setting parental controls. . . . . . . . . . . . . . . . . . . . . . . 10
Setting up digital audio . . . . . . . . . . . . . . . . . . . . . . . . 10
Resetting to factory defaults . . . . . . . . . . . . . . . . . . . . 10
Maintaining . . . . . . . . . . . . . . . . . . . . . . . . . . . . . .11
Cleaning the cabinet. . . . . . . . . . . . . . . . . . . . . . . . . . 11
Handling discs . . . . . . . . . . . . . . . . . . . . . . . . . . . . . . 11
Cleaning discs . . . . . . . . . . . . . . . . . . . . . . . . . . . . . . 11
Troubleshooting . . . . . . . . . . . . . . . . . . . . . . . . . .11
Error messages . . . . . . . . . . . . . . . . . . . . . . . . . . . . . 12
Specifications . . . . . . . . . . . . . . . . . . . . . . . . . . . .12
90-day limited warranty. . . . . . . . . . . . . . . . . . . . .13
Français. . . . . . . . . . . . . . . . . . . . . . . . xx
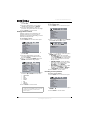
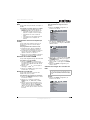
Introduction
Congratulations on your purchase of a
high-quality Insignia product. Your NS-FSDVD
represents the state of the art in DVD player
design, and is designed for reliable and
trouble-free performance.
Safety information
1 Read these instructions.
2 Keep these instructions.
3 Heed all warnings.
4 Follow all instructions.
5 Do not use your DVD player near water.
6 Clean only with a dry cloth.
7 Do not block any ventilation openings. Install
in accordance with the manufacturer's
instructions.
8 Do not install near any heat sources such as
radiators, heat registers, stoves, or other
heat-generating devices (including
amplifiers) that produce heat.
9 Do not defeat the safety purpose of the
polarized or grounding-type plug. A polarized
plug has two blades with one wider than the
other. A grounding type plug has two blades
and a third grounding prong. The wide blade
or the third prong are provided for your safety.
If the provided plug does not fit into your
outlet, consult an electrician for replacement
of the obsolete outlet.
CAUTION
RISK OF ELECTRIC SHOCK
DO NOT OPEN
Warning
To reduce the risk of electric shock, do not remove
the cover or back. No user serviceable parts
inside. Refer servicing to qualified service
personnel.
To reduce the risk of fire or electric shock, do not
expose your DVD player to rain or moisture.
Caution
To prevent electric shock, match the wide blade on
the power cord plug to the wide slot on an electric
outlet. If the plug does not fit, consult a licensed
electrician to replace the obsolete outlet. Do not
modify the power cord plug, or you will defeat this
safety feature.
This symbol indicates that dangerous
voltage constituting a risk of electric shock
is present within your DVD player. This
label is located on the back of your DVD
player.
This symbol indicates that there are
important operating and maintenance
instructions in the literature accompanying
your DVD player.
Warning
Your DVD player employs a laser
system.
Use of controls, adjustments, or the
performance of procedures other
than those specified may result in
hazardous radiation exposure.
Visible laser radiation is present when open and
interlocks defeated. Do not stare into beam.

2
Insignia NS-FSDVD DVD Player
www.insignia-products.com
10 Protect the power cord from being walked on
or pinched particularly at plugs and
convenience receptacles and the point where
they exit from your DVD player.
11 Only use attachments/accessories specified
by the manufacturer.
12 Use only with the cart, stand,
tripod, bracket, or table specified
by the manufacturer or sold with
your DVD player. When a cart is
used, use caution when moving
the cart and DVD player
combination to avoid injury from tip-over.
13 Unplug your DVD player during lightning
storms or when unused for long periods of
time.
14 Refer all servicing to qualified service
personnel. Servicing is required when your
DVD player has been damaged in any way,
such as when the power-supply cord or plug
is damaged, when liquid has been spilled or
objects have fallen into your DVD player,
when your DVD player has been exposed to
rain or moisture, or when your DVD player
does not operate normally or has been
dropped.
15 The main plug is the disconnect device and
should remain readily accessible.
16 These servicing instructions are for use by
qualified service personnel only. To reduce
the risk of electric shock do not perform any
servicing other than that contained in the
operating instructions unless you are
qualified to do so.
17 Your DVD player shall not be exposed to
dripping or splashing and no objects filled
with liquids, such as vases, shall be placed
on your DVD player.
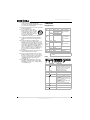
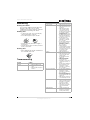
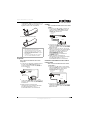
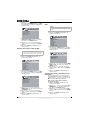
Features
Playable discs
Front
Type Size Playback time Data format
DVD 12 cm 1 layer: 120 min. Compressed digital
audio
Compressed digital
video
2 layers: 240 min.
8 cm 1 layer: 80 min.
2 layers: 180 min.
SVCD
CVD
12 cm 45 min. MPEG2
Compressed digital
audio
Compressed digital
video
VCD
VCD1.1
VCD1.0
DVCD
12 cm 74 min. MPEG1
Compressed digital
audio
Compressed digital
video
8 cm 20 min.
CD 12 cm 74 min. CD-DA: Digital audio
8 cm 20 min.
CD 12 cm 74 min. Digital audio
JPEG 12 cm 60 min. Digital photo
Note
Your player can also play DVD±RWs, CD-Rs, and
CD-RWs.
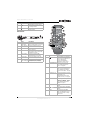
# Component Description
1
POWER
Press to turn your player on or off
(standby mode). When your player is
in standby mode, it is still receiving
power. To disconnect all power,
unplug the power cord.
2 Display Displays status information.
3 Remote control
sensor
Receives signals from the remote
control. Do not block.
4
PLAY/PAUSE
Press to start or pause playback.
5
STOP
Press to stop playback. If you press
this button once then press
PLAY/PAUSE, playback resume from
where you stopped. If you press this
button twice then press
PLAY/PAUSE, playback starts at the
beginning of the disc.
6
PREV
Press to go to the previous DVD
chapter, CD track, or picture.
7
NEXT
Press to go to the next DVD chapter,
CD track, or picture.
8 EJECT Press to open or close the disc tray.
1
2
3
8
7
6
5
4

3
Insignia NS-FSDVD DVD Player
www.insignia-products.com
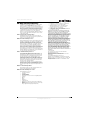
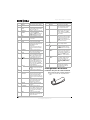
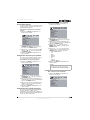
Back
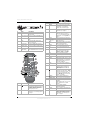
Remote control
# Jacks Description
1 Component video Connect a TV with component jacks
to these jacks.
2 CVBS (composite)
video
Connect a TV with standard AV jacks
to this jack.
3 AC power Connect the AC power cord to this
jack.
4 Audio Connect an audio cable to these
jacks and to the audio jacks on the
TV you connected.
5 Coaxial output
(digital audio)
Connect a digital audio receiver or
other digital audio device to this jack.
6 S-Video output Connect a TV with an S-Video jack to
this jack.
7 Optical output
(digital audio)
Connect a digital audio receiver or
other digital audio device to this jack.
# Button Description
1
POWER
Press to turn your player on or off
(standby mode). When your player is
in standby mode, it is still receiving
power. To disconnect all power,
unplug the power cord.
2 PROGRAM Press to create a playlist. For more
information, see “Creating a playlist”
on page 7.
3
5
6
7
2
1
4
25
24
26
21
23
22
27
28
30
2
3
4
5
6
7
8
9
10
11
12
13
29
31
32
14
33
16
18
19
17
15
1
20
3 REPEAT Press to repeat the current chapter,
title, or the entire disc. For more
information, see “Repeating a
chapter, title, or DVD” on page 7.
4 A-B REPEAT Press to create a playback loop. For
more information, see “Creating a
playback loop” on page 8.
5 ZOOM Press to enlarge the video image.
When the image is used, press
or to move the image. For more
information, see “Using ZOOM” on
page 8.
6 SETUP Press to open the on-screen menu.
7
In on-screen menus, press to select
and adjust options.
8 TITLE When playing a DVD, press open the
DVD title menu, if available. Not all
DVDs support this feature.
9 ENTER In on-screen menus, press to
confirm selections.
10 PBC Press to turn the PBC feature for
VCDs (2.0) on or off.
11 PSCAN/NORMAL Press to select the type of TV you
have connected. You can select
Interlace, S-Video, or P-SCAN.
12 VOL+ Press to increase the volume.
13 SUBTITLE When playing a DVD, press to select
a subtitle language.
14 VOL– Press to decrease the volume.
15 AUDIO When playing a DVD, press to select
a secondary soundtrack, such as a
different language or a commentary.
When playing a VCD 2.0, press to
select the soundtrack.
16 MUTE Press to turn off the sound. Press
again to turn on the sound.
17 ANGLE When playing a DVD, press to select
a different camera angle. Not all
DVDs are recorded with different
camera angles.
18
STOP
Press to stop playback. If you press
this button once then press PLAY,
playback resume where you stopped.
If you press this button twice then
press PLAY, playback starts at the
beginning of the disc.
19
PAUSE
Press to pause playback. Press
PLAY to resume playback.
20 OPEN/CLOSE Press to open or close the disc tray.
21 Numbers In on-screen menus, press to enter
numbers.
When playing a disc, press to select
title, chapters, tracks, or JPEG
pictures.
22 OSD Press to display playback
information. Press again the hide
playback information.
23 CANCEL Press to delete the last number you
entered in a playback list.
24 SEARCH Press to open the search menu
where you can select a title, chapter,
track, or time position. For more
information, see “Searching on a
disc” on page 8.
# Button Description

4
Insignia NS-FSDVD DVD Player
www.insignia-products.com
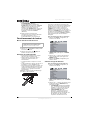
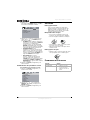
Setting up your player
Installing remote control batteries
To install remote control batteries:
1 Remove the battery compartment cover.
2 Insert two AAA batteries into the battery
compartment. Make sure that the + and –
symbols on the batteries match the + and –
symbols in the battery compartment.
3 Replace the cover.
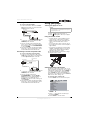
Connecting a TV with composite video.
To connect a TV with composite video:
1 Connect a standard video cable to the Video
Out jack on the back of your player and to the
AV IN jack on the back of the TV.
2 Connect an audio cable to the Audio Out
jacks on the back of your player and to the AV
AUDIO IN jacks on the TV.
3 Turn on the TV, then select the appropriate
input source. For more information, see the
documentation that came with the TV.
25 MENU When playing a DVD, press to open
the DVD’s menu. Some DVDs do not
support this feature.
26 RETURN When playing a DVD, press to return
to the DVD menu. Some DVDs do
not support this feature.
27 SLOW Press to play a DVD in slow motion.
Each time you press this button, the
slow-motion speed changes. Press
PLAY to resume normal playback.
28 STEP Press once to pause playback. Press
repeatedly to advance one frame at a
time. Press PLAY to resume
normal playback.
29
NEXT
Press to go to the next DVD chapter,
CD track, or picture.
30
PREV
Press to go to the previous DVD
chapter, CD track, or picture.
31
FWD
Press to fast forward on a disc. Each
time you press this button the
fast-forward speed increases. Press
PLAY to resume normal playback.
32
REV
Press to fast reverse on a disc. Each
time you press this button the
fast-reverse speed increases. Press
PLAY to resume normal playback.
33
PLAY
Press to start playback. When
playback is paused, press to resume
playback.
# Button Description
Notes
• Do not mix different types together or old
batteries with new batteries
• If the remote control will not be used for a long
time, remove the batteries to prevent possible
damage from leakage.
• To prevent leakage, remove exhausted
batteries immediately.
• Typical battery life is about six months of
normal use.
CVBS
VIDEO OUT
OPTICAL OUT PUT
Back of player
Video cable
Audio cable
TV

5
Insignia NS-FSDVD DVD Player
www.insignia-products.com
Connecting a TV with S-Video
To connect a TV with S-Video:
1 Connect an S-Video cable to the S-Video
Out jack on the back of your TV and to the
S-Video In jack on the TV.
2 Connect an audio cable to the MIX L/R jacks
on the back of your player and to the AV
AUDIO IN jacks on the TV.
3 Turn on your player. The default TV video
type is set to S-Video. If you have changed
the TV video type, press PSCAN/NORMAL
to select S-VIDEO.
4 Turn on the TV, then select the appropriate
input source. For more information, see the
documentation that came with the TV.
Connecting a TV with component video
To connect a TV with component video:
1 Connect a component video cable to the
YPbPr jacks on the back of your player and
to the Component In jacks on the TV.
2 Connect an audio cable to the MIX L/R jacks
on the back of your player and to the AV
AUDIO IN jacks on the TV.
3 Turn on your player, then press
PSCAN/NORMAL to select P-SCAN or
Interlace. If the TV is a high-definition or
progressive scan capable TV, select
P-SCAN. If the TV is an older, “analog” TV,
select Interlace.
4 Turn on the TV, then select the appropriate
input source. For more information, see the
documentation that came with the TV.
Using your player
Turning your player on or off
To turn your player on or off:
1 Press Power. Your player turns on.
2 Press Power again to turn off your player.
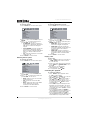
Using the remote control
• Point the remote control toward the remote
control sensor on the front of your player.
• Make sure that no objects are between the
remote control and the remote control
sensor.
• Do not expose the remote control to shock.
• Do not expose the remote control to liquids or
high humidity.
• Do not place your player in a location where
sunlight or bright light shines on the remote
control sensor. This can interfere with the
signal from the remote control.
The following illustration shows the best angle
for using the remote control.
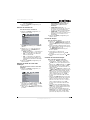
Selecting the video output mode
You need to set the video output mode on your
player to match the TV video type. If you connect
a TV using the S-Video jack, select S-VIDEO. If
you connect a TV using the component jacks,
select P-SCAN if the TV is a high-definition or
progressive scan capable TV or select Interlace
if the TV is an older, “analog” TV.
To select the video output mode:
1 Press SETUP. The on-screen menu opens.
2 Press or to select VIDEO, then press
ENTER.
3 Press or to select the TV video type,
then press ENTER.
4 Press SETUP to close the menu.
CVBS
VIDEO OUT
OPTICAL OUT PUT
Back of player
S-Video cable
TV
Audio cable
CVBS
VIDEO OUT
OPTICAL OUT PUT
Back of player
TV
Audio cable
Component video
cable
Warning
When your player is in standby mode, it is still
receiving power. To completely disconnect power,
unplug the power cord.
30°
30°
19.7ft. (6 m)
SYSTEM SETUP
TV SYSTEM
SCREEN SAVER
VIDEO
TV TYPE
PASSWORD
RATING
DEFAULT
LAST MEMORY

6
Insignia NS-FSDVD DVD Player
www.insignia-products.com
Selecting the TV type
To select the TV type:
1 Press SETUP. The on-screen menu opens.
2 Press or to select TV TYPE, then press
ENTER.
3 Press or to select the TV type, then
press ENTER. You can select:
• 4:3 PANSCAN—Select if your player is
connected to a standard TV. The left and
right sides of a widescreen image are
cropped.
• 4:3 LETTERBOX—Select if your player is
connected to a standard TV. The full
widescreen image is displayed with black
bars across the top and bottom of the
screen.
• 16:9—Select if your player is connected to
a widescreen TV.
4 Press SETUP to close the menu.
Selecting the TV system
To select the TV system:
1 Press SETUP. The on-screen menu opens.
2 Press or to select TV SYSTEM, then
press ENTER.
3 Press or to select the TV system, then
press ENTER. You can select:
• AUTO—Select if you are not sure what
system the TV uses.
• PAL—Select if the TV uses the PAL
system.
• NTSC—Select if the TV uses the NTSC
system. NTSC is the TV system
commonly used in North America.
4 Press SETUP to close the menu.
Selecting the digital audio out mode
To select the digital audio out mode:
1 Press SETUP. The on-screen menu opens.
2 Press or to select , then press ENTER.
The audio out menu opens.
3 Press or to select an option, then press
ENTER. You can select:
• S/PDIF OFF—Select if your player is not
connected to a digital sound system.
• S/PDIF RAW—Select if your player is
connected to a digital sound system, and
you want to listen to the audio in its
original format.
• S/PDIF PCM—Select if your player is
connected to a digital sound system, and
you want the audio converted to PCM
format.
4 Press SETUP to close the menu.
Playing a disc
To play a disc:
1 Press EJECT on the front of your player or
OPEN/CLOSE on the remote control to
open the disc tray.
2 Insert a disc, label side up, into the tray, then
press EJECT or OPEN/CLOSE to close
the tray.
3 If the disc does not start playing
automatically, press PLAY.
4 To stop playback, press STOP.
Controlling disc playback
To control disc playback:
• Press PAUSE to pause playback. Press
PLAY to resume playing.
• Press NEXT or PREV to go to the next
DVD chapter, CD track, or picture.
• Press FWD or REV to fast forward or
fast reverse. Each time you press one of
these buttons, the speed changes from 1× to
2× to 8× to 20×. Press PLAY to resume
normal playback.
• Press SLOW to play forward in play motion.
Each time you press this button, the speed
changes from 1/2× to 1/3× to 1/4× to 1/5× to
1/7× normal speed. Press PLAY to resume
normal playback.
• If you are playing a DVD, press MENU to
open the DVD disc menu, if the DVD has one.
Some DVDs may not support this feature.
• If you are playing a DVD, press TITLE to
open the DVD title menu, if the DVD has one.
Some DVDs may not support this feature.
SYSTEM SETUP
TV SYSTEM
SCREEN SAVER
VIDEO
TV TYPE
PASSWORD
RATING
DEFAULT
LAST MEMORY
SYSTEM SETUP
TV SYSTEM
SCREEN SAVER
VIDEO
TV TYPE
PASSWORD
RATING
DEFAULT
LAST MEMORY
SYSTEM SETUP
TV SYSTEM
SCREEN SAVER
VIDEO
TV TYPE
PASSWORD
RATING
DEFAULT
LAST MEMORY

7
Insignia NS-FSDVD DVD Player
www.insignia-products.com
• If you are playing a DVD, press RETURN to
return to the previous menu. Some DVDs
may not support this feature.
• If you are playing a DVD, press STEP to
pause playback, then press this button again
to play forward one frame at a time. Press
PLAY to resume normal playback.
Adjusting the volume
To adjust the volume:
• Press VOL+ or VOL– to increase or decrease
the volume.
• Press MUTE to turn off the sound. Press this
button again to turn on the sound.
Adjusting the video
To adjust the video:
1 Press SETUP. The on-screen menu opens.
2 Press or to select , then press ENTER.
The
VIDEO SETUP
menu opens.
3 Press or to select the option you want to
adjust, then press ENTER. You can select:
• BRIGHTNESS—Adjusts the amount of
light in the darkest portion of the picture.
• CONTRAST—Adjusts the level of white
between the lightest and darkest portions
of an image.
• HUE—Adjusts balance between the
colors in the image.
• SATURATION—Adjusts the overall color.
4 Press or to adjust the option, then press
ENTER.
5 Press SETUP to close the menu.
Selecting a camera angle
Some DVDs have scenes recorded from
different camera angles.
To select a camera angle:
• Press ANGLE. An angle icon appears on the
screen when multiple angles are available.
Creating a playlist
You can create a playlist of DVD chapters or
titles, CD tracks, or JPEG pictures. You can add
as many as 16 chapters, titles, tracks, or pictures
to the playlist.
To create a playlist:
1 Press PROGRAM. The program screen
opens.
DVD or JPEG disc
CD, SVCD, VCD, or HD-CD
2 Press the number buttons to enter a chapter,
title, track, or picture number, then press
or to move to the next entry field. If you
need to delete an entry, press CLEAR.
3 Repeat Step 2 to enter more chapters, titles,
tracks, or pictures.
4 Press or to select PLAY, then press
ENTER. Your playlist starts playing.
5 To cancel the playlist, press PROGRAM,
press or to select CLEAR, then
press ENTER. You can also remove the disc
from the disc tray to cancel the playlist.
Repeating a chapter, title, or DVD
You can repeat a chapter, title, DVD.
To repeat a chapter, title, or DVD:
• During DVD playback, press REPEAT one or
more times.
• The first time you press this button, the
current chapter is repeated.
• The second time you press this button,
the current title is repeated.
• The third time you press this button, the
entire DVD is repeated.
• The fourth time you press this button,
repeat play is cancelled.
Note
The volume and mute controls only work when
using the left and right stereo ouputs. They do not
work when using digital audio outputs.
SYSTEM SETUP
TV SYSTEM
SCREEN SAVER
VIDEO
TV TYPE
PASSWORD
RATING
DEFAULT
LAST MEMORY
VIDEO SETUP
BRIGHTNESS
CONTRAST
HUE
SATURATION
Note
During playback, you can press STOP and
PLAY to stop and start playback.
PROGRAM PLAY CLEAR
PROGRAM
PLAY CLEAR

8
Insignia NS-FSDVD DVD Player
www.insignia-products.com
Creating a playback loop
You can create a playback loop to play a section
of a disc repeatedly.
To create a playback loop:
1 During playback, press A-B when you reach
the starting point for your loop.
2 When you reach the ending point for your
loop, press A-B again. Your playback loop
starts playing.
3 Press A-B again to cancel the loop and
resume normal playback.
Using ZOOM
You can enlarge (zoom) the video image.
To use ZOOM:
1 Press ZOOM one or more times to enlarge
the video image. You can select ×2, ×3, ×4,
1/2, 1/3, or 1/4.
2 Press or to navigate around the
image.
3 Press PLAY to resume normal playback.
Searching on a disc
You can search for a chapter, title, track, or time
position.
To search on a disc:
1 Press SEARCH. The search menu opens.
2 Press or to select Chapter, Title, or
Time.
3 Press the number buttons to enter the
chapter, title or track number or the time
position, then press ENTER. Your player
finds the chapter, title, track, or time position
you entered and starts playback.
Selecting the on-screen menu language
To select the on-screen menu language:
1 Press SETUP. The on-screen menu opens.
2 Press or to select , then press ENTER.
The
LANGUAGE SETUP
menu opens.
3 Press or to select OSD LANGUAGE,
then press ENTER.
4 Press or to select the language you
want, then press ENTER.
5 Press SETUP to close the menu.
Selecting a DVD subtitle language
To select a DVD subtitle language:
1 Press SETUP. The on-screen menu opens.
2 Press or to select , then press ENTER.
The
LANGUAGE SETUP
menu opens.
3 Press or to select SUBTITLE LANG,
then press ENTER.
4 Press or to select the language you
want, then press ENTER.
5 Press SETUP to close the menu.
Selecting the DVD audio language
To select the DVD audio language:
1 Press SETUP. The on-screen menu opens.
SYSTEM SETUP
TV SYSTEM
SCREEN SAVER
VIDEO
TV TYPE
PASSWORD
RATING
DEFAULT
LAST MEMORY
LANGUAGE SETUP
OSD LANGUAGE
AUDIO LANG
SUBTITLE LANG
MENU LANG
Note
This feature may not work with all DVDs. You may
need to select the DVD subtitle language from the
DVD disc menu.
Note
This feature may not work with all DVDs. You may
need to select the DVD audio language from the
DVD disc menu.
SYSTEM SETUP
TV SYSTEM
SCREEN SAVER
VIDEO
TV TYPE
PASSWORD
RATING
DEFAULT
LAST MEMORY
LANGUAGE SETUP
OSD LANGUAGE
AUDIO LANG
SUBTITLE LANG
MENU LANG
SYSTEM SETUP
TV SYSTEM
SCREEN SAVER
VIDEO
TV TYPE
PASSWORD
RATING
DEFAULT
LAST MEMORY

9
Insignia NS-FSDVD DVD Player
www.insignia-products.com
2 Press or to select , then press ENTER.
The
LANGUAGE SETUP
menu opens.
3 Press or to select AUDIO LANG, then
press ENTER.
4 Press or to select the language you
want, then press ENTER.
5 Press SETUP to close the menu.
Selecting the DVD menu language
To select the DVD menu language:
1 Press SETUP. The on-screen menu opens.
2 Press or to select , then press ENTER.
The
LANGUAGE SETUP
menu opens.
3 Press or to select MENU LANG, then
press ENTER.
4 Press or to select the language you
want, then press ENTER.
5 Press SETUP to close the menu.
Turning Last Memory on or off
If the LAST MEMORY option is turned on and
you press press STOP then press PLAY,
playback starts when it stopped.
To turn last memory on or off:
1 Press SETUP. The on-screen menu opens.
2 Press or to select LAST MEMORY, then
press ENTER.
3 Press or to select ON or OFF, then press
ENTER.
4 Press SETUP to close the menu.
Turning the screen saver on or off
Your player has a screen saver that will turn on
when your player is in stop mode for several
minutes.
To turn the screen saver on or off:
1 Press SETUP. The on-screen menu opens.
2 Press or to select SCREEN SAVER,
then press ENTER.
3 Press or to select ON or OFF, then press
ENTER.
4 Press SETUP to close the menu.
Setting the parental password
The parental password lets you control access to
parental controls.
To set the parental password:
1 Press SETUP. The on-screen menu opens.
Note
This feature may not work with all DVDs. You may
need to select the DVD menu language from the
DVD disc menu.
LANGUAGE SETUP
OSD LANGUAGE
AUDIO LANG
SUBTITLE LANG
MENU LANG
SYSTEM SETUP
TV SYSTEM
SCREEN SAVER
VIDEO
TV TYPE
PASSWORD
RATING
DEFAULT
LAST MEMORY
LANGUAGE SETUP
OSD LANGUAGE
AUDIO LANG
SUBTITLE LANG
MENU LANG
SYSTEM SETUP
TV SYSTEM
SCREEN SAVER
VIDEO
TV TYPE
PASSWORD
RATING
DEFAULT
LAST MEMORY
SYSTEM SETUP
TV SYSTEM
SCREEN SAVER
VIDEO
TV TYPE
PASSWORD
RATING
DEFAULT
LAST MEMORY
SYSTEM SETUP
TV SYSTEM
SCREEN SAVER
VIDEO
TV TYPE
PASSWORD
RATING
DEFAULT
LAST MEMORY

10
Insignia NS-FSDVD DVD Player
www.insignia-products.com
2 Press or to select PASSWO RD, then
press ENTER.
3 Press the number buttons to enter 0000
(default password), then press ENTER.
4 Press the number button to enter your
password. Your password must be four digits.
5 Press SETUP to close the menu.
Setting parental controls
Parental controls let you lock ratings for TV
programs and movies. If you try to want a
program or movie with a locked rating, you must
enter the parental password.
To set parental controls:
1 Press SETUP. The on-screen menu opens.
2 Press or to select PASSWO RD, then
press ENTER.
3 Press the number buttons to enter the
password (0000 is the default password),
then press ENTER.
4 Press or to select RATING, then press
ENTER. The available ratings appear.
5 Press or to select the rating you want to
block, then press ENTER. You can select:
• 1 KID SAFE
•2 G
•3 PG
•4 PG 13
•5 PG-R
•6 R
•7 NC-17
• 8 ADULT
6 Press SETUP to close the menu.
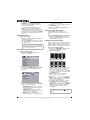
Setting up digital audio
To set up digital audio:
1 Press SETUP. The on-screen menu opens.
2 Press or to select , then press ENTER.
The
DIGITAL SETUP
menu opens.
3 Press or to select an option, then press
ENTER. You can select:
• OP MODE—Selects the sound level.
Select LINE OUT for most sound systems
or select RF REMOD if the sound level is
too low when your player is connected
directly to the TV.
• DYNAMIC RANGE—Selects the range
between the loudest and softest sounds.
This option is only available when
OP MODE is set to LINE OUT.
• DUAL MONO—Selects the audio output
mode. Select STEREO for normal
playback or select MONO L., MONO R.,
or MIX MONO for karaoke playback.
4 Press SETUP to close the menu.
Resetting to factory defaults
To reset to factory defaults:
1 Press SETUP. The on-screen menu opens.
2 Press or to select DEFAULT, then press
ENTER.
3 Press SETUP to close the menu.
Note
When you close the on-screen menu, the parental
controls are re-locked. When you try to access the
parental controls again, you must enter the
password again.
SYSTEM SETUP
TV SYSTEM
SCREEN SAVER
VIDEO
TV TYPE
PASSWORD
RATING
DEFAULT
LAST MEMORY
TV
SYSTEM SETUP
1 KID SAFE
2 G
3 PG
4 PG13
5 PG-R
6 R
7 NC-17
8 ADULT
TV SYSTEM
SCREEN SAVER
VIDEO
TV TYPE
PASSWORD
RATING
DEFAULT
LAST MEMORY
SYSTEM SETUP
TV SYSTEM
SCREEN SAVER
VIDEO
TV TYPE
PASSWORD
RATING
DEFAULT
LAST MEMORY
DIGITAL SETUP
OP MODE
DYNAMIC RANGE
DUAL MONO
SYSTEM SETUP
TV SYSTEM
SCREEN SAVER
VIDEO
TV TYPE
PASSWORD
RATING
DEFAULT
LAST MEMORY

11
Insignia NS-FSDVD DVD Player
www.insignia-products.com
Maintaining
Cleaning the cabinet
Use a soft cloth slightly moistened with a mild
detergent solution. Do not use a solution
containing alcohol, spirits, ammonia, or abrasive
cleaners. They may damage the cabinet.
Handling discs
• To keep a disc clean, do not touch the play
side (non-label side) of the disc.
• Do not attach paper or tape to the disc.
• Keep the disc away from direct sunlight or
heat sources.
• Store the disc in a disc case after you remove
it from your recorder.
Cleaning discs
• Before playback, wipe the disc outwards from
the center with clean cloth.
Troubleshooting
Problem Solution
No power • Make sure that the power
cord is plugged into a power
outlet.
• Make sure that your player is
turned on.
Disc does not play • Make sure that a disc is in the
disc tray.
• Make sure that the disc label
is facing up.
• Make sure that the region
code on the disc matches
your player’s region code.
The disc’s region code should
be on the disc or the disc
packaging. The region code
for your player is 1.
• The DVD’s rating level may be
higher than the rating level
your player is set up to play.
• The disc may not be a
supported disc. For more
information, see “Playable
discs” on page 2.
• The disc may be damaged or
dirty. Clean the disc or try
another disc. For more
information, see “Cleaning
discs” on page 11.
• Moisture may have
condensed inside your player.
Remove the disc, then leave
your player turned on for one
or two hours to let the
moisture evaporate.
No picture • Make sure that the TV is
turned on.
• Make sure that the TV is set
to the correct video input
setting. See the
documentation that came
with the TV.
• Make sure that the video
cable(s) are connected
securely. For more
information, see the topics in
“Setting up your player” on
page 4.
• The disc may be damaged or
dirty. Clean the disc or try
another disc. For more
information, see “Cleaning
discs” on page 11.
Picture noise or distortion • The disc may be damaged or
dirty. Clean the disc or try
another disc. For more
information, see “Cleaning
discs” on page 11.
• Reset the color system on the
TV. For more information, see
the documentation that came
with the TV.
• Make sure that your player is
connected directly to the TV.
Picture not full screen • Make sure that you have
selected the correct aspect
ratio for your player. For more
information, see “Selecting
the TV type” on page 6.
• Make sure that you have
selected the correct aspect
ratio from the DVD disc
menu.
General malfunction • Unplug your player for 30
minutes, then plug it back in
and turn it on. Your player
should operate normally.
Problem Solution

12
Insignia NS-FSDVD DVD Player
www.insignia-products.com
Error messages
Specifications
Accessories
• Remote control
• A/V cable
• AAA batteries (2)
• User guide
Legal notices
FCC Part 15
This device complies with Part 15 of the FCC Rules.
Operation of this product is subject to the following two
conditions: (1) this device may not cause harmful
interference, and (2) this device must accept any interference
received, including interference that may cause undesired
operation.
This equipment has been tested and found to comply within
the limits for a class B digital device, pursuant to Part 15 of
the FCC Rules. These limits are designed to provide
reasonable protection against harmful interference in a
residential installation. This equipment generates, uses, and
can radiate radio frequency energy and, if not installed and
used in accordance with the instructions, may cause harmful
interference to radio communications. However, there is no
guarantee that interference will not occur in a particular
installation. If this equipment does cause harmful
interference to radio or television reception, which can be
determined by turning the equipment off and on, the user is
encouraged to try to correct the interference by one or more
of the following measures:
• Reorient or relocate the receiving antenna.
• Increase the separation between the equipment and
receiver.
• Connect the equipment into an outlet on a circuit
different from that to which the receiver is connected.
• Consult the dealer or an experienced technician for
help.
FCC warning
Changes or modifications not expressly approved by the
party responsible for compliance with the FCC Rules could
void the user’s authority to operate this equipment.
DHHS and FDA safety certification
This product is made and tested to meet safety standards of
the FCC, requirements and compliance with safety
performance of the U.S. Department of Health and Human
Services, and also with FDA Radiation Performance
Standards 21 CFR Subchapter J.
Canada ICES-003 statement
This Class B digital apparatus complies with Canadian
ICES-003.
Dolby Laboratories
This product incorporates copyright protection technology
that is protected by method claims of certain US patents and
other intellectual property rights owned by Macrovision
Corporation and other rights owners. Use of this copyright
protection technology must be authorized by Macrovision
Corporation, and is intended for home and other limited
viewing uses only unless otherwise authorized by
Macrovision Corporation. Reverse engineering or
disassembly is prohibited.
Manufactured under license from Dolby Laboratories.
Dolby and the symbol are registered trademarks of DOLBY
LABORATORIES. All rights reserved.
Message Explanation
WRONG REGIONAL DISC The DVD’s region code does not
match your player’s region code. The
disc’s region should be on the disc
or the disc packaging. The region
code for your player is 1.
WRONG PASSWORD The DVD’s rating is higher than the
rating level your player is set up to
play.
You may have entered to password
incorrectly in the SETUP menu.
WRONG DISC Your player has automatic disc
quality detection software. When
your player detects a problem with a
disc, your player may keep playing
the disc at a lower quality or stop
playing.
Playable discs CD, DVD, MP3, and JPEG
Color system NTSC, PAL, AUTO
Audio system Analog stereo
Dolby Digital
Audio DAC 24-bit at 96 KHz
Signal output Video: 1 vpp at 75 ohm
Audio: 2 vpp stereo
Frequency response CD: 20 Hz-20 KHz (EIAT)
DVD: 20 Hz-22KHz (48 K)
20 Hz-44 KHz (96 K)
S/N ratio > 90 dB
THD < 0.05%
Output terminals Composite video
S-Video
Component video
Audio left and right
Coaxial digital optical 5.1 channels
Power supply AC 110 V at 60 Hz
< 15 W
Operating temperature 32°F to 104°F (0°C to 40°C)
Dimensions 16.93×9.84×1.5 inches
(43×25×3.8 cm)
Weight 4.87 lbs. (2.21 kg)

13
Insignia NS-FSDVD DVD Player
www.insignia-products.com
90-day limited warranty
Insignia Products (“Insignia”) warrants to you, the original
purchaser of this new NS-FSDVD (“Product”), that the
Product shall be free of defects in the original manufacture of
the material or workmanship for a period of 90 days from the
date of your purchase of the Product (“Warranty Period”).
This Product must be purchased from an authorized dealer
of Insignia brand products and packaged with this warranty
statement. This warranty does not cover refurbished
Product. If you notify Insignia during the Warranty Period of a
defect covered by this warranty that requires service, terms
of this warranty apply.
How long does the coverage last?
The Warranty Period lasts for 90 days from the date you
purchased the Product. The purchase date is printed on the
receipt you received with the Product.
What does this warranty cover?
During the Warranty Period, if the original manufacture of the
material or workmanship of the Product is determined to be
defective by an authorized Insignia repair center or store
personnel, Insignia will (at its sole option): (1) repair the
Product with new or rebuilt parts; or (2) replace the Product
at no charge with new or rebuilt comparable products or
parts. Products and parts replaced under this warranty
become the property of Insignia and are not returned to you.
If service of Products or parts are required after the Warranty
Period expires, you must pay all labor and parts charges.
This warranty lasts as long as you own your Insignia Product
during the Warranty Period. Warranty coverage terminates if
you sell or otherwise transfer the Product.
How to obtain warranty service?
If you purchased the Product at a retail store location, take
your original receipt and the Product to the store you
purchased it from. Make sure that you place the Product in
its original packaging or packaging that provides the same
amount of protection as the original packaging. If you
purchased the Product from an online web site, mail your
original receipt and the Product to the address listed on the
web site. Make sure that you put the Product in its original
packaging or packaging that provides the same amount of
protection as the original packaging.
To obtain in-home warranty service for a television with a
screen 25 inches or larger, call 1-888-BESTBUY. Call agents
will diagnose and correct the issue over the phone or will
have an Insignia-approved repair person dispatched to your
home.
Where is the warranty valid?
This warranty is valid only to the original purchaser of the
product in the United States and Canada.
What does the warranty not cover?
This warranty does not cover:
• Customer instruction
• Installation
• Set up adjustments
• Cosmetic damage
• Damage due to acts of God, such as lightning strikes
• Accident
•Misuse
•Abuse
• Negligence
• Commercial use
• Modification of any part of the Product, including the
antenna
• Plasma display panel damaged by static (non-moving)
images applied for lengthy periods (burn-in).
This warranty also does not cover:
• Damage due to incorrect operation or maintenance
• Connection to an incorrect voltage supply
• Attempted repair by anyone other than a facility
authorized by Insignia to service the Product
• Products sold as is or with all faults
• Consumables, such as fuses or batteries
• Products where the factory applied serial number has
been altered or removed
REPAIR REPLACEMENT AS PROVIDED UNDER THIS
WARRANTY IS YOUR EXCLUSIVE REMEDY. INSIGNIA
SHALL NOT BE LIABLE FOR ANY INCIDENTAL OR
CONSEQUENTIAL DAMAGES FOR THE BREACH OF ANY
EXPRESS OR IMPLIED WARRANTY ON THIS PRODUCT,
INCLUDING, BUT NOT LIMITED TO, LOST DATA, LOSS OF
USE OF YOUR PRODUCT, LOST BUSINESS OR LOST
PROFITS. INSIGNIA PRODUCTS MAKES NO OTHER
EXPRESS WARRANTIES WITH RESPECT TO THE
PRODUCT, ALL EXPRESS AND IMPLIED WARRANTIES
FOR THE PRODUCT, INCLUDING, BUT NOT LIMITED TO,
ANY IMPLIED WARRANTIES OF AND CONDITIONS OF
MERCHANTABILITY AND FITNESS FOR A PARTICULAR
PURPOSE, ARE LIMITED IN DURATION TO THE
WARRANTY PERIOD SET FORTH ABOVE AND NO
WARRANTIES, WHETHER EXPRESS OR IMPLIED, WILL
APPLY AFTER THE WARRANTY PERIOD. SOME STATES,
PROVINCES AND JURISDICTIONS DO NOT ALLOW
LIMITATIONS ON HOW LONG AN IMPLIED WARRANTY
LASTS, SO THE ABOVE LIMITATION MAY NOT APPLY TO
YOU. THIS WARRANTY GIVES YOU SPECIFIC LEGAL
RIGHTS, AND YOU MAY ALSO HAVE OTHER RIGHTS,
WHICH VARY FROM STATE TO STATE OR PROVINCE TO
PROVINCE.
Contact Insignia:
For customer service please call 1-877-467-4289
www.insignia-products.com
Distributed by Best Buy Purchasing, LLC
7601 Penn Avenue South, Richfield, Minnesota, U.S.A.
55423-3645
© 2008 Best Buy Enterprise Services, Inc.
All rights reserved. INSIGNIA is a trademark of Best Buy
Enterprise Services, Inc. Registered in some countries. All
other products and brand names are trademarks of their
respective owners.

14
Insignia NS-FSDVD DVD Player
www.insignia-products.com

15
Insignia NS-FSDVD Lecteur DVD
www.insignia-products.com
Insignia
NS-FSDVD
Lecteur DVD
Table des matières
Introduction. . . . . . . . . . . . . . . . . . . . . . . . . . . . . .15
Informations sur la sécurité . . . . . . . . . . . . . . . . .15
Fonctionnalités . . . . . . . . . . . . . . . . . . . . . . . . . . .16
Disques compatibles. . . . . . . . . . . . . . . . . . . . . . . . . . 16
Face avant . . . . . . . . . . . . . . . . . . . . . . . . . . . . . . . . . 16
Face arrière. . . . . . . . . . . . . . . . . . . . . . . . . . . . . . . . . 17
Télécommande. . . . . . . . . . . . . . . . . . . . . . . . . . . . . . 17
Configuration du lecteur . . . . . . . . . . . . . . . . . . . .18
Installation des piles de la télécommande . . . . . . . . . 18
Connexion d’un téléviseur avec vidéo composite. . . . 19
Connexion d’un téléviseur avec une entrée S-Vidéo . 19
Connexion d’un téléviseur avec vidéo à composantes 19
Fonctionnement du lecteur . . . . . . . . . . . . . . . . . .20
Mise en marche et arrêt du lecteur . . . . . . . . . . . . . . . 20
Utilisation de la télécommande. . . . . . . . . . . . . . . . . . 20
Sélection du mode de sortie vidéo . . . . . . . . . . . . . . . 20
Sélection du type de téléviseur. . . . . . . . . . . . . . . . . . 20
Sélection du standard TV . . . . . . . . . . . . . . . . . . . . . . 21
Sélection du mode de sortie audio numérique . . . . . . 21
Lecture de disques . . . . . . . . . . . . . . . . . . . . . . . . . . . 21
Contrôle de la lecture du disque. . . . . . . . . . . . . . . . . 21
Réglage du volume. . . . . . . . . . . . . . . . . . . . . . . . . . . 22
Réglage de la vidéo . . . . . . . . . . . . . . . . . . . . . . . . . . 22
Choix d'un angle de la caméra . . . . . . . . . . . . . . . . . . 22
Création d'une liste de lecture . . . . . . . . . . . . . . . . . . 22
Répétition d'un chapitre, d'un titre ou d'un DVD . . . . . 23
Programmation d’une lecture répétée (en boucle) . . . 23
Utilisation de la fonction ZOOM . . . . . . . . . . . . . . . . . 23
Recherche sur un disque . . . . . . . . . . . . . . . . . . . . . . 23
Sélection de la langue des menus d'écran . . . . . . . . . 23
Sélection de la langue des sous-titres du DVD. . . . . . 23
Sélection de la langue audio du DVD . . . . . . . . . . . . . 24
Sélection de la langue pour le menu du DVD. . . . . . . 24
Activer et désactiver la dernière position mémorisée . 24
Activation ou désactivation de l’économiseur d’écran. 25
Configuration du mot de passe parental. . . . . . . . . . . 25
Configuration des contrôles parentaux . . . . . . . . . . . . 25
Configuration de l’audio numérique . . . . . . . . . . . . . . 25
Réinitialisation des paramètres d'usine . . . . . . . . . . . 26
Entretien . . . . . . . . . . . . . . . . . . . . . . . . . . . . . . . .26
Nettoyage du boîtier . . . . . . . . . . . . . . . . . . . . . . . . . . 26
Manipulation des disques . . . . . . . . . . . . . . . . . . . . . . 26
Nettoyage des disques . . . . . . . . . . . . . . . . . . . . . . . . 26
Problèmes et solutions . . . . . . . . . . . . . . . . . . . . .26
Messages d’erreur . . . . . . . . . . . . . . . . . . . . . . . . . . . 27
Spécifications . . . . . . . . . . . . . . . . . . . . . . . . . . . .27
Avis juridiques. . . . . . . . . . . . . . . . . . . . . . . . . . . .28
Garantie limitée de 90 jours . . . . . . . . . . . . . . . . .29
Introduction
Félicitations d’avoir acheté ce produit Insignia de
haute qualité. Le modèle NS-FSDVD représente
la dernière avancée technologique dans la
conception de lecteur DVD et a été conçu pour
des performances et une fiabilité
exceptionnelles.
Informations sur la sécurité
1 Lire ces instructions.
2 Conserver ces instructions.
3 Respecter tous les avertissements.
4 Observer toutes les instructions.
5 Ne pas utiliser le lecteur DVD près de l’eau.
6 Nettoyer uniquement avec un chiffon sec.
7 Ne pas obstruer les ouvertures d'aération.
Installer l’appareil conformément aux
instructions du fabricant.
8 Installer l’appareil à l’écart de sources de
chaleur, telles que radiateurs, bouches de
chaleur, fours ou autres appareils (y compris
les amplificateurs) qui produisent de la
chaleur.
ATTENTION
RISQUE DE CHOC ÉLECTRIQUE
NE PAS OUVRIR
Avertissement
Afin de réduire le risque de choc électrique, ne
pas enlever le couvercle (ou le panneau arrière).
Ne contient aucune pièce réparable par
l'utilisateur. Confier l’entretien à un personnel
qualifié.
Afin de réduire le risque d’incendie et de choc
électrique, ne pas exposer cet appareil à la pluie
ou l’humidité.
Attention
Pour éviter des chocs électriques, introduire le plot
le plus large de la prise du cordon d’alimentation
dans la fente correspondante de la prise secteur.
Si la prise ne s'adapte pas, contacter un
électricien afin qu’il remplace la prise secteur
inadéquate. Ne pas modifier la prise du cordon
d’alimentation, sinon ce dispositif de sécurité
serait inopérant.
Ce symbole indique qu'une tension
dangereuse, constituant un risque de choc
électrique, est présente dans cet appareil.
Cette étiquette est située au dos du lecteur
DVD.
Ce symbole indique que d'importantes
instructions concernant le fonctionnement
et la maintenance figurent dans la
documentation qui accompagne le lecteur
DVD.
Avertissement
Ce lecteur DVD est doté d’un
lecteur au laser.
L’utilisation de commandes ou de
réglages ou la réalisation de
procédures autres que celles
spécifiées dans les présentes
pourrait entraîner une exposition dangereuse aux
radiations.
Émission de rayon laser visible en cas d’ouverture
ou de dispositif de verrouillage défectueux. Ne
pas regarder directement le rayonnement
laser.

16
Insignia NS-FSDVD Lecteur DVD
www.insignia-products.com
9 Ne pas chercher à modifier le dispositif de
sécurité de la prise polarisée ou de type mise
à la terre. Une prise polarisée comporte deux
plots, un plus large que l'autre. Une prise de
type mise à la terre est composée de deux
plots et d’un troisième de mise à la terre. Ce
troisième plot à lame large a été prévu pour
la sécurité de l’utilisateur. Si la prise fournie
ne rentre pas dans la prise secteur, faire
appel à un électricien pour qu’il remplace
cette dernière qui est obsolète.
10 Protéger le cordon d’alimentation afin d’éviter
qu’on marche dessus ou qu’il soit pincé, en
particulier au niveau des prises murales,
plaques multiprises et à l’endroit où il est
rattaché au lecteur DVD.
11 N’utiliser que des périphériques et des
accessoires spécifiés par le fabricant.
12 N’utiliser qu’avec la table
roulante, le pied, le trépied, le
support ou la table spécifiés par
le fabricant ou vendus avec le
lecteur DVD. Lorsqu’une table
roulante est utilisée, déplacer
l’ensemble lecteur DVD/table roulante avec
précaution pour éviter les blessures
provoquées par une éventuelle chute de
l’appareil.
13 Débrancher le lecteur DVD lors d’orages ou
quand il n’est pas utilisé pendant une période
prolongée.
14 Toutes les réparations doivent être réalisées
par un personnel qualifié. Faire réparer le
lecteur DVD s’il a été endommagé, qu’il
s’agisse du cordon d’alimentation ou de la
prise qui seraient détériorés, de liquide entré
dans l’appareil ou d’objets qui seraient
tombés dessus, d’une exposition à la pluie ou
à l’eau, d’un fonctionnement anormal ou
qu’on l’ait fait tomber.
15 La prise principale sert à débrancher
l'appareil et doit rester facilement accessible.
16 Ces instructions d'entretien sont uniquement
réservées à des techniciens qualifiés. Pour
réduire les risques de choc électrique,
n'effectuer que les opérations d'entretien
contenues dans ce manuel à moins d'avoir la
qualification nécessaire.
17 Le lecteur DVD ne doit pas être exposé à des
gouttes d’eau ou des éclaboussures et aucun
objet rempli de liquide, tel qu’un vase, ne doit
être posé dessus.
Fonctionnalités
Disques compatibles
Face avant
Type
Dimen
sion
Durée de
lecture
Format de données
DVD 12 cm 1 couche : 120
min
Audio numérique
comprimé
Vidéo numérique
comprimée
2 couches : 240
min
8 cm 1 couche : 80 min
2 couches : 180
min
SVCD
CVD
12 cm 45 min MPEG2
Audio numérique
comprimé
Vidéo numérique
comprimée
VCD
VCD 1.1
VCD 1.0
DVCD
12 cm 74 min MPEG1
Audio numérique
comprimé
Vidéo numérique
comprimée
8 cm 20 min
CD 12 cm 74 min CD-DA : Audio
numérique
8 cm 20 min
CD 12 cm 74 min Audio numérique
JPEG 12 cm 60 min Photo numérique
Remarque
Le lecteur peut lire des DVD±RW, des CD-R et
des CD-RW.
# Composant Description
1
Marche/Arrêt
Permet d’allumer ou d’éteindre le
lecteur (mode Attente). Quand le
lecteur est en mode Attente il est
toujours alimenté. Pour déconnecter
l'alimentation, débrancher le cordon
secteur.
2 Affichage Affiche des informations d'état.
3 Capteur de
télécommande
Reçoit les signaux de la
télécommande. Ne pas obstruer la
transmission des signaux.
4
LECTURE/PAUSE
Permet de démarrer ou d’arrêter
momentanément la lecture.
5
ARRÊT
Permet d’arrêter la lecture. En
appuyant une fois sur cette touche,
puis sur PLAY/PAUSE
(Lecture/Pause) la lecture reprend à
partir du point d’arrêt. En appuyant
deux fois sur cette touche, puis sur
PLAY/PAUSE (Lecture/Pause) la
lecture reprend à partir du début du
disque.
6
PRÉCÉDENT
Permet de revenir au chapitre
précédent d’un DVD, à la piste
précédente d’un CD ou à l’image
précédente.
1
2
3
8
7
6
5
4

17
Insignia NS-FSDVD Lecteur DVD
www.insignia-products.com
Face arrière
Télécommande
7
SUIVANT
Permet d’aller au chapitre suivant
d’un DVD, à la piste suivante d’un CD
ou à l’image suivante.
8 ÉJECTER Permet d’ouvrir ou de fermer le
plateau à disque.
# Prises Description
1Vidéo à
composantes
Brancher un téléviseur avec des
prises à composantes sur ces prises.
2 Vidéo composite
CVBS
Brancher un téléviseur avec des
prises AV standard sur cette prise.
3 Alimentation CA Brancher le cordon d’alimentation
CA sur cette prise.
4 Audio Brancher un câble audio sur ces
prises ainsi que sur les prises audio
du téléviseur connecté.
5 Sortie coaxiale
(audio numérique)
Brancher un récepteur audio
numérique ou autre périphérique
audio numérique sur cette prise.
6 Sortie S-Vidéo Connecter un téléviseur avec une
prise S-Vidéo à cette prise.
7 Sortie optique
(audio numérique)
Brancher un récepteur audio
numérique ou autre périphérique
audio numérique sur cette prise.
# Composant Description
3
5
6
7
2
1
4
# Touche Description
1
Marche/Arrêt
Permet d’allumer ou d’éteindre le
lecteur (mode Attente). Quand le
lecteur est en mode Attente il est
toujours alimenté. Pour
déconnecter l'alimentation,
débrancher le cordon secteur.
2 PROGRAMMATION Permet de créer une liste de
lecture. Pour plus d’informations,
voir « Création d'une liste de
lecture » à la page 22.
3 RÉPÉTITION Permet de répéter le chapitre ou le
titre en cours d’un DVD ou tout le
disque. Pour plus d’informations,
voir « Répétition d'un chapitre,
d'un titre ou d'un DVD » à la page
23
4 Répéter de A à B Permet de programmer une lecture
en boucle. Pour plus
d’informations, voir
« Programmation d’une lecture
répétée (en boucle) » à la page 23.
5 ZOOM Permet d’agrandir l’image vidéo.
Quand l’image est sélectionnée,
appuyer ou pour la
déplacer. Pour plus d’informations,
voir « Utilisation de la fonction
ZOOM » à la page 23.
6 CONFIGURATION Permet d’accéder au menu
d’écran.
7
Dans le menu d’écran, permettent
de sélectionner et de modifier les
options.
8 TITRE Lors de la lecture d'un DVD,
sélectionner le menu du titre du
DVD s'il est disponible. Tous les
DVD ne prennent pas en charge
cette fonction.
25
24
26
21
23
22
27
28
30
2
3
4
5
6
7
8
9
10
11
12
13
29
31
32
14
33
16
18
19
17
15
1
20

18
Insignia NS-FSDVD Lecteur DVD
www.insignia-products.com
Configuration du lecteur
Installation des piles de la télécommande
Pour installer les piles de la télécommande :
1 Retirer le couvercle du compartiment des
piles.
9 ENTRÉE Dans les menus d’écran, permet
de confirmer les sélections.
10 PBC (Contrôle de la
lecture)
Permet d’activer (ON) ou
désactiver (OFF) la fonctionnalité
PBC pour les VCD (2.0).
11 BALAYAGE
PROGRESSIF/
NORMAL
Permet de sélectionner le type de
téléviseur connecté. Il est possible
de sélectionner Interlace
(Entrelacé), S-Video (S-Vidéo) ou
P-SCAN (Balayage progressif).
12 VOL + Permet d’augmenter le volume.
13 SOUS-TITRES Lors de la lecture d'un DVD,
permet de sélectionner une langue
de sous-titres.
14 VOL – Permet de diminuer le volume.
15 AUDIO Lors de la lecture d'un DVD,
permet de sélectionner une
deuxième piste audio telle qu'une
langue différente ou un
commentaire.
Lors de la lecture d'un VCD 2.0,
permet de sélectionner la bande
sonore.
16 SOURDINE Permet de mettre l’appareil en
sourdine. Appuyer de nouveau sur
cette touche pour rétablir le son.
17 ANGLE Lors de la lecture d'un DVD,
permet de sélectionner un angle de
prise de vues différent. Certains
DVD ne sont enregistrés qu'avec
un seul angle de prise de vues.
18
ARRÊT
Permet d’arrêter la lecture. En
appuyant une fois sur cette touche,
puis sur PLAY (Lecture), la
lecture reprend à partir du point
d’arrêt. En appuyant deux fois sur
cette touche, puis sur PLAY
(Lecture) la lecture reprend à partir
du début du disque.
19
PAUSE
Permet d’interrompre la lecture
momentanément. Appuyer sur
PLAY (Lecture) pour reprendre
la lecture.
20
OUVRIR/FERMER
Permet d’ouvrir ou de fermer le
plateau à disque.
21 Touches
numériques
Dans les menus d’écran,
permettent de saisir les chiffres.
Lors de la lecture d'un disque,
permet de sélectionner le titre, les
chapitres, les pistes ou des images
JPEG.
22 OSD Permet d’afficher l’information sur
la lecture. Appuyer de nouveau sur
cette touche pour désactiver
l'information sur la lecture.
23 ANNULER Permet de supprimer le dernier
chiffre qui a été entré dans la liste
de lecture.
24 RECHERCHE Permet d’ouvrir le menu de
recherche pour sélectionner un
titre, un chapitre, une piste, ou une
position. Pour plus d’informations,
voir « Recherche sur un disque » à
la page 23.
25 MENU Lors de la lecture d'un DVD,
permet d’ouvrir le menu du DVD.
Certains DVD ne prennent pas en
charge cette fonction.
# Touche Description
26 RETOUR Lors de la lecture d'un DVD,
permet de retourner au menu du
DVD. Certains DVD ne prennent
pas en charge cette fonction.
27 RALENTI Permet la lecture d’un DVD au
ralenti. La vitesse du ralenti varie à
chaque fois que cette touche est
appuyée. Appuyer sur PLAY
(Lecture) pour revenir au mode de
lecture normal.
28 IMAGE PAR IMAGE Appuyer une fois sur cette touche
pour arrêter momentanément la
lecture. Appuyer de façon répétée
sur cette touche pour une avance
image par image. Appuyer sur
PLAY (Lecture) pour revenir au
mode de lecture normal.
29
SUIVANT
Permet d’aller au chapitre suivant
d’un DVD, à la piste suivante d’un
CD ou à l’image suivante.
30
PRÉCÉDENT
Permet de revenir au chapitre
précédent d’un DVD, à la piste
précédente d’un CD ou à l’image
précédente.
31
AVANCE
RAPIDE
Permet d’effectuer une avance
rapide sur un disque. Chaque fois
que cette touche est appuyée, la
vitesse de l’avance rapide s’accroît.
Appuyer sur PLAY (Lecture)
pour revenir au mode de lecture
normal.
32
RETOUR
RAPIDE
Permet d’effectuer un retour rapide
sur un disque. Chaque fois que
cette touche est appuyée, la
vitesse du retour rapide s’accroît.
Appuyer sur PLAY (Lecture)
pour revenir au mode de lecture
normal.
33
LECTURE
Permet de commencer la lecture.
Quand la lecture est arrêtée
momentanément, permet de
reprendre la lecture.
# Touche Description
La page charge ...
La page charge ...
La page charge ...
La page charge ...
La page charge ...
La page charge ...
La page charge ...
La page charge ...
La page charge ...
La page charge ...
La page charge ...
La page charge ...
-
 1
1
-
 2
2
-
 3
3
-
 4
4
-
 5
5
-
 6
6
-
 7
7
-
 8
8
-
 9
9
-
 10
10
-
 11
11
-
 12
12
-
 13
13
-
 14
14
-
 15
15
-
 16
16
-
 17
17
-
 18
18
-
 19
19
-
 20
20
-
 21
21
-
 22
22
-
 23
23
-
 24
24
-
 25
25
-
 26
26
-
 27
27
-
 28
28
-
 29
29
-
 30
30
-
 31
31
-
 32
32


Insignia DVD Player NS-FSDVD Manuel utilisateur
- Catégorie
- Lecteurs DVD
- Taper
- Manuel utilisateur
dans d''autres langues
Documents connexes
-
Insignia NS-FSDVDR Manuel utilisateur
-
-
Insignia NS-BRDVD Manuel utilisateur
-
-
-
-
-
-